Embossing Folder Stamping

by Audrie Magno-Gordon

Use ink or paint on an embossing folder for a unique monoprinted background.

Supplies
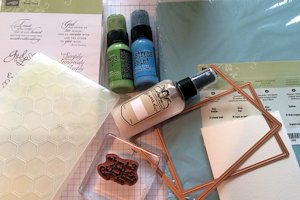
  • Watercolor paper
  • Water-based paints or inks (Salty Ocean & Mowed Lawn Distress Paints used here)
  • Embossing folder (Stampin' Up! Honeycomb used here)
  • Mister bottle, filled with water or pearlescent spray (Tattered Angels Pearl Glimmer Mist used here)
  • Archival or permanent ink (Jet Black Stazon used here)
  • Stamps (Stampin' Up! Trust God Stamp Set used here)
  • Cardstock and other supplies to finish the card (Baja Breeze cardstock and Spellbinders Rectangle Dies used here)

Step-by-Step

  1. Step 1

    Cut watercolor paper to fit your card front.
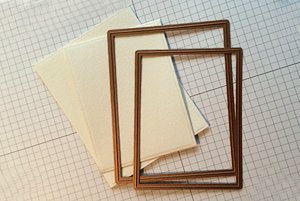
  2. Alternative:
    Instead of precutting the panel, cut after making a print.
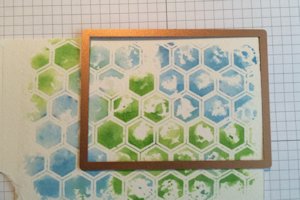
  3. Step 2

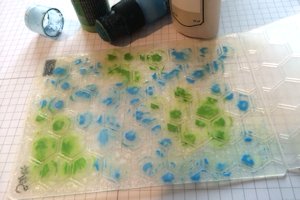
    Open the embossing folder. On the side with the logo, use ink or paint daubers to daub color in different areas.

    Use glimmer mist or water to wet the embossing folder (plenty of water will help the pigment lift and soak into the paper).

    Note:
    A print can be taken from either side of the folder. The design on the logo side is the 'negative', which covers more area. The other side will print a finer outline.

  4. Step 3

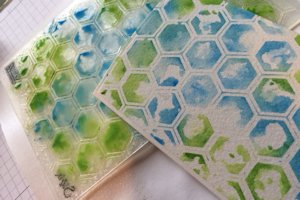
    Lay the watercolor paper into the wet paint. Don’t close the folder; just press with your fingers here and there (try not to press evenly).

    Allow a few seconds for the paint to soak into the watercolor paper.
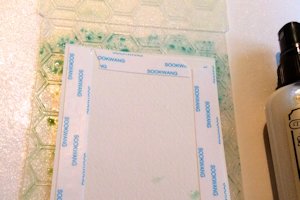
  5. Step 4

    Pick the watercolor paper straight up off of the folder (try not to drag it on the surface). Allow the panel to dry completely.
  6. Step 5

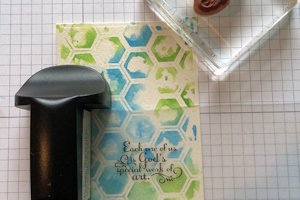
    Use a stamp positioner to determine good placement, then stamp a sentiment in the selected location on the printed panel.

    Hint:
    Use Stazon to stamp the image on the clear Stamp-a-ma-jig sheet to avoid smearing while you are working.
  7. Step 6

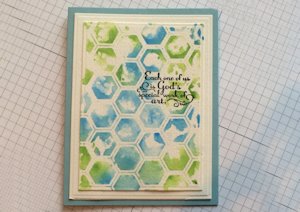
    Assemble and complete the card.
Video!

Your Turn

You've seen the tutorial, now you try it! We've got a section of the gallery set aside for Embossing Folder Stamping. Try this technique, then upload your artwork to the gallery. Show us your creations!

***Please note - Internet Explorer/Edge is not a supported browser, and will not allow you to see the videos. Please use Chrome, Firefox or Safari to view our tutorial videos.
Questions and Comments

We'd love to get your feedback or questions. Leave your comment below.

Audrey you are a born instructor!! great video and you gave great tips on how to achieve better results. I will be trying this soon. Also liked how you showed the "negative" side of the folder image.
maureen davino  |  Wed May 7, 2014 at 8:19 AM
Question: do you ever actually dry emboss it after you've got the color dried?
Christine Umthun  |  Wed May 7, 2014 at 8:24 AM
I love this! Such a great affect with easy effort. Just in time for Mothers day. Great video, too.
Dorothy  |  Wed May 7, 2014 at 8:45 AM
One quick question, Audrie - would Distress Stains work for your technique? I have lots of them, but no Distress Paints. (If not, I'll try it with ink.)

Great video - thank you so much!
Susan Bridgman  |  Wed May 7, 2014 at 9:21 AM
Loved the video but I missed the directions on how you used the die cuts (are they SU?) to make the nice borders. I am new to card making and am trying to learn!
Sarah Sweet  |  Wed May 7, 2014 at 9:32 AM
Susan, the Distress Stains are water-based, so they should work just fine! The inks work great as well.
dina  |  Wed May 7, 2014 at 9:51 AM
Awesome technique! Thanks for explaining it so well.
Jeanette  |  Wed May 7, 2014 at 11:08 AM
Beautiful card, Audrie! I can't wait to try this method!
Karen Jones  |  Wed May 7, 2014 at 12:05 PM
What a great video! Separate from the technique, your voice and presentation are lovely. I am looking forward to more videos from you. Thanks for your time and effort, Audrie.
Sharman Martin  |  Wed May 7, 2014 at 12:56 PM
Wow, Audrie! Not only a great technique...but I love, love, love your paper saving tip. Good timing on this tutorial...I have three cards to make today. Guess what technique I'm going to use? grin
Traci Brennan  |  Wed May 7, 2014 at 1:43 PM
You are awesome at explaining things in a tutorial! I like to move right along and you do. I can't help to be impressed with your speaking too. Well, now I will get to the card technique! LOL. I love it! I love different techniques besides just putting dies on a paper with tons of embellishments. Though they have their place and occasion, I just am also drawn to their amazing products and what can be done with them...especially the Ranger products. Thanks for the time you put into this video. An added note is: I have always thought there must be a use for all the hidden cardstock! You are the very first person to cut a die out of the middle and actually say that you did it. I'm not a purist either and I love the idea very much. I will join you now in the ones who have mounds of stash of these inner die cut pieces!
Dottie  |  Wed May 7, 2014 at 1:57 PM
Love this effect can't wait to try it out.
Valerie Balshaw  |  Wed May 7, 2014 at 2:01 PM
I really enjoyed this technique, and I am anxious to try it with a variety of embossing folders and see what I can do. Thanks for a fun idea.
Mary Bellis  |  Wed May 7, 2014 at 2:12 PM
This was fabulous! Thanks for the tips! Lovely, lovely cards!
Loretta  |  Wed May 7, 2014 at 2:48 PM
This is a really fun video! AND a gorgeous card- thanks Audrie. I loved your voice and positive teaching style.
Trish  |  Wed May 7, 2014 at 3:11 PM
What a fantastic technique. Can't wait to try it! Thanks so much for sharing this with us.
Catherine  |  Wed May 7, 2014 at 3:17 PM
Thank you for this video. I am so going to try this. Your a very good instructor.
Sandra Ethridge  |  Wed May 7, 2014 at 4:28 PM
Audrie, I don't comment nearly as much as I should, but I have to stop and comment on this post. It is a relatively easy technique with stunning outcomes. And you are such a good teacher and communicator. Thanks for taking the time to do this. I can't wait to try it; I have a bajillion embossing folders that have a brand new lease on life!!!
Kathy Mellin  |  Wed May 7, 2014 at 10:07 PM
Love this idea! Thanks so much for the tutorial.
Tami Hewlett  |  Fri May 9, 2014 at 10:15 AM
Wonderful technique Audrie, I love it, thank you for sharing. Jackie
Jackie Hole  |  Fri May 9, 2014 at 3:14 PM

Page 2 of 4 pages  <  1 2 3 4 >

You need to be logged in to comment

GET OUR NEWSLETTER


Splitcoaststampers's privacy policy