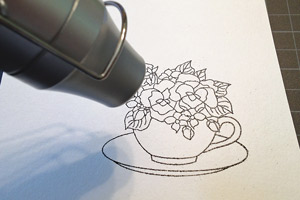
Distress Marker Painting

by Jen Shults

Learn how to use Distress Markers, heat embossing, and a waterbrush to create an easy and gorgeous watercolor look.

Supplies
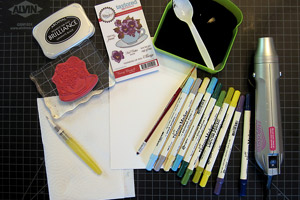
  • Stamps, Teacup Bouquet from Taylored Expressions used here

  • Pigment or Watermark Ink

  • Black Embossing Powder

  • Heat Gun

  • Distress Markers

  • Waterbrush

  • paper towel

  • watercolor paper

Step-by-Step

  1. Step 1

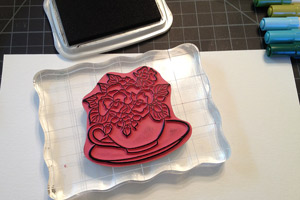
    Stamp the image on watercolor paper using pigment or watermark ink.
  2. Step 2

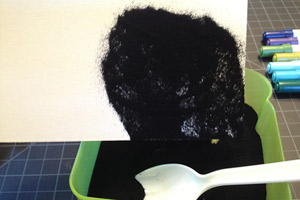
    Apply black embossing powder to image and gently tap off excess.
  3. Step 3

    Heat set embossing powder.

  4. Step 4

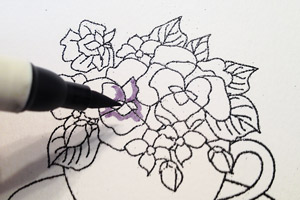
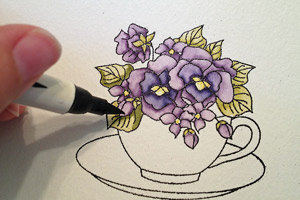
    Apply Distress Marker directly to the image. Begin with the lightest layer in the darkest part of the image. Apply ink sparingly.
  5. Step 5

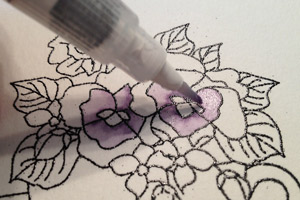
    Use water brush to pull and spread the marker ink throughout the individual spaces of the image.
  6. Step 6

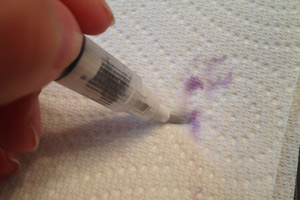
    Blot the brush on a paper towel frequently to create a gradient.
  7. Step 7

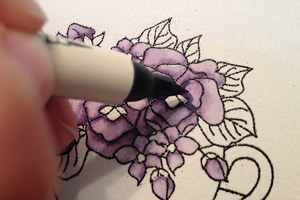
    Layer darker colors over previously painted areas to create new colors and depth.
  8. Step 8

    Repeat steps 4 thru 7 until the entire image is completed.
  9. Step 9

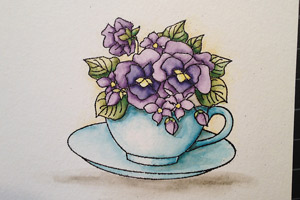
    Create a cast shadow and atmosphere around the image using grays and light yellows.
  10. Step 10

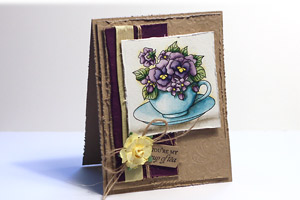
    Apply the finished painting to a card or other project.
Video!

Your Turn

You've seen the tutorial, now you try it! We've got a section of the gallery set aside for Distress Marker Painting. Try this technique, then upload your artwork to the gallery. Show us your creations!

***Please note - Internet Explorer/Edge is not a supported browser, and will not allow you to see the videos. Please use Chrome, Firefox or Safari to view our tutorial videos.

Questions and Comments

We'd love to get your feedback or questions. Leave your comment below.

So very beautiful, Jen. I just love your shading!
Mel McCarthy  |  Wed Jun 12, 2013 at 2:42 AM
Thanks so much for a great tutorial. I have about 30 of these markers and so far have only used them for writing!! I colour like a three year old, so I hope to improve after watching your terrific tutorial Jen.
Susie Williams  |  Wed Jun 12, 2013 at 3:39 AM
Wow! That is fantastic! I must try it out. Thank you.
Bridget Keenor  |  Wed Jun 12, 2013 at 6:42 AM
What a wonderful tutorial. Thank you SO much. I can't wait to practice.
Priss  |  Wed Jun 12, 2013 at 6:52 AM
thanks Jen! Lovely piece! Beautiful painting!
Pam Sparks  |  Wed Jun 12, 2013 at 7:19 AM
Thank you for the great tutorial. Love your card!
Terry Mays  |  Wed Jun 12, 2013 at 7:25 AM
Hi Jen, Thanks for sharing this lovely technique.
I've always loved watercolor paintings. TFS
Kris  |  Wed Jun 12, 2013 at 7:36 AM
Fabulous tutorial and very easy to follow. Your example is beautiful. Love the end result.
Judy  |  Wed Jun 12, 2013 at 11:00 AM
Really enjoyed your distress marker tutorial.
Maryann Van Den Hul  |  Wed Jun 12, 2013 at 12:53 PM
That was absolutely gorgeous! You make it look so simple! I will be trying this and will probably need to watch your video over and over to get it right! Thanks!
Sue Neuharth  |  Wed Jun 12, 2013 at 2:30 PM
This is truly beautiful. Would the same process work with SU markers? I have set a limit on buying things, so won't be purchasing distress markers.
Jeanne Johannes  |  Wed Jun 12, 2013 at 5:10 PM
That is gorgeous thanks for sharing a great help to a learner.
Lee Gysberts  |  Wed Jun 12, 2013 at 5:17 PM
What a gorgeous card! TYFS Your video was so helpful and inspiring...can't wait to try again with your tips. Hope to see more vids in future smile
Beth Anne Dunlap  |  Wed Jun 12, 2013 at 6:18 PM
I don't get what makes these "distress" markers, they seem to work just like any other water based marker. Am I missing something?
deb  |  Wed Jun 12, 2013 at 6:40 PM
@Jeanne Johannes, Hi Jeanne - Thanks for your comment! I don't have SU markers so I can't say how exactly they compare to Distress Markers but if they are waterbased I'm sure you could definitely do something similar. The main difference I've noticed about Distress Markers versus other waterbased markers is the Distress Markers dry slower therefore when you get them wet they move more on the paper surface making watercoloring a bit easier. You could try coloring on an acrylic block or silicone craft sheet and then picking the ink up with the brush and watercoloring that way. Hope this helps!
Jennifer Shults  |  Wed Jun 12, 2013 at 7:38 PM
@deb Hi Deb, thanks for your comment! The main difference that I have found with Distress Markers versus other waterbased markers is the drying time is markedly longer and they don't grab onto the paper fibers quite as fast making it easier to manipulate the ink once it's on the paper. They also dry fairly permanent after they have been activated with water.
Jennifer Shults  |  Wed Jun 12, 2013 at 7:41 PM
Your card is beautiful and the shading is perfect! I have SU markers and have thought about buying distress markers. Do you think they are a product that is used in addition to SU markers or instead of SU markers?
Fran MacDonald  |  Thu Jun 13, 2013 at 12:44 PM
Thanks so much for your demo. It is beautiful.
What really impressed me is that you are left handed.
I am as well and have given up using markers as I smear them.
At present I am trying water color markers with a water brush and images that have been embossed as they don't spread the color.
Where can I subscribe to see more of your demos?
Lee Kendel  |  Thu Jun 13, 2013 at 4:21 PM
This is beautiful and your tutorial is perfect! You do a wonderful job explaining how to get a beautiful picture.
Lenoria  |  Fri Jun 14, 2013 at 8:22 AM
Thanks for the great tutorial. The video really helped me.
Jeanne  |  Sat Jun 15, 2013 at 5:12 PM

Page 1 of 2 pages  1 2 >

You need to be logged in to comment

GET OUR NEWSLETTER


Splitcoaststampers's privacy policy