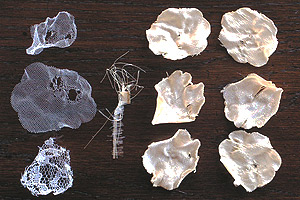
Crinkled Ribbon Flower

by Susan Roberts

Heated ribbon and sheer fabrics create a crinkled flower.

Supplies
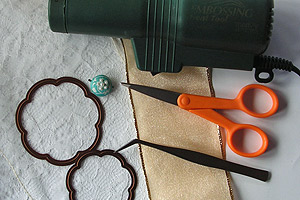
  • Sheer Ribbon, Organdy, Tulle and Lace used here

  • Dies, Spellbinders “Blossom” used here

  • Heat Gun

  • Decorative Brad

  • Tweezers and Scissors, optional

Step-by-Step

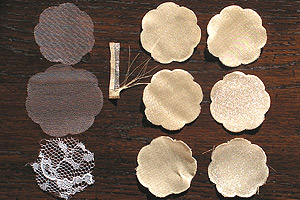
  1. Step 1

    Cut several flowers from the ribbon, tulle and lace using flower shaped or circle dies.
  2. Hint:
    If you don’t have any dies, scissors can be used to cut freehand flowers or circles.
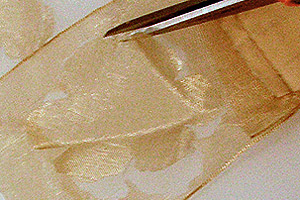
  3. Step 2

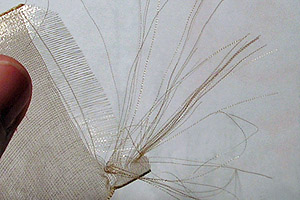
    Pull threads from a piece of ribbon leaving them attached on one side.
  4. Step 3

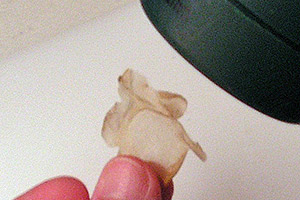
    Heat the cutout flowers and pulled threads with a heat gun. It doesn’t take much to really get them to crinkle!

    Hint:
    You may want to use tweezers to hold the ribbon to avoid burning your fingers!
  5. Step 4

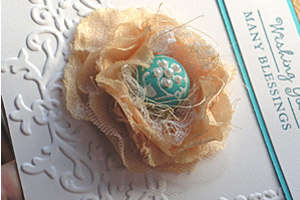
    Assemble the flower by pushing a brad through the center of each piece. Start with the threads and then begin with the flowers which are smallest or crinkled/melted the most.
  6. Step 5

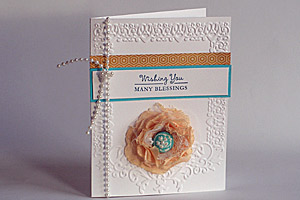
    Voila! You have a crinkled ribbon flower to use on your next project!
Video!

Your Turn

You've seen the tutorial, now you try it! We've got a section of the gallery set aside for Crinkled Ribbon Flower. Try this technique, then upload your artwork to the gallery. Show us your creations!

***Please note - Internet Explorer/Edge is not a supported browser, and will not allow you to see the videos. Please use Chrome, Firefox or Safari to view our tutorial videos.

Questions and Comments

We'd love to get your feedback or questions. Leave your comment below.

oh so beautiful, I have never seen anything so elegant.
Betty Callahan  |  Wed Dec 12, 2012 at 3:55 AM
very nice I am continually amazed that you keep on coming up with new and easy ideas Thanks
Lorraine Sullivan  |  Wed Dec 12, 2012 at 4:36 AM
This is so pretty, I will have to try this on my next card or scrapbook page, thanks
colleen howell  |  Wed Dec 12, 2012 at 6:53 AM
Simply elegant. This is a definite "give it a try" idea.
Gayle Saver  |  Wed Dec 12, 2012 at 7:29 AM
Really beautiful I am going to have to try this later today!
Pam Stang  |  Wed Dec 12, 2012 at 8:11 AM
Thanks, Beate--you make it look so easy. I love the "do over" parts too--it's good to include them, just so we know.
Pam Aylmer  |  Wed Dec 12, 2012 at 9:18 AM
This is just what I have been looking for! It will be perfect not only for cards, but also for my little grandaughter's headbands that I want to make-Thanks Beate!
Vicky Wright  |  Wed Dec 12, 2012 at 10:28 AM
Wonderful tutorial Beate! It seems very doable and you make it look easy too!
Julie Hall  |  Wed Dec 12, 2012 at 11:13 AM
I'm going to make some bows with crinkled seam binding and this flower would go so nice with with that romantic old fashioned style.. thanks!
Donna  |  Wed Dec 12, 2012 at 11:58 AM
Love the idea for this flower. I can hardly wait to get to try it out. Thanks for showing us how to make it.
Dottie Burd  |  Wed Dec 12, 2012 at 2:55 PM
thank you for the tute what a cute flower ,i'll be using that one very soon
vanessa newton  |  Wed Dec 12, 2012 at 2:56 PM
What a great tutorial! Wonderful job, ladies!
Bev Rousch  |  Wed Dec 12, 2012 at 3:12 PM
thank you for another helpful tutorial!!!
Charlotte Zweigoron  |  Wed Dec 12, 2012 at 4:01 PM
Ah, so one can use a heat-gun to make these flowers. Good to know! I learned to make them last year using a candle flame: it was a bit perilous, to say the least. Thanks Beate and Susan.
PjP  |  Wed Dec 12, 2012 at 5:05 PM
So beautiful. Lovely for springtime cards. Wishing all Splitcoast Stampers members a magical Christmas and a happy and prosperous new year. I'm so very glad I joined. Biddy.
Bridget Keenor  |  Fri Dec 14, 2012 at 4:17 AM
Love your site-made flowers -easy to follow-I need lots of directions!!!
mary forde  |  Sun Dec 16, 2012 at 6:15 AM
Love your site
Roslyn Smith  |  Wed Feb 20, 2013 at 5:54 AM
These flowers are so pretty and seem so easy to cut watching the video. BUT I have tried making the sandwich with my cuttlebug and the design does not cut thru the organza ribbon that I am using. I put a piece of cardstock, ribbon, and then die and the die cuts the cardstock but just leaves an impression on the ribbon. Any suggestions appreciated. Thanks
Deborah James  |  Wed Mar 6, 2013 at 10:30 AM
Love this flower. I will for sure try it smile
Suzanne B�rub�  |  Wed Mar 13, 2013 at 7:11 PM
Just wondering what I might be doing wrong. I can cut the cardstock, but the ribbon just gets an impression on it. It doesn't cut the ribbon
Deborah James  |  Thu Mar 14, 2013 at 11:16 AM

Page 1 of 2 pages  1 2 >

You need to be logged in to comment

GET OUR NEWSLETTER


Splitcoaststampers's privacy policy