Crinkled Ribbon Flower
by Susan Roberts
Heated ribbon and sheer fabrics create a crinkled flower.
Supplies
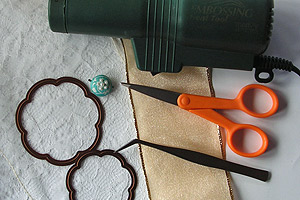
- Sheer Ribbon, Organdy, Tulle and Lace used here
- Dies, Spellbinders “Blossom” used here
- Heat Gun
- Decorative Brad
- Tweezers and Scissors, optional
Step-by-Step
-
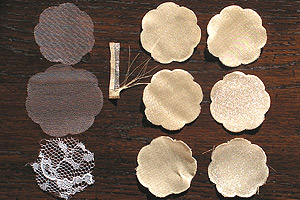
Step 1
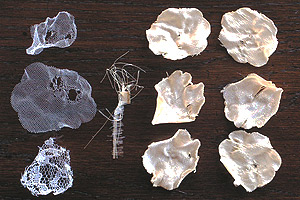
Cut several flowers from the ribbon, tulle and lace using flower shaped or circle dies.
-
Hint:
If you don’t have any dies, scissors can be used to cut freehand flowers or circles.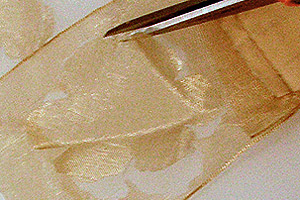
-
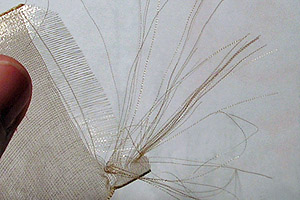
Step 2
Pull threads from a piece of ribbon leaving them attached on one side.
-
Step 3
Heat the cutout flowers and pulled threads with a heat gun. It doesn’t take much to really get them to crinkle!
Hint:
You may want to use tweezers to hold the ribbon to avoid burning your fingers!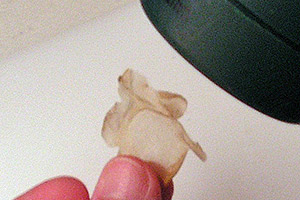
-
-
Step 4
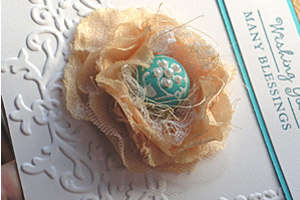
Assemble the flower by pushing a brad through the center of each piece. Start with the threads and then begin with the flowers which are smallest or crinkled/melted the most.
-
Step 5
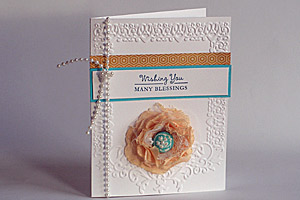
Voila! You have a crinkled ribbon flower to use on your next project!
Video!
Your Turn
You've seen the tutorial, now you try it! We've got a section of the gallery set aside for Crinkled Ribbon Flower. Try this technique, then upload your artwork to the gallery. Show us your creations!
***Please note - Internet Explorer/Edge is not a supported browser, and will not allow you to see the videos. Please use Chrome, Firefox or Safari to view our tutorial videos.

Questions and Comments
We'd love to get your feedback or questions. Leave your comment below.
Page 2 of 2 pages < 1 2