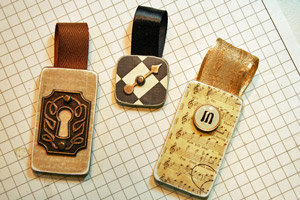
Chipboard Bookmark

by Beverly Gerard

Create a magnetic bookmark.

Supplies
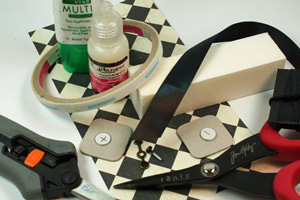
  • Two identical chipboard shapes
  • Small pair of magnets (Basic Grey magnetic snaps used here)
  • Patterned paper (The Paper Studio used here)
  • Liquid glue (Tombow Mono Multi glue & Glossy Accents used here)
  • Sanding block
  • Scissors
  • Brayer or flat edge tool for scraping, such as a ruler
  • Ribbon, cut to about 3 5/8" length
  • Embellishment of choice

Step-by-Step

  1. Step 1

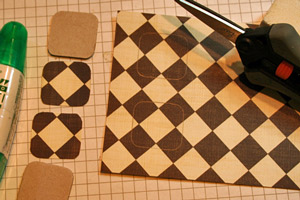
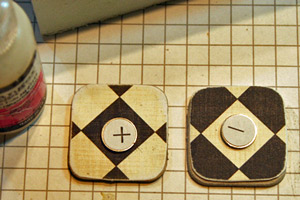
    Trace around chipboard onto the patterned paper to cut out 4 pieces of paper to fit the chipboard shape. (Allows for front & back of each chipboard.)
    Use a thin layer of liquid glue to adhere cut paper to all 4 chipboard surfaces.
  2. Step 2

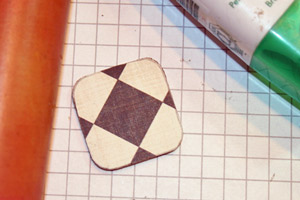
    Use a brayer to squeeze out any air bubbles between the chipboard and paper. Do this to all chipboard/paper surfaces.
  3. Step 3

    Sand all chipboard edges with a sanding block. Next, adhere the magnets to the backs of the chipboard pieces, using a strong liquid adhesive, such as Glossy Accents or Crystal Effects.
  4. Step 4

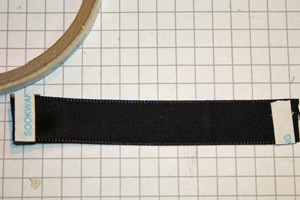
    Add Scor-Tape™ to the raw cut ends of the ribbon. Fold the taped ends over on themselves to hide & secure raw edges.
  5. Step 5

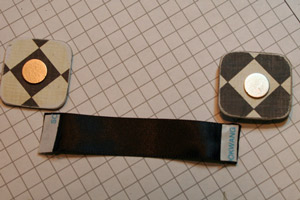
    Once the raw ribbon ends are folded under and secured, repeat the process by adding Scor-Tape to the folded ends of the ribbon. Now secure the ribbon ends to the chipboard backs, above the magnets in the topmost portion of the chipboard backs.
  6. Step 6

    Use strong liquid adhesive to attach the embellishment to the front of the bookmark. Allow just a few minutes to dry.
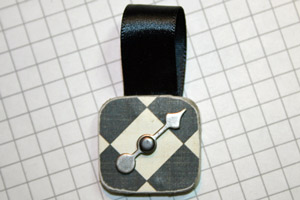
  7. Your bookmark is done.

Video!

Your Turn

You've seen the tutorial, now you try it! We've got a section of the gallery set aside for Chipboard Bookmark. Try this technique, then upload your artwork to the gallery. Show us your creations!

***Please note - Internet Explorer/Edge is not a supported browser, and will not allow you to see the videos. Please use Chrome, Firefox or Safari to view our tutorial videos.

Questions and Comments

We'd love to get your feedback or questions. Leave your comment below.

Hope you enjoy it!
TexasGrammy  |  Tue Apr 24, 2012 at 12:42 PM
Bev, what a great tutorial, I love reading and I ALWAYS need bookmarks, not to mention the fab gift this would be! I thought you'd have a Texan accent!!! : ) It's so good to hear your lovely voice!
Bridget Finlay  |  Wed May 2, 2012 at 3:04 AM
Wow Miss Bev! Love your Terrific Chipboard Bookmarks and what a Super tutorial too! Can't wait to give this a try! Thanks so much for the inspiration! 8-)

Big hugs
Shannon
Shannon White  |  Wed May 2, 2012 at 3:05 AM
Cute little project.
I can use up a few of my left over scrap pieces for.
Thank you for sharing TexasGrammy.
Elisabeth  |  Wed May 2, 2012 at 3:17 AM
Bev, this is such a cool project! Mothers Day is approaching fast here in NZ (13 May - is it the same day in the US?), and this will make a fabulous gift for my Mum and MIL. Thank you!
Bron Heslop  |  Wed May 2, 2012 at 3:21 AM
Great project Bev! Cute and inspiring, I'm adding this one to my Gotta Try list!! The ribbon addition to the chipboard piece makes this unique from the other Tuts Ive seen. Great idea to use as an embellishment on a Grad card! Thanks for sharing!
Anne Harada  |  Wed May 2, 2012 at 4:43 AM
Aw Bev, very cool and fun video. I love it when you all do videos. It's like being in your craft room with you. This is a great idea and I'm thinking of butterflies and letters and so much more!
Cindy Coutts  |  Wed May 2, 2012 at 5:28 AM
tr�s mignon tes projets j'adore
bise raymonde
raymonde  |  Wed May 2, 2012 at 5:54 AM
Great tutorial. Can you please share the size of the chipboard piece you used on the video? Did you buy the chipboard pre-cut? Thanks.
Debbie  |  Wed May 2, 2012 at 6:17 AM
Very cool tut! I think I might even take it one step further and put a magnet on the back of the "bookmark" and put it on the fridge to hold appt. cards. One for each family member! Thanks for the inspiration!
Dana  |  Wed May 2, 2012 at 6:18 AM
I love the look of these, but as a former teacher and librarian--and serious book-lover--I caution against using them as bookmarks, Two layers of chipboard and two magnet pieces are much too thick and can ruin by the book by breaking its spine if it's closed with the bookmark in place.

I do have a similar commercially made bookmark, but it's made from much thinner materials.
EC  |  Wed May 2, 2012 at 6:19 AM
These are darling! So many options for loving gifts!

I do think you'd want to use these out by the loose edges of the pages, not near the spine.
Leslie Parks  |  Wed May 2, 2012 at 7:09 AM
Hi Bev! I love your idea and the tutorial was wonderful and very easy to follow. These would be wonderful end of the year teacher gifts. Music paper for the music teacher, back to school paper for regular teachers, etc. I love the idea from Dana to use these on the refrigerator. Fabulous! Thanks so much.
Kelly Wentling  |  Wed May 2, 2012 at 7:21 AM
What a great bookmark! I always look for things I can do with my grand daughter for teacher gifts and bookmarks are great gifts. This one is easy to make for male or female teachers...thank you so much for your ideas. I do not agree that the chipboard is too thick...you can find thin board and it will work great and the magnets are super thin..I've used them before. I've received store bought bookmarks that are thicker and metal and have never damage a book. Perhaps my bookmarks don't sit long in any given book! I speak as a former teacher and a life long reader...This would make great stocking stuffers too for I have grand children who are super book readers even with Nooks!!!
Kathy E  |  Wed May 2, 2012 at 7:24 AM
Love this idea!! Will definitely be trying this one soon!
Shelly Hickox  |  Wed May 2, 2012 at 7:47 AM
such a fun gift for teachers and family. Great tutorial thank you so much for sharing.
Linda  |  Wed May 2, 2012 at 8:08 AM
I love your tutorials and the great ideas look forward to receiving your mail
Charlotte Esterhuizen  |  Wed May 2, 2012 at 8:20 AM
Lovely idea and it won't take much time either.
Scarlett  |  Wed May 2, 2012 at 8:40 AM
Loved the video. Thanks for sharing. I am also in the area where you are....just moved here about 3 years ago. Having a hard time finding any craft stores other than M and HL. Suggestions? smile
Trudie Vick  |  Wed May 2, 2012 at 8:43 AM
These would make great incentives for teachers to give their students to encourage them to read!! And a great little thinking of you gift! Wonderful for church bazaars!! I can already see that I am going to be making a ton of these!!!
Peggy  |  Wed May 2, 2012 at 9:24 AM

Page 1 of 3 pages  1 2 3 >

You need to be logged in to comment

GET OUR NEWSLETTER


Splitcoaststampers's privacy policy