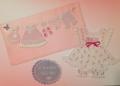
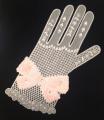
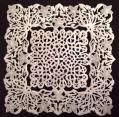
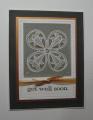
I have had so many lovely comments on the picture I uploaded of the Parchment Twist Project I did, I thought I would upload the photos showing the various steps it took to complete the project.
As you can see you start by embossing the complete design onto parchment paper and then prick out the sections you want to remove.
Date: Wednesday, April 29, 2015 GMT Views: 955
Favorited:3
Additional Info
Paper: Parchment Paper
Paper Size: 10" x 10"
Accessories: Ball tools and parchment pricking tools
Registered: February 3, 2005 Location: Delray Beach, FL Posts: 34769
Sun, May 03, 2015 @ 4:25 AM
Oh, I am so glad you show the steps, Rachel! Wow, is this amazing, and I love seeing the process and transformation! Once again, a big welcome to SCS - you've really delighted us! Hugs!
------------------------------ Cheryl
Proverbs 3:5-6 My blog