Water Stamping
by Beverly Gerard
Stamp with water to create a soft look.
Supplies
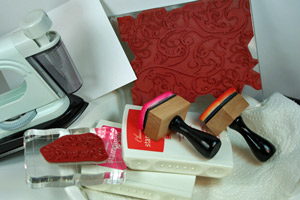
- White cardstock
- Background stamp
- Dye ink pad
- Blending tool, or sponges
- Paper towel
- Plate or pie plate
- Iron (optional)
Step-by-Step
-
Step 1
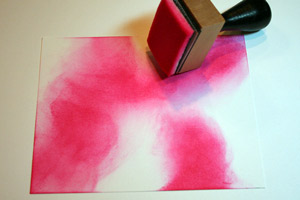
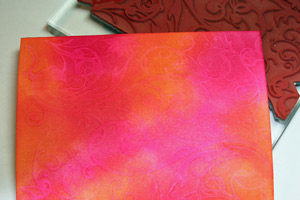
Sponge your first color of dye ink onto random areas of the cardstock. Aim for a rich application of color.
-
Step 2
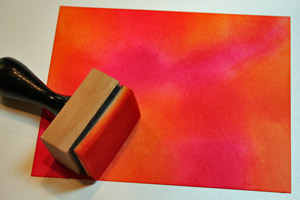
Use another sponge ink applicator to rub the second color of dye ink onto the uncolored areas of the same cardstock piece. Again, aim for a rich color application, and be sure to blend the color edges together.
-
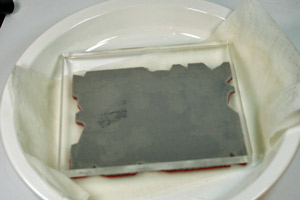
Step 3
Fold the paper towel in half & lay it in the pie plate. Add a small amount of water to completely soak the paper towel.
-
Step 4
Pat the background stamp onto the water soaked paper towel, as it is acting as your substitute ink pad. Apply the wet background stamp to the inked cardstock as you would if it were inked.
-
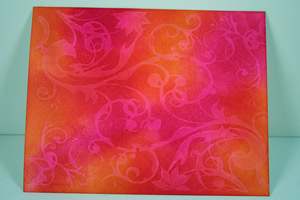
Step 5
The wet image will need to dry. As it dries, the image will become more apparent.
-
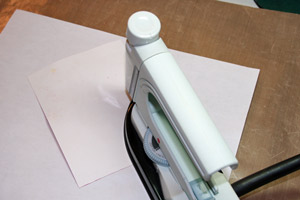
Step 6 (Optional)
Using an iron to flatten & dry the image piece is optional, but I prefer doing so. In this sample, the image was air-dried, but warped.
Hint:
Iron on the back side of the image, particularly if image is wet. And, keep the iron moving at all times.
-
Step 7
Now you can trim your finished cardstock to the size you wish for your card design
-
Step 8
Finish your card.

Video!
Variations
Be sure to try it using just one ink, or three inks, etc. & have fun! Don’t want to use a stamp? Just splatter a bit of water onto your inked cardstock for an always-unique design! Or use a mister to lightly mist the stamp … or try misting the cardstock!
Your Turn
You've seen the tutorial, now you try it! We've got a section of the gallery set aside for Water Stamping. Try this technique, then upload your artwork to the gallery. Show us your creations!
***Please note - Internet Explorer/Edge is not a supported browser, and will not allow you to see the videos. Please use Chrome, Firefox or Safari to view our tutorial videos.

Questions and Comments
We'd love to get your feedback or questions. Leave your comment below.
Alyse
http://www.rubbernecker.com/rubber-stamps/imagine-what-you-could-do.html
Thanks again,
Bev
It sounds like your background image is not completely wet ... Or ... if it is completely wet, try leaving it in contact with the inked paper longer, and pressing all the way from the middle out toward the edges. Hope this helps!
~Bev
Page 4 of 5 pages « First < 2 3 4 5 >