Watercolor Powders
by Dina Kowal
Learn a variety of techniques for using powdered watercolor products.
Supplies
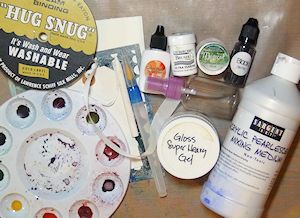
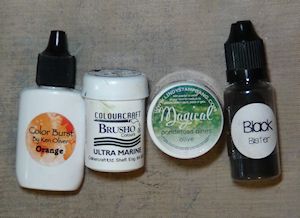
- Watercolor powders or crystals, such as Brusho, Color Burst, Bisters, or Magicals (Lindy’s Stamp Gang)
- Watercolor paper or coated shipping tags (other assorted papers can also be used - CanvaPaper, photo paper, coated cardstock, coffee filters, even canvas)
- Mister bottle with water
- Craft sheet, wax paper or ceramic tile (nonporous work surface)
- Paper towels
- Rayon seam binding (Hug Snug brand used here)
- Paint palette
- Liquid bleach
- Waterbrush or nylon paint brush
- White crayon or oil pastel
- Stencils
- Acrylic mediums (embossing/modeling paste, gel medium, clear glazes, etc)
- Other supplies as needed to complete the project (please see gallery posts for specific product information)
Step-by-Step
-
Step 1
In this tutorial we’ll explore some techniques using powdered or crystalline watercolor products, such as Brusho, Bisters, Magicals, and Color Burst. These products are highly concentrated, water-soluble colors in powdered form. For more product-specific information and resources, please click HERE for the thread in our forums.
-
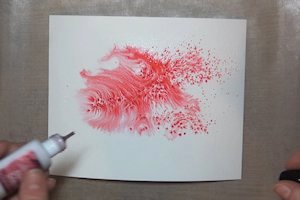
Step 2
To create a misted background:
Sprinkle watercolor powder onto a piece of dry watercolor paper.
NOTE:
Other types of paper can be used, with varying results.
-
Mist with water from a distance, and lightly at first, to activate color. Mist with more water as desired, moving in closer to the panel.
More water will create a more blended background with a wider spread of color.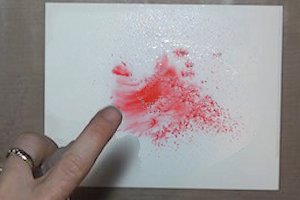
-
Step 3
An alternative method is to mist water on the paper first. (You could even brush or stamp with water for a more controlled effect.)
-
Next, sprinkle product into the wet areas. Repeat as needed until the desired effect is reached.
-
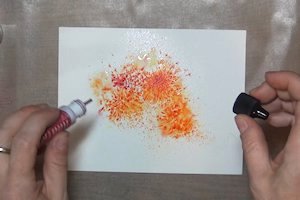
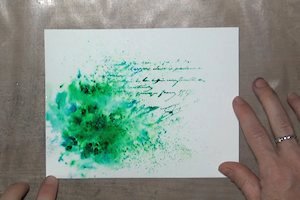
Step 4
When using multiple colors, work from light to dark and allow colors to dry between layers to prevent muddying.
-
HINT
For best results, allow the panel to air dry. Drying can be sped up with a heat tool but this will also cause the colors to move and blend.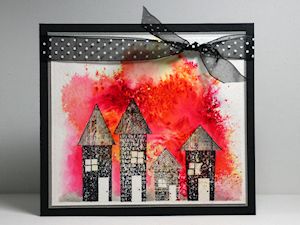
-
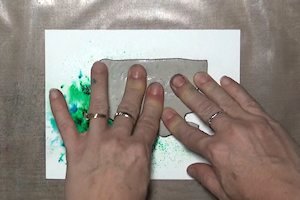
Step 5
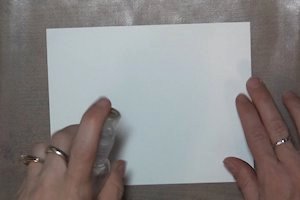
To lift color from a dry panel, mist or brush water to wet certain areas.
A stencil can be used if a pattern is desired.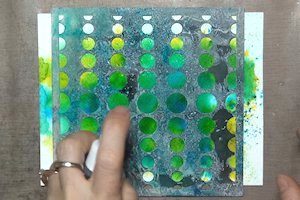
-
Blot panel with a paper towel or rag to remove color from the wet areas.
HINT:
Rolling a full paper towel roll over the panel will allow color to lift without a wiping motion, keeping other areas unharmed.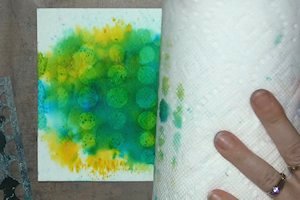
-
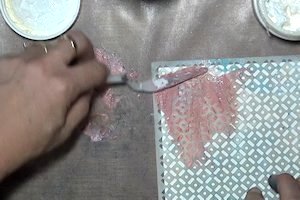
Step 6
For a sharper contrast, or to prepare a stamped image for coloring, brush liquid bleach onto colored areas after drying.
Results will vary depending on color, color strength and how long the panel has been dry. This technique works best when powder has been fully activated with plenty of water, and recently dried.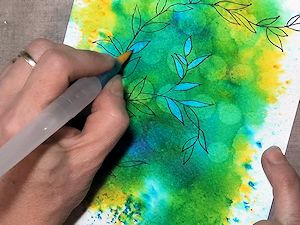
-
NOTE:
Be sure to use a nylon or synthetic brush for bleaching, as bleach will destroy natural hair bristles. Waterbrushes can be filled with bleach for a continuous flow. Dry completely before layering color over bleached areas.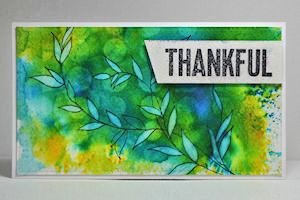
-
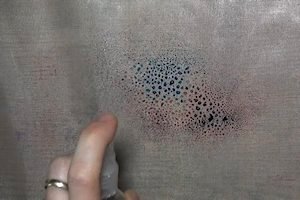
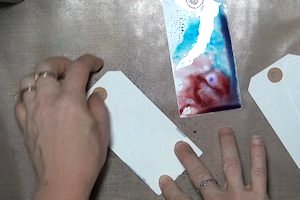
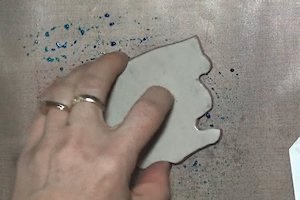
Step 7
For a monoprint effect similar to the Wrinkle Free Distress technique, sprinkle and mist product on a craft sheet or other non-porous surface.
-
Lay paper or tags into the activated ink to create a unique background every time. Several prints can be taken from one application of color.
-
Step 8
The activated powder can also be used to ink a rubber stamp.
-
Ink and press the stamp onto the panel.
-
Step 9
Rayon seam binding can be dyed to match in the same way.
-
Use dyed seam binding on paper or altered projects. The dyes are not permanent and cannot be washed.
.JPG)
-
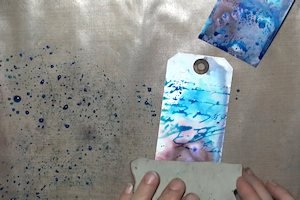
Step 10
Instead of lifting color from another surface, try moving product that has already been misted on paper.
Sprinkle and mist product on watercolor paper, then press a rubber stamp into the activated color.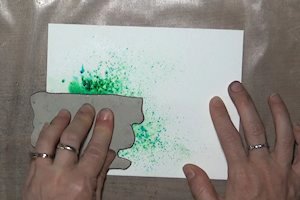
-
Stamp the inked image in another area of the panel.
-
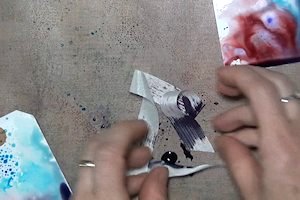
Step 11
This technique is a great way to add texture and interest to a background while preserving the colors already used.
-
(Sample combines use of bleach, as in step 6.)
.JPG)
-
Step 12
Stamp and heat emboss an image onto watercolor paper, or choose another favorite resist technique.
-
Apply color with one of the techniques above.
(Sample combines stamping with activated ink, as in Step 11.)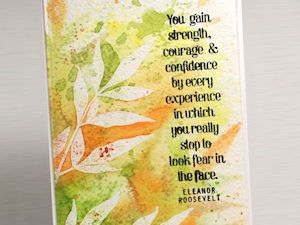
-
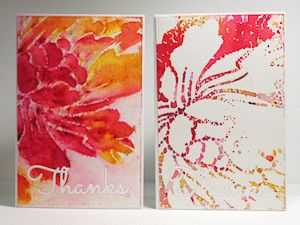
Step 13
Lay a stencil down and sprinkle product through the openings, then mist with water to activate the colors.
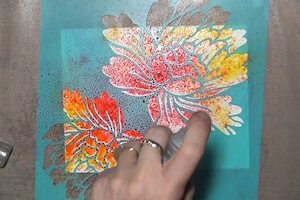
-
Turn the stencil over onto another piece of watercolor paper to make a print from the color activated on the surface of the stencil, as in the Stencil Monoprints technique.
-
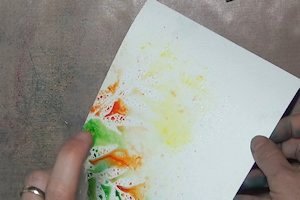
Step 14
Mix product with a few drops of water in a palette to create a watercolor paint.
Higher concentration of product will produce more intense color; a more dilute mix will be lighter.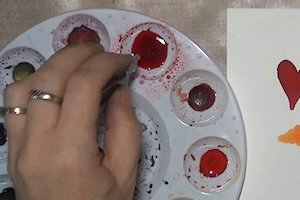
-
Paint as with other liquid watercolor mediums. Combine colors in the palette for your own custom blends.
Paint can be left to dry in the palette, and revived with water at another time.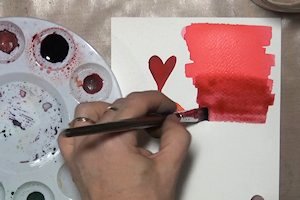
-
Step 15
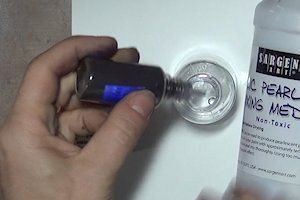
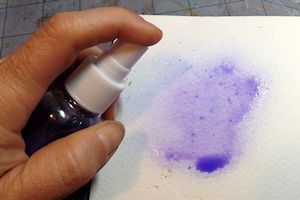
Create custom color mists by mixing product with water in a mister bottle. Add pearl or metallic mixatives for some extra shimmer. (Try Perfect Pearls, Sargent Pearlescent Mixing Medium, pearl or metallic watercolors, etc.)
-
Mists can be used on porous surfaces such as paper, canvas or wood.
-
Step 16
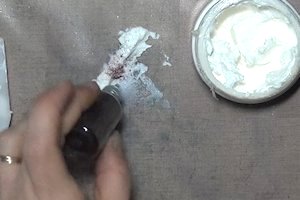
Add product to acrylic mediums or clear glazes for custom colored effects. (Heavy gloss gel medium shown in photo.)
-
Mix thoroughly with palette knife and add to project.
-
Step 17
Many of the techniques above can be combined, and results will vary. Experiment to find your favorite techniques, product combinations, and effects, and please share!
Video!
Your Turn
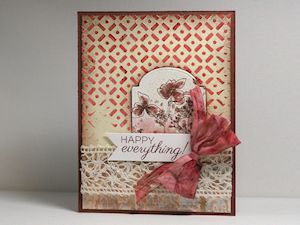
You've seen the tutorial, now you try it! We've got a section of the gallery set aside for Watercolor Powders. Try this technique, then upload your artwork to the gallery. Show us your creations!
***Please note - Internet Explorer/Edge is not a supported browser, and will not allow you to see the videos. Please use Chrome, Firefox or Safari to view our tutorial videos.

Questions and Comments
We'd love to get your feedback or questions. Leave your comment below.
Paper Hugs,
Jan
Many thanks!
Thank you!!!
Harriettb
Page 2 of 3 pages < 1 2 3 >