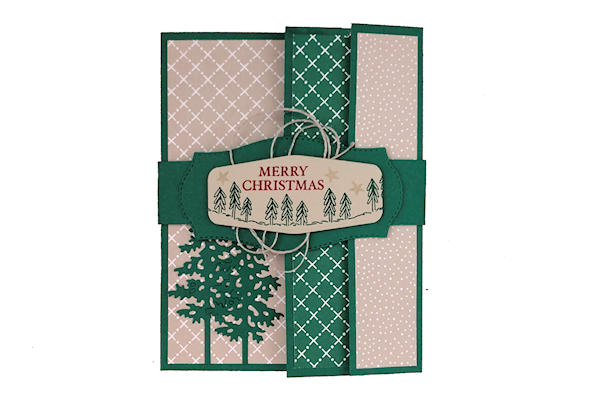
Triple Fold Card
by Mary Bush
Create a multi-panel card with a decorative band.
Supplies
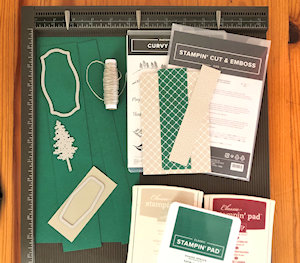
- Cardstock (two coordinating colors, Stampin' Up!® Shaded Spruce and Sahara Sand used here)
- Assorted patterned papers (SU Classic Christmas 6”x6” Designer Series Paper used here)
- Die cuts and/or punches that layer (SU Tasteful Labels and Pine Woods Dies used here)
- Die-cutting machine if needed
- Paper trimmer
- Scoring board (SU Simply Scored used here)
- Adhesives
- Other supplies as neededto complete the card (SU supplies used here: linen thread, bone folder, Curvy Christmas stamp set, Shaded Spruce, Cherry Cobbler, and Sahara Sand inks)
Step-by-Step
-
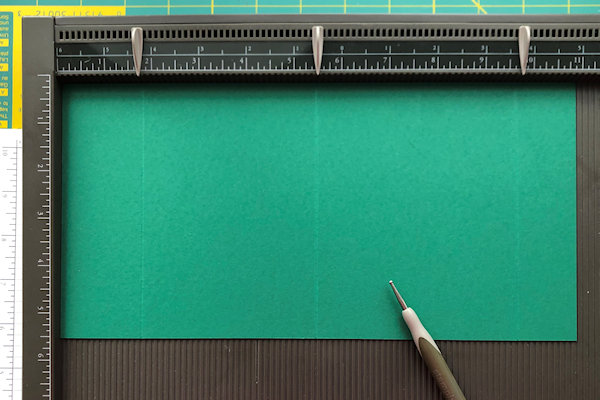
Step 1
Score a piece of 5 1/2” x 11” card stock on the long side at 1 3/4”, 5 1/2”, and 9 3/4”.
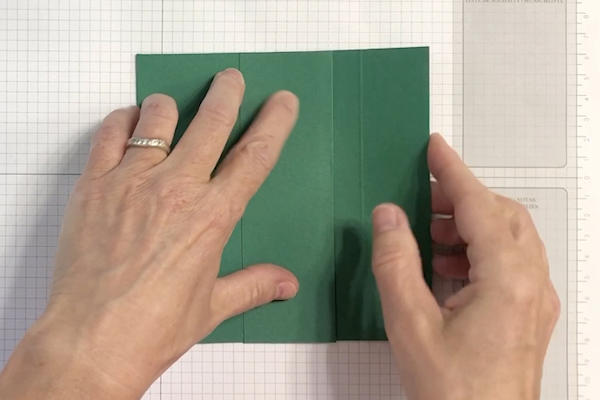
-
Fold as shown. The base is folded in half, then both flaps folded to the left.
-
Step 2
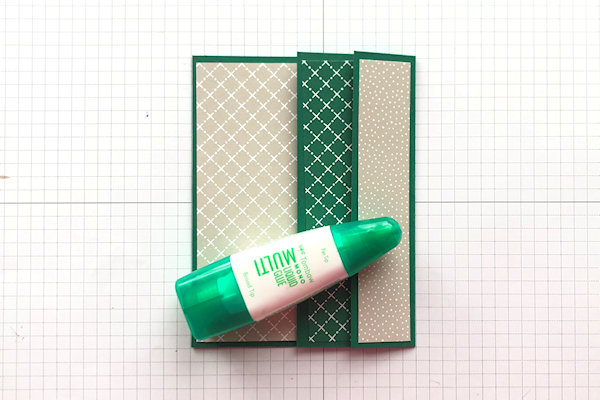
Adhere a 3 1/2" x 5 1/4" piece of patterned paper to the largest area on the card front and embellish.
-
Step 3
Adhere a 1 1/2” x 5 1/4” piece of patterned paper to the larger flap.
-
Step 4
Adhere a 1” x 5 1/4 piece of patterned paper to the smaller flap.
-
Step 5
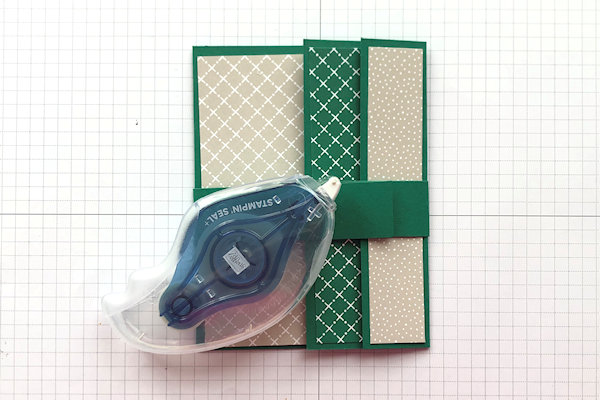
Wrap a 1” x 11” strip of cardstock around the folded card and adhere overlapping ends to form a belly band.
-
Step 6
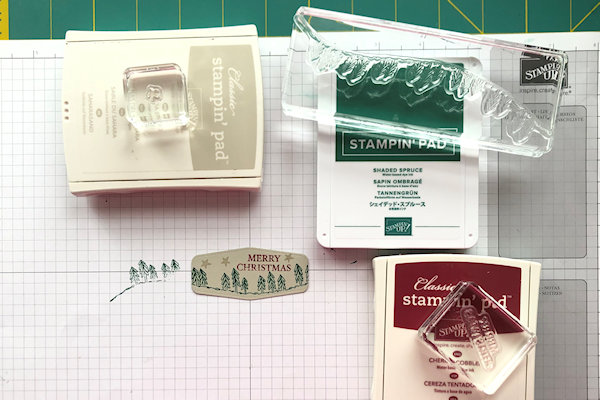
Stamp images and a greeting on a die cut or punched label.
-
Step 7
Loop a length of Linen Thread and attach to stamped label under dimensionals which will be used to attach stamped label to larger die cut or punched piece. Adhere this completed label to Belly Band.
-
Step 8
Complete the project.
.jpg)
.jpg)

Video!
Your Turn
You've seen the tutorial, now you try it! We've got a section of the gallery set aside for Triple Fold Card. Try this technique, then upload your artwork to the gallery. Show us your creations!
***Please note - Internet Explorer/Edge is not a supported browser, and will not allow you to see the videos. Please use Chrome, Firefox or Safari to view our tutorial videos.

Questions and Comments
We'd love to get your feedback or questions. Leave your comment below.
Shirl
Linda D.
Page 1 of 1 pages