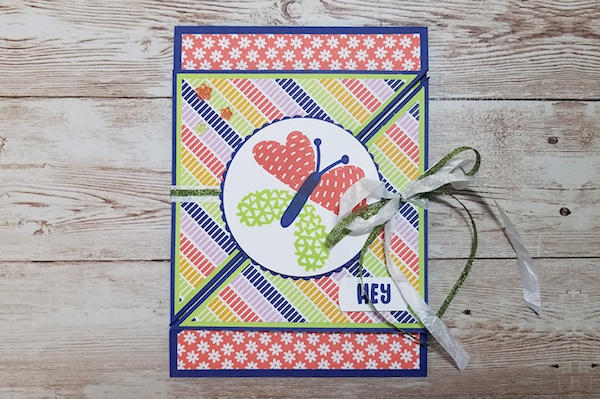
Triangle Trifold Card
by Twila Davis
Create a trifold card with a triangular twist.
Supplies
- Cardstock (Stampin' Up!® Basic White, Parakeet Party, Starry Sky used here)
- Patterned paper (SU Butterfly Kisses 6" x 6" used here)
- Paper trimmer
- Ruler and pencil
- Layering circle dies (or punches)
- Adhesive (Dimensionals and Tombow mono liquid adhesive used here)
- Die cut machine
- Scissors
- Ribbon (White Crinkled Seam Binding Ribbon used here)
- Other supplies as needed to complete the project (SU products used here: Parakeet Party 1/8" Metallic Woven Ribbon, Small Circle Punch, Fun Flower Resin Shapes)
Step-by-Step
-
Step 1
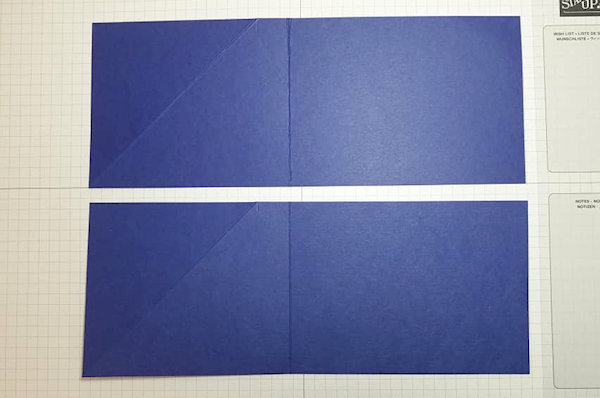
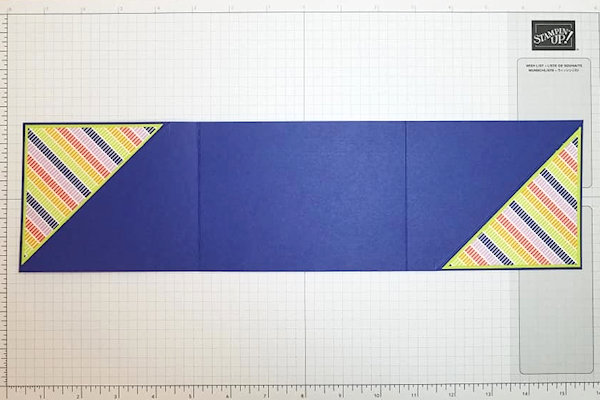
Cut a piece of cardstock to 10 1/4" x 8". On the short side cut the cardstock in half at 4".
Score both of these pieces at 5 1/2" on the long side. On the side of the cardstock that measures 4 3/4" make a pencil mark at 4" and score diagonally to the outer corner. Do this to both pieces. -
Step 2
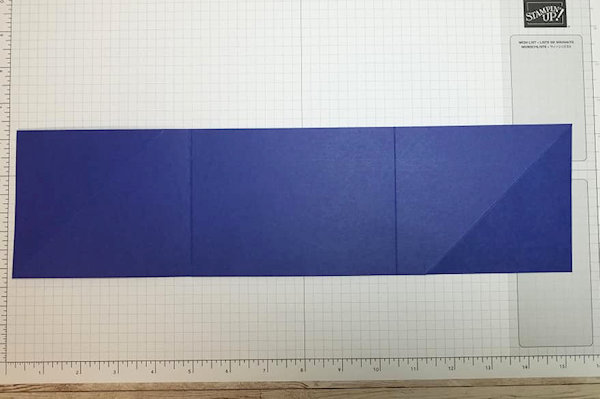
Flip one piece over and attach to the other piece of cardstock matching up and gluing over the 5 1/2" area. (You should have a triangle to the top left and a triangle to the bottom right when you are finished.)
-
Step 3
Cut a piece of coordinating cardstock to 3 3/4" x 3 3/4" and a piece of patterned paper to 3 1/2" x 3 1/2". Cut both of these in half on the diagonal. (Keep in mind that when the card is closed up it is a portrait type card.) Layer these pieces onto the card base.
-
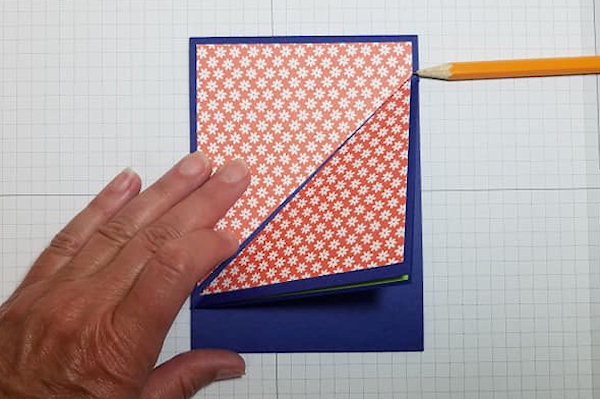
Step 4
Cut two pieces of patterned paper to 3 3/4" x 4 1/4". Fold up the card base and fold the top triangle back. Lay the patterned paper as shown. Using a pencil make a mark about 1/8" from the diagonal score line (about 9/16" from the top).
-
Step 5
Using your paper trimmer cut the patterned paper at an angle from the opposite corner to the pencil mark. Do the same with the other piece. Note that this piece will be opposite.
-
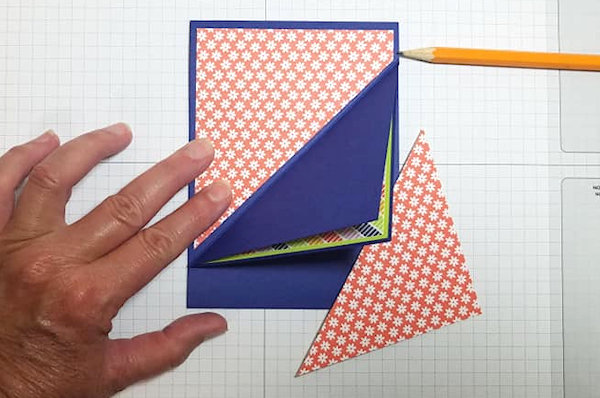
Step 6
Attach the pieces with adhesive as shown.
-
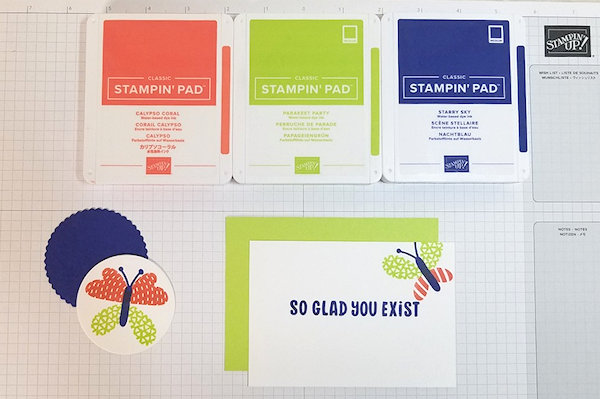
Step 7
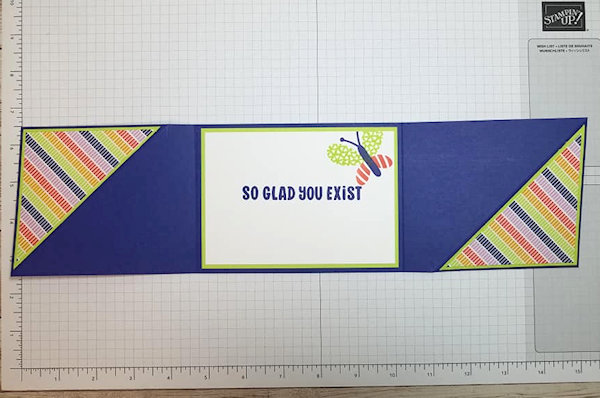
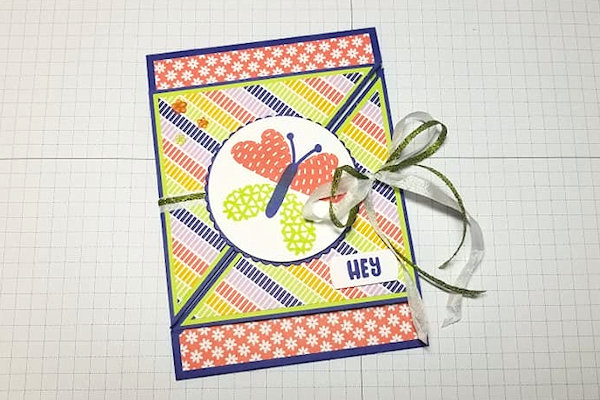
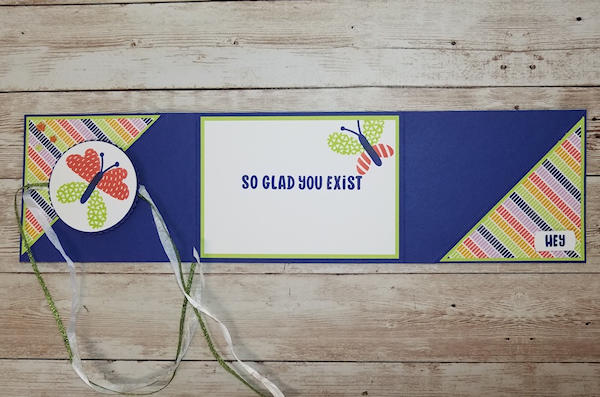
Prepare a focal panel for the card that will center between the two triangles on the front, and a panel for the inside of the card. For the sample, two layered circles were die cut, one in white and another in a coordinating color cardstock. The white circle was stamped with an image.
For the inside cut and stamp a piece of white cardstock at 3 5/16" x 5 1/16" and coordinating cardstock to 3 3/4" x 5 1/4". -
Layer and attach the inside pieces as shown.
-
Step 8
Use Dimensionals to attach the stamped Image to the coordinating background circle. Wrap a piece of ribbon 24" long around the card so that the ends are to the right hand side of card.
Add glue to the half of the Circle image that lays on the top triangle and glue down over the ribbon to card. Add other embellishments to the card front as desired.
-
Step 9
Tie the ribbon in a bow and your card is now complete.
-

Video!
Your Turn
You've seen the tutorial, now you try it! We've got a section of the gallery set aside for Triangle Trifold Card. Try this technique, then upload your artwork to the gallery. Show us your creations!
***Please note - Internet Explorer/Edge is not a supported browser, and will not allow you to see the videos. Please use Chrome, Firefox or Safari to view our tutorial videos.

Questions and Comments
We'd love to get your feedback or questions. Leave your comment below.
Page 1 of 1 pages