Tiny Treat Basket
by Cambria Turnbow
Fill these adorable little baskets with covered peppermint patties for any occasion.
Supplies
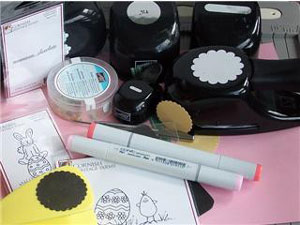
- 5"x 5" piece of cardstock
- Additional cardstock for punches
- Four 2" x 1 1/2" pieces patterned paper
- Scor-Pal™, or other scoring tool
- Slot Punch
- Round Scallop Punch
- Circle Punch
- Brads
- Ribbon for handle
- Adhesive
- Peppermint Patties either Pearson or York
Step-by-Step
-
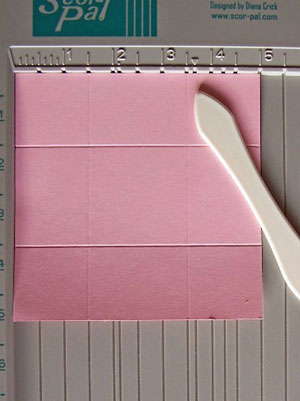
Step 1
Score each side of 5" cardstock square at 1 1/2".
-
Step 2
Adhere strips of patterned paper to each of the outer center panels.
-
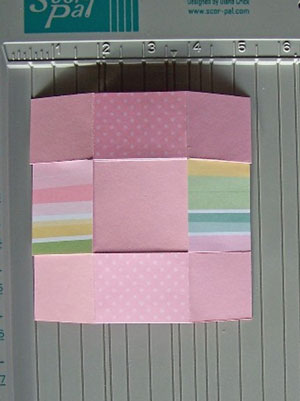
Step 3
Cut the two score lines on top and bottom of the square.
Punch a slot in the two center pieces that have the cut score lines next to them.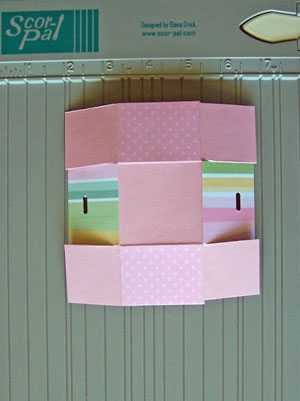
-
Step 4
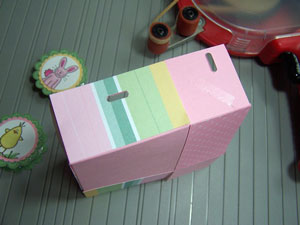
Fold one flap in and punch through existing hole to add a slot in the sides of the basket.
Repeat with each flap.
Hint:
Don't try folding the box sides up and punching through all three layers at once. The slot punch can only punch through one layer at a time.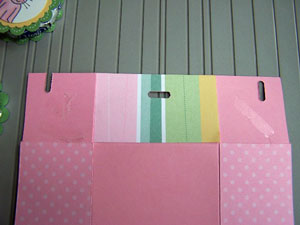
-
Step 5
Apply adhesive on the outer sides of the flaps and fold them in one at a time to create the basket.
-
Step 6
Loop ribbon through the slots and secure with a brad to make a handle.
Variation:
Instead of using the slot punch and ribbon, try a strip of cardstock attached with eyelets or brads.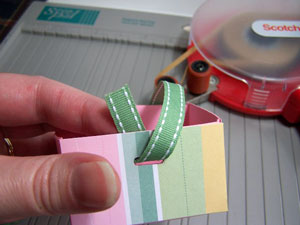
-
Step 7
Apply strong adhesive to a scallop punched cardstock circle.

-
Step 8
Adhere scallop to peppermint patty.
Decorate a second scalloped circle and adhere to the other side of candy.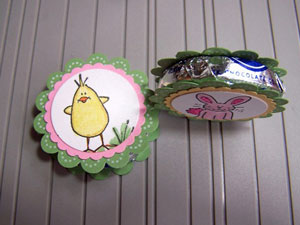
-
Step 9
Decorate the basket and fill with embellished patties.
When made using these dimensions, the basket will hold four patties.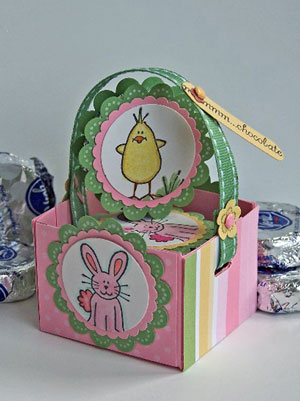
Video!
Your Turn
You've seen the tutorial, now you try it! We've got a section of the gallery set aside for Tiny Treat Basket. Try this technique, then upload your artwork to the gallery. Show us your creations!
***Please note - Internet Explorer/Edge is not a supported browser, and will not allow you to see the videos. Please use Chrome, Firefox or Safari to view our tutorial videos.

 *
*
Questions and Comments
We'd love to get your feedback or questions. Leave your comment below.
now I want a Peppermint Patty!
Thanks- awesome tutorial, BTW!
I got the punch(The pink round, inner scallop) here: http://shop.ginakdesigns.com/product.sc?categoryId=8&productId=16
The biggest scallope (wasabi) is the Round Scallop Punch from SU! The Bunny is punched out with the 1 1/4 inch round punch from SU!.
I got the stamps here:
http://www.cornishheritagefarms.com/index.php/cPath/376_390_345_347
They are designed by our own Asela Hopkins and made by Cornish Heritage Farms... awesome stamps!
Again, thanks so much for the sweet comments!
~C
thanks so much
I just love this box. It is way too cute!
Thanks,
Hope
Page 2 of 3 pages < 1 2 3 >