Tent Topper Card
by Beate Johns
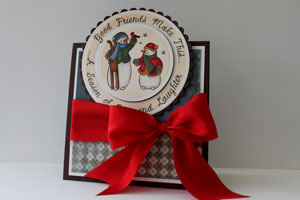
For an out-of-the-ordinary card that will still fit in a regular envelope, try this card created by Dirty Dozen Alumni Michelle Wooderson.
Supplies
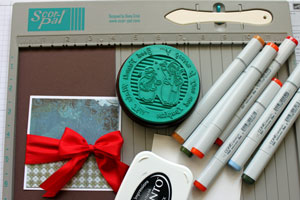
- 4 1/4" x 8 1/2" piece of cardstock for card base
- Scor-Pal™, or other scoring tool
- Scor-Tape™, or other strong adhesive
- Stamps, JustRite Stampers' Old Fashioned Christmas
- Ink
- Additional cardstock for your main image and card front
- Patterned Paper for your card front
- Embellishments
Step-by-Step
-
Step 1
Score your 4 1/4" x 8 1/2" piece of cardstock at 4 1/4".
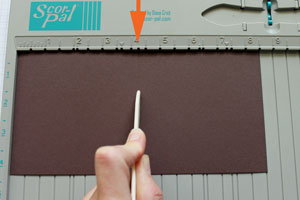
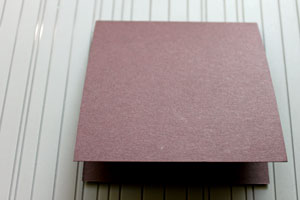
-
Fold cardstock at score line to create your card base.
-
Step 2
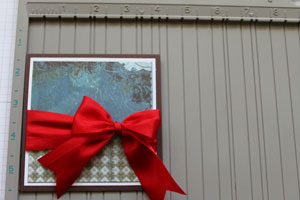
Decorate your card front with additional cardstock, patterned paper and embellishments.
Leave room on the top to add your focal point.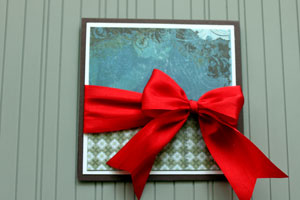
-
Step 3
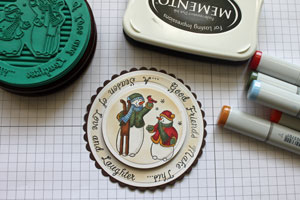
Stamp, color and layer your main image.
-
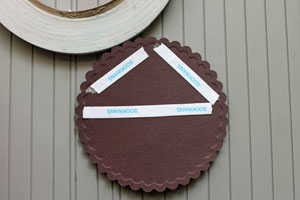
Step 4
Add Scor-Tape™ to the lower half of the back of your image.
-
Step 5
Line up your card front at 5 1/2" either on your Scor-Pal™ or your grid paper.
-
Step 6
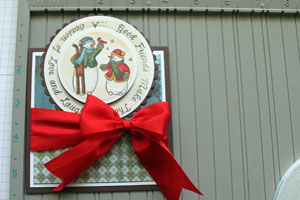
Adhere your main image so that the top of the image will line up with 0" to create a 4 1/4" x 5 1/2" card.
-
Your tent topper card is done.
Video!
Variations
Different sizes
Try different card sizes. Whatever size you want to create, make your card base a bit smaller and then let your image stick over so much that it will end at the regular height of that card size.
Your Turn
You've seen the tutorial, now you try it! We've got a section of the gallery set aside for Tent Topper Card. Try this technique, then upload your artwork to the gallery. Show us your creations!
***Please note - Internet Explorer/Edge is not a supported browser, and will not allow you to see the videos. Please use Chrome, Firefox or Safari to view our tutorial videos.
 *
*
Questions and Comments
We'd love to get your feedback or questions. Leave your comment below.
Check my gallery upload. I listed all my card supplies there. The Basic Grey paper pack that I used is called Periphery.
How did you airbrush that background? I have always wanted an airbrush , and maybe this is the project that will allow me to let myself get one! Thanks a million.
I am finally ready to make this card. One question: Did you stamp your circles before or after you embossed them?I just got my Wizard and am wondering what order to do things. Was it cut, stamp , emboss, color? Thanks.
Leslie
Page 2 of 2 pages < 1 2