Tealight Cake
by Anne Harada
Turn an electric tealight into a birthday cake.
Supplies
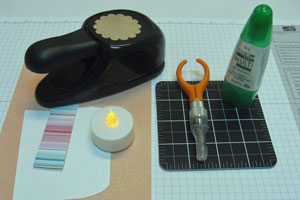
- One flameless battery-operated tealight
- One 5” x 3/4” strip of patterned paper for the cake's side
- Cardstock or patterned paper for the scalloped cake top
- Scrap paper to use as a pattern
- Adhesive
- Scallop circle punch or scallop circle die
- Pencil
- Craft knife and cutting mat
- Embellishments
Step-by-Step
-
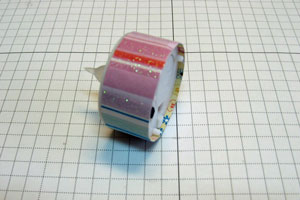
Step 1
Adhere the 5” x 3/4” strip of patterned paper around the side of the tealight.
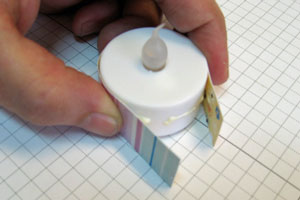
-
The height of the band will hide the legs under the tea light.
-
Step 2
Punch a scrap piece of paper with the scallop circle punch to use as a pattern. Fold into quarters, and then snip a very tiny piece of the corner off.
Hint:
Save this pattern with your stash of tealights for use on future cakes.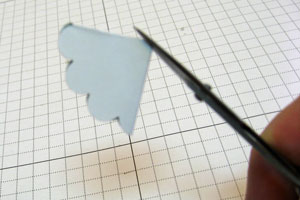
-
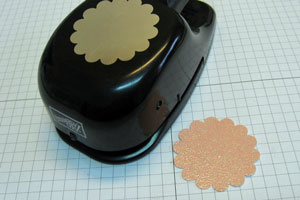
Step 3
Punch the cardstock with the same Scallop Circle punch. This will be the top of the cake.
-
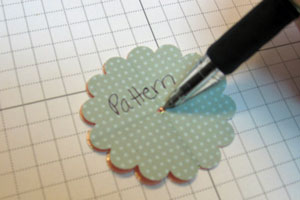
Step 4
Find the center of your scalloped cake top by positioning your pattern over your cake top. Mark the center.
-
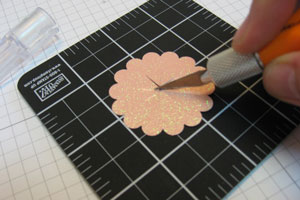
Step 5
Using a craft knife, cut four ½” intersecting lines across the center of the cake top.
-
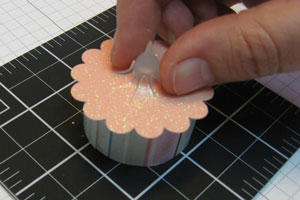
Step 6
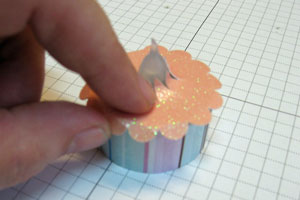
Apply glue to the top surface of the tealight.
.jpg)
-
Slip your cake top over the flame of the tealight. Press to adhere.
-
Step 7
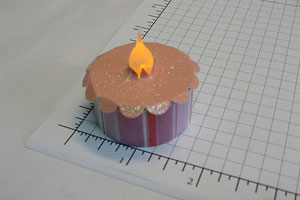
Bend the scalloped edges down over the side of the cake.
-
Step 8
The basic tealight cake is complete. You can now embellish your tealight cake as you choose for any occasion.
-
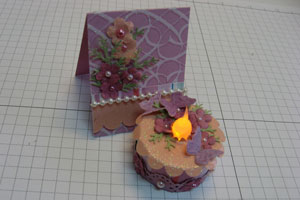
Design a matching mini card to complement your creation! The finished mini card with this project is 2” x 2-1/2”.
Video!
Your Turn
You've seen the tutorial, now you try it! We've got a section of the gallery set aside for Tealight Cake. Try this technique, then upload your artwork to the gallery. Show us your creations!
***Please note - Internet Explorer/Edge is not a supported browser, and will not allow you to see the videos. Please use Chrome, Firefox or Safari to view our tutorial videos.

Questions and Comments
We'd love to get your feedback or questions. Leave your comment below.
I have an aunt with a b/d very shortly as well as a very dear friend. This will be great for them. They are most times the ones I try new things with and they always keep them displayed. I think they will just adore these.
Thank you for bringing us such wonderful tutorials.
Blessings
Page 1 of 4 pages 1 2 3 > Last »