Tealight Cake

by Anne Harada

Turn an electric tealight into a birthday cake.

Supplies
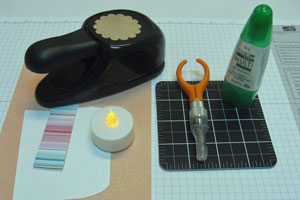
  • One flameless battery-operated tealight

  • One 5” x 3/4” strip of patterned paper for the cake's side

  • Cardstock or patterned paper for the scalloped cake top

  • Scrap paper to use as a pattern

  • Adhesive

  • Scallop circle punch or scallop circle die

  • Pencil

  • Craft knife and cutting mat

  • Embellishments

Step-by-Step

  1. Step 1

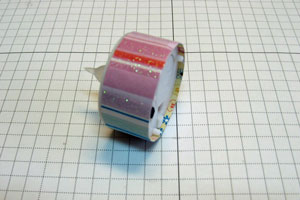
    Adhere the 5” x 3/4” strip of patterned paper around the side of the tealight.
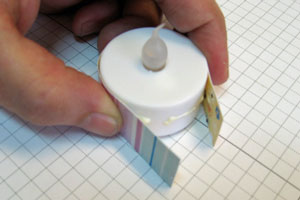
  2. The height of the band will hide the legs under the tea light.
  3. Step 2

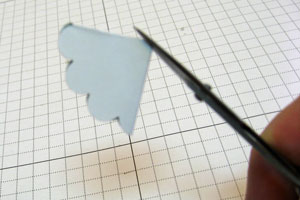
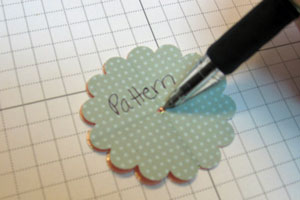
    Punch a scrap piece of paper with the scallop circle punch to use as a pattern. Fold into quarters, and then snip a very tiny piece of the corner off.

    Hint:
    Save this pattern with your stash of tealights for use on future cakes.
  4. Step 3

    Punch the cardstock with the same Scallop Circle punch. This will be the top of the cake.
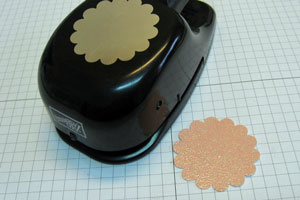
  5. Step 4

    Find the center of your scalloped cake top by positioning your pattern over your cake top. Mark the center.
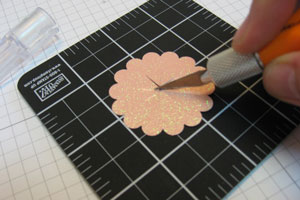
  6. Step 5

    Using a craft knife, cut four ½” intersecting lines across the center of the cake top.
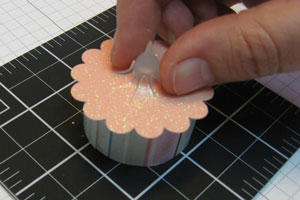
  7. Step 6

    Apply glue to the top surface of the tealight.

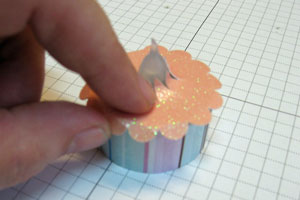
  8. Slip your cake top over the flame of the tealight. Press to adhere.
  9. Step 7

    Bend the scalloped edges down over the side of the cake.
  10. Step 8

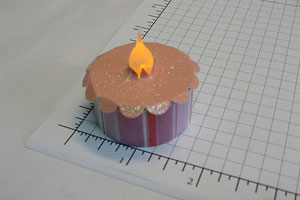
    The basic tealight cake is complete. You can now embellish your tealight cake as you choose for any occasion.
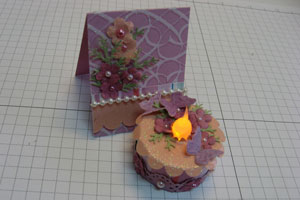
  11. Design a matching mini card to complement your creation! The finished mini card with this project is 2” x 2-1/2”.
Video!

Your Turn

You've seen the tutorial, now you try it! We've got a section of the gallery set aside for Tealight Cake. Try this technique, then upload your artwork to the gallery. Show us your creations!

***Please note - Internet Explorer/Edge is not a supported browser, and will not allow you to see the videos. Please use Chrome, Firefox or Safari to view our tutorial videos.

Questions and Comments

We'd love to get your feedback or questions. Leave your comment below.

Toooooo Cute. Just love it. What a great little addition to a card. TFS!
Wendy  |  Wed Apr 28, 2010 at 8:26 AM
Thank you for a darling, clever and easy project! Can't wait to make them for my daughter's birthday.
Cathy  |  Wed Apr 28, 2010 at 8:32 AM
I LOVE this cute idea! I will definitely be making one of these for the next birthday person I know! Thank you!
Lori  |  Wed Apr 28, 2010 at 8:33 AM
What a neat idea!! Great idea for my grandchildren.
Rosie  |  Wed Apr 28, 2010 at 8:41 AM
Anne, these are so cute! Trust you to come up with something so adorable. You are such an amazing artist!
Julie  |  Wed Apr 28, 2010 at 8:45 AM
These are so gorgeous!!! My friend is getting married early next year. I think I will offer to make these for her tables!!!!
SusieQ  |  Wed Apr 28, 2010 at 9:31 AM
I was looking for something really cute to make for my friend birthday this week. A big THANKS!!! for providing such a cute idea.
Kendria  |  Wed Apr 28, 2010 at 9:31 AM
Anne, you clever and creative genius!!! I totally love this and now will have to run out and get some of these tealights. Thanks so much for your fabulous tutorial.
Joanne (sleepyinseattle)  |  Wed Apr 28, 2010 at 9:56 AM
OMG! This is so adorable! I will be stopping at the dollar store for some tealights today! =)
Julz  |  Wed Apr 28, 2010 at 10:11 AM
BRILLIANT!!!
Lisa  |  Wed Apr 28, 2010 at 10:14 AM
Absolutely CUTE!! Mother's Day gifts for my daughter and daughters-in-law!! Can't wait to make my first one!
Peggy  |  Wed Apr 28, 2010 at 10:44 AM
Thanks Anne, that is one of the coolest ideas I have seen in a while!
kim  |  Wed Apr 28, 2010 at 10:49 AM
This is awesome!! I now have my 3-D project for clubs next month!! Will post mine as soon as I have it done.

Thanks so much for sharing!!
April  |  Wed Apr 28, 2010 at 11:19 AM
Wow! I'm blown away by the simplicity of this project. Even I, with my fumbly fingers, can make this. Off I go to buy tea lights. Thanks so much for sharing.
Gail  |  Wed Apr 28, 2010 at 11:55 AM
Oh dear, oh dear, I've never seen anything so cute. I know the Dollar Tree sells them so off I go to get my packages. Thank you for this perfectly adorable idea.
Mary Ann Huntington  |  Wed Apr 28, 2010 at 1:07 PM
where can u get the tea lights? thank u
karen charette  |  Wed Apr 28, 2010 at 1:17 PM
darn, i want to go home now and make one of these! sitting here wondering if my nestabilities scalloped circle would work because i would like to make a 2 or 3 layered cake, with the tealight as the top layer. i would need find something suitable for the 2nd or 3rd layer. i know i'll find something at home.
lupe martinez  |  Wed Apr 28, 2010 at 1:30 PM
Can you say WEDDING FAVORS?? I bet there is a lot I could do with white-on-white, especially using SU's Bride paper, and their white Smooch Spritz, and the Pretties Kit.... Yum!
Charly  |  Wed Apr 28, 2010 at 2:52 PM
What a fantastic, easy project! I LOVE IT!! I was wondering, too, where your purchased your tealights and what size they are.

Thank you for an AWESOME tutorial!! I can even do this!! smile
Judy  |  Wed Apr 28, 2010 at 3:32 PM
loved the idea!! Cute simple and fun enough!
jeanne  |  Wed Apr 28, 2010 at 5:08 PM

Page 2 of 4 pages  <  1 2 3 4 >

You need to be logged in to comment

GET OUR NEWSLETTER


Splitcoaststampers's privacy policy