Tealight Cake

by Anne Harada

Turn an electric tealight into a birthday cake.

Supplies
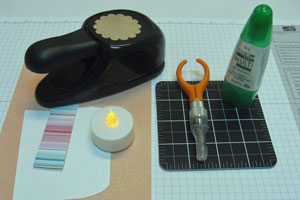
  • One flameless battery-operated tealight

  • One 5” x 3/4” strip of patterned paper for the cake's side

  • Cardstock or patterned paper for the scalloped cake top

  • Scrap paper to use as a pattern

  • Adhesive

  • Scallop circle punch or scallop circle die

  • Pencil

  • Craft knife and cutting mat

  • Embellishments

Step-by-Step

  1. Step 1

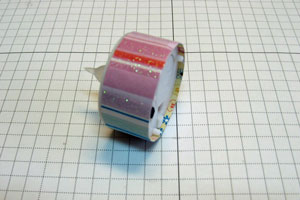
    Adhere the 5” x 3/4” strip of patterned paper around the side of the tealight.
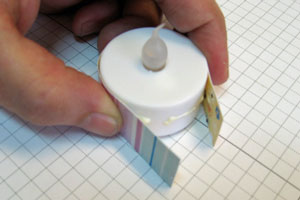
  2. The height of the band will hide the legs under the tea light.
  3. Step 2

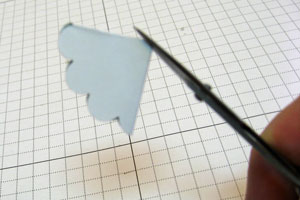
    Punch a scrap piece of paper with the scallop circle punch to use as a pattern. Fold into quarters, and then snip a very tiny piece of the corner off.

    Hint:
    Save this pattern with your stash of tealights for use on future cakes.
  4. Step 3

    Punch the cardstock with the same Scallop Circle punch. This will be the top of the cake.
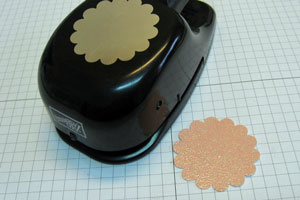
  5. Step 4

    Find the center of your scalloped cake top by positioning your pattern over your cake top. Mark the center.
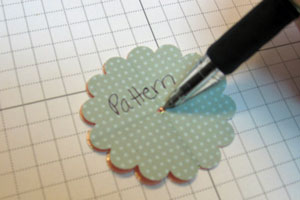
  6. Step 5

    Using a craft knife, cut four ½” intersecting lines across the center of the cake top.
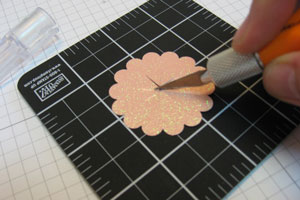
  7. Step 6

    Apply glue to the top surface of the tealight.

  8. Slip your cake top over the flame of the tealight. Press to adhere.
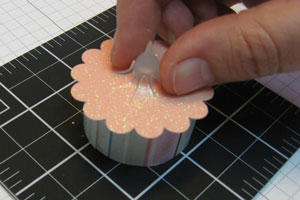
  9. Step 7

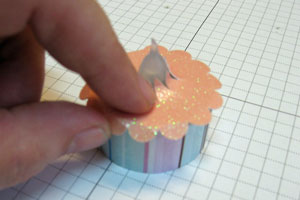
    Bend the scalloped edges down over the side of the cake.
  10. Step 8

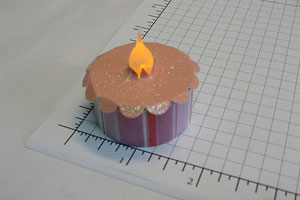
    The basic tealight cake is complete. You can now embellish your tealight cake as you choose for any occasion.
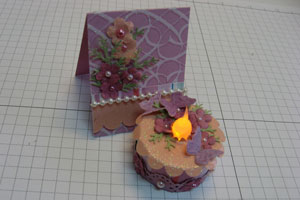
  11. Design a matching mini card to complement your creation! The finished mini card with this project is 2” x 2-1/2”.
Video!

Your Turn

You've seen the tutorial, now you try it! We've got a section of the gallery set aside for Tealight Cake. Try this technique, then upload your artwork to the gallery. Show us your creations!

***Please note - Internet Explorer/Edge is not a supported browser, and will not allow you to see the videos. Please use Chrome, Firefox or Safari to view our tutorial videos.

Questions and Comments

We'd love to get your feedback or questions. Leave your comment below.

I've never seen electric tea lights like that before! Someone posted they can be found at the dollar store - most definitely going to check it out. Fun, simple, & cute... the perfects project!
Bernadet Rodakowski  |  Wed Apr 28, 2010 at 6:37 PM
Very nice.
Rosie  |  Wed Apr 28, 2010 at 6:52 PM
This has to be the cutest thing I've ever seen!! I'm definitely going to add this on my list of Must Try. Thanks for sharing!
Melissa Craig  |  Wed Apr 28, 2010 at 7:54 PM
i am a nurse assistant and love to make cards for the elderly. these are just perfect for the people at the nursing home. Thanks for sharing!
Nikki  |  Wed Apr 28, 2010 at 8:29 PM
Cute, cute, cute! Thanks for the tutorial!
Stampin'HappyInCT  |  Wed Apr 28, 2010 at 8:58 PM
That is so adorable. My sister and I decorate on the side and I absolutely LOVE this. I also think this is perfect for sending someone a "cake" long distance! (much cheaper delivery fees!)
Sarah W  |  Wed Apr 28, 2010 at 11:16 PM
This is completely adorable and I have a couple of friends in mind who would love a birthday cake that wouldn't add pounds!
Toni Storie  |  Thu Apr 29, 2010 at 9:54 AM
Oh..so cute. Thank You! smile
printables4free  |  Thu Apr 29, 2010 at 10:09 AM
i found one solitary tealight in my stash and made one last night. so fun, so fast, and so cute! went hunting this morning and found some flameless tealight candles at michael's. they are 1 1/2 inch in diameter and 3/4 inch in heighth, batteries included, have a smooth finish, and come 6 to a pkg. i had a 40% off coupon--sweeet! i haven't ck'd $1 stores. HL or Joann's...bet they have them--i have their coupons, too.
lupe martinez  |  Thu Apr 29, 2010 at 10:28 AM
I just love this! How ingenious! This is an original, just think of the things you can do. Just wonderful.


Elaine Allen
Elaine Allen  |  Thu Apr 29, 2010 at 4:56 PM
Anne! I'm SO Happy to see you hear showing us how to make your wonderful tea light cake! these are just SO cute and fun!

Your rock GF!!!
Julia Aston  |  Thu Apr 29, 2010 at 5:58 PM
Awesome. One of my stampin friends just gave me one of these tonight for my birthday. I can't wait to try it myself.
Cindy  |  Thu Apr 29, 2010 at 9:00 PM
Truly the cutest, thing I have ever seen! Who ever invented this is a genius!
Jill Foley  |  Fri Apr 30, 2010 at 11:57 AM
Anne, what a darling idea!!! Thank you for sharing your fabulous creativity with us!
Charlene Merrick  |  Fri Apr 30, 2010 at 12:54 PM
LOVE this idea! Thank you! As usual, great job Beate!
Susane 527  |  Sat May 1, 2010 at 7:24 PM
wear can i find these tealights
karen charette  |  Sat May 1, 2010 at 7:49 PM
This is a wonderful idea and so pretty. What punch/die did you use for the petite flowers and lacey leaves.
tyger  |  Mon May 3, 2010 at 7:40 AM
Love this, I receive Splitcoaststampers every Wed. Really enjoy it, but this take "the cake"!
Mary  |  Mon May 3, 2010 at 4:51 PM
The tealight cakes are so much fun! Thanks for the tutorial!
suen  |  Thu May 6, 2010 at 7:30 PM
Absolutely LOVE this project. Think they will make great little gifts. Thanks so much.
Debbie  |  Sat May 8, 2010 at 12:38 PM

Page 3 of 4 pages  <  1 2 3 4 >

You need to be logged in to comment

GET OUR NEWSLETTER


Splitcoaststampers's privacy policy