Stray Embossing Powder
by Anna-Karin Evaldsson
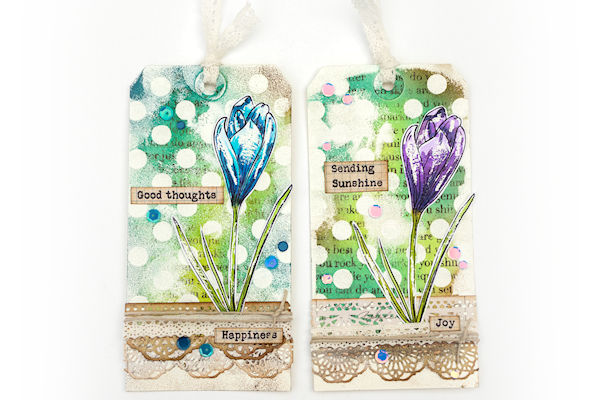
Embrace stray and random embossing powder placement as a design element. Stray powder can create wonderful texture and also works great to create highlights and as a resist effect.
Supplies
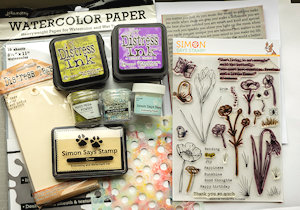
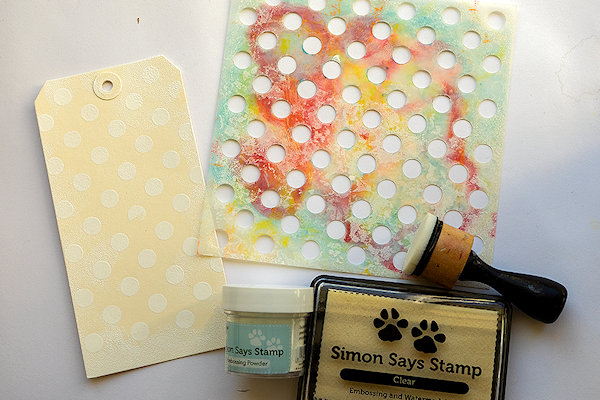
- Embossing ink (Simon Says Stamp Clear Embossing and Watermark Ink used here)
- Embossing powder (Simon Says Stamp White Detail Powder; Ranger: Lime Mixed Media Powder, Blueberry Speckle Powder used here)
- Stencil (Simon Says Stamp Large Dots used here)
- Paper (Ranger: Watercolor Paper, Distress Tags size #8; Tim Holtz idea-ology Journal Cards used here)
- Ink-blending tools (Ranger tools used here)
- Heat tool
- Non-stick craft sheet (Ranger)
- Stamps (Simon Says Stamp Thoughtful Flowers, You Matter Background used here).
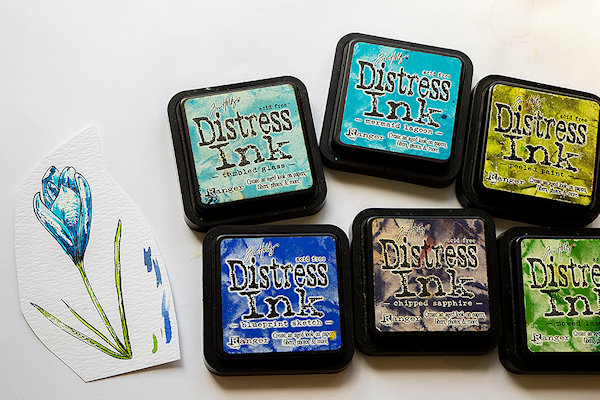
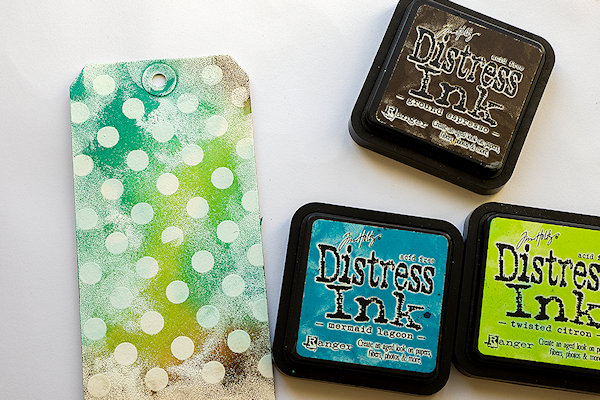
- Other inks (Ranger Archival Ink Jet Black used for stamping; Ranger Tim Holtz Distress Inks used for watercoloring: Wilted Violet, Dusty Concord, Chipped Sapphire, Peeled Paint, Mowed Lawn, Ground Espresso, Worn Lipstick, Candied Apple, Tumbled Glass, Mermaid Lagoon, Blueprint Sketch, Black Soot, Twisted Citron)
- Other supplies as needed to complete the project (used here: Sizzix Tim Holtz Crochet Thinlits, Die cutting machine (Big Shot), sequins, twine, lace trim)
Step-by-Step
-
Step 1
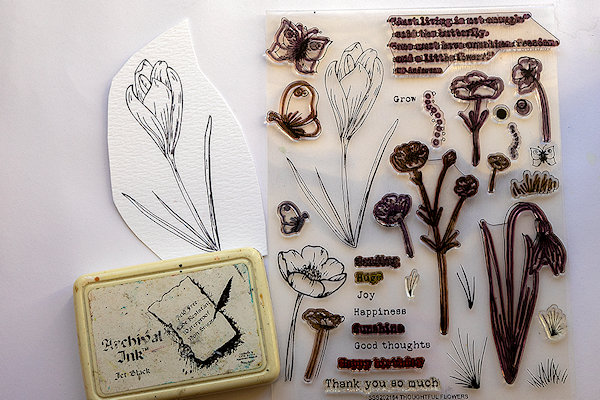
Stamp outline images on watercolor paper with a waterproof black ink pad.
NOTE:
Any kind of image that has open space to color works great for the technique. It doesn’t have to be a flower. -
Step 2
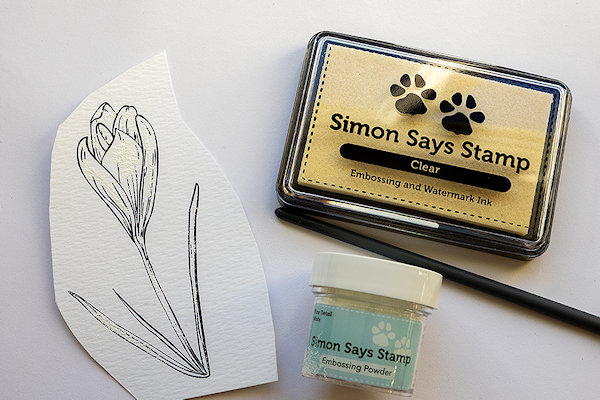
Apply embossing ink to areas of the image, using your finger for larger areas and the tip of the handle of a paint brush or another tool for details and smaller areas. You can also use a Q-tip or something similar.
Cover with white embossing powder and melt the powder with a heat tool. Always be careful when using a heat tool so that you don’t burn yourself. -
Step 3
Smear Distress Inks on a non-stick craft sheet and mist lightly with water. Pick up with a paint brush and watercolor the images. Start with the lighter shade and gradually build up darker colors and shading. The embossing powder will resist the ink.
-
Step 4
To apply the technique to a background: apply embossing ink through a stencil with an ink-blending tool onto a tag or other background panel. Then dab the tool around the edges and here and there on the design. Emboss with white powder.
-
Step 5
Ink the tag using an ink-blending tool. The embossing powder will resist the ink and create a great textured look.
-
Step 6
Stamp the background. Wipe the ink off from the embossed areas with a paper towel or cloth.
-
Step 7
Embellish the project as desired.
-
Step 8
Complete the project.


Video!
Your Turn
You've seen the tutorial, now you try it! We've got a section of the gallery set aside for Stray Embossing Powder. Try this technique, then upload your artwork to the gallery. Show us your creations!
***Please note - Internet Explorer/Edge is not a supported browser, and will not allow you to see the videos. Please use Chrome, Firefox or Safari to view our tutorial videos.

Questions and Comments
We'd love to get your feedback or questions. Leave your comment below.
Shirl
Page 1 of 1 pages