Stamp Carving Basics
by Dina Kowal
Learn the basics for beginning stamp carving.
Supplies
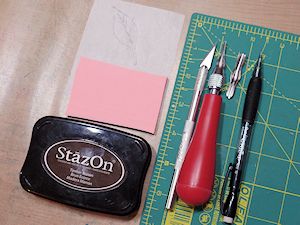
- Stamp carving block (Speedball® Speedy-Carve recommended and used here)
- Carving tools (Speedball Lino Handle and interchangeable cutter tips used here, including a small #1 V-gouge and #5 U-gouge blade)
- Pencil (#2/HB or softer lead)
- Cardstock, paper, or tracing paper
- An image to carve
- Sharp craft knife
- Stazon ink
- Scrap paper
- Self-healing cutting mat
- Other supplies as needed to complete the project (Versafine Onyx Black and Spanish Moss ink, Concord & 9th Painted Thank You clear stamp set, ScorPal, Bazzill Cardstock, MISTI)
Step-by-Step
-
Step 1
Draw or trace a simple image onto a piece of paper or cardstock,using a soft-leaded pencil.
Trim around the image with scissors.
NOTE:
If you are a beginner, choose a solid image with straight lines, broad curves and wide angles. As you practice, you will be able to progress to images with outlines and more details.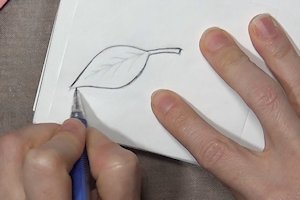
-
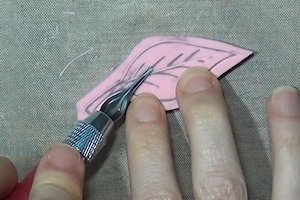
Step 2
Lay the paper with the image face down on the carving block. With your thumbnail, a bone folder, or other flat tool, burnish the paper so that the image transfers to the block. Take care to keep the paper still. If needed, touch up the image or edges of the transferred drawing with a pencil or alcohol marker so that it is clear and complete.

-
Trim the carving block with a craft knife, leaving a 1/8" – 1/4" border around the image.
NOTE:
Images can be drawn directly onto the carving block, but remember that they will be stamped in reverse. Using a transfer method will allow the stamped image to return to the orientation in which it was drawn.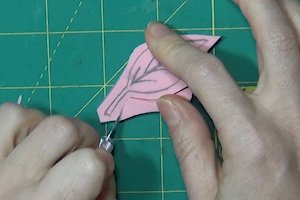
-
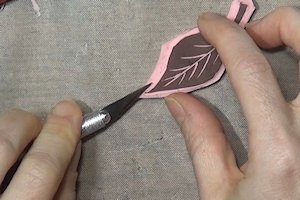
Step 3
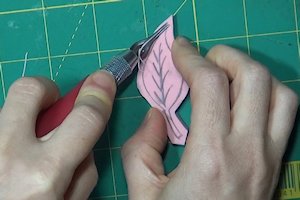
Using the smallest V-gouge blade, cut around the outline of the image. Keep the flat back of the tip against the block to ensure that the blade does not dig into the block too deeply.
TIPS:
Work slowly and carefully.
Cut from inside angles out.
Always cut away from yourself, and watch your fingers!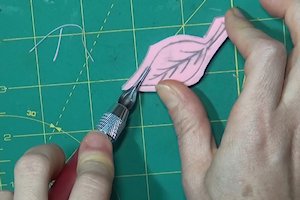
-
If cutting around a curve, turn the block to meet the blade rather than trying to turn the blade into a curved cut.
-
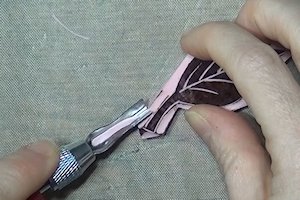
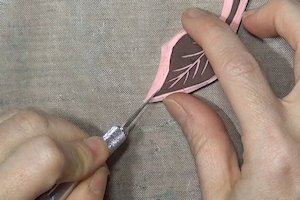
Step 4
Use the small blade to cut along any detail lines inside the outline as well.
-
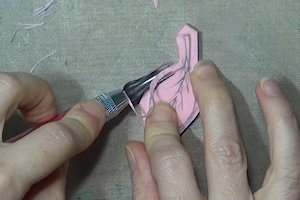
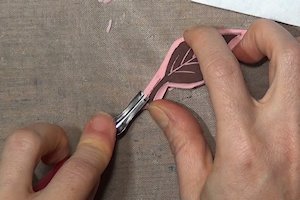
Step 5
Switch blades to a larger U-gouge tip. Cut away the excess rubber around the outline, leaving only the area that you want to stamp.
-
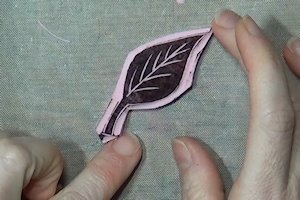
Step 6
Ink the stamp surface with Stazon ink. This will give a good idea of what surfaces of the stamp may still need to be carved away. Allow the ink to dry completely before proceeding.
-
Step 7
Keep carving away inked areas that are not a part of the stamp image. Take care not to undercut the image; cut at a slight angle away from the edge.
-
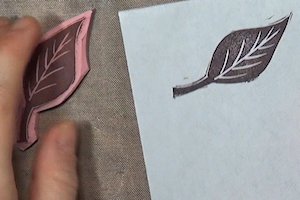
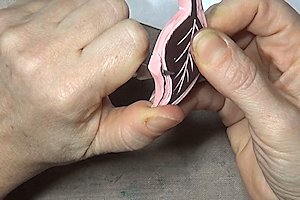
Step 8
Use a scrap piece of paper to stamp a test image. This will allow you to see which areas of the image will stamp, and indicate where adjustments are still needed.
-
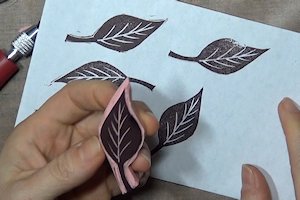
Step 9
Repeat steps 7 and 8 until the image is trimmed to your satisfaction.
-
Be patient and work slowly – you will need to stamp several test images as you go along, and keep making adjustments until all the excess rubber is trimmed away.
-
Step 10
To add very fine details and sharp angles, a craft knife can be used. Hold the blade straight up and down to go along the outline, cutting into the block about 1/16".
-
To complete the cut, angle the blade 30-45 degrees, and cut down in to the first cut line from about 1/16" outside the first cut.
-
Step 11
Trim the edges of the stamp closer to the edge of the image with a craft knife, cutting at an angle.
-
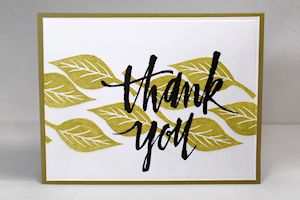
Step 12
Stamp with the carved stamp as usual to decorate a card panel.
Video!
Variations
-
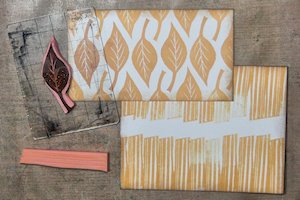
Scraps of the carving block can be used to make borders, accent stamps, or repeating patterns. The border stamp in the photo was carved with a few parallel lines, and stamped repeatedly to create a striped background.
Your Turn
You've seen the tutorial, now you try it! We've got a section of the gallery set aside for Stamp Carving Basics. Try this technique, then upload your artwork to the gallery. Show us your creations!
***Please note - Internet Explorer/Edge is not a supported browser, and will not allow you to see the videos. Please use Chrome, Firefox or Safari to view our tutorial videos.

Questions and Comments
We'd love to get your feedback or questions. Leave your comment below.
I'd love to have anyone who is interested check out a few of the stamps that I have carved in the past on my PictureTrail album ( http://www.picturetrail.com/andrearbt )
Art Stamping Workshop (North Light Books)
by Gloria Page - stepped out photos and clear instructions for lots of projects.
Gallery in back of book. I have a carving in the ATC gallery on page 110.
Thanks for the trip down memory lane.
Page 1 of 1 pages