Stair Step Fold
by Beate Johns
Create this special fold card to show off your landscaping, patterned paper or die cuts.
Supplies
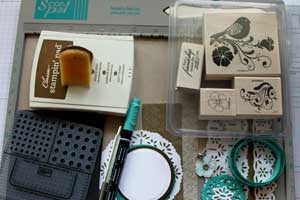
- One 5 1/2" x 10 1/2" piece of cardstock for card base
- Scor-Pal™ or other scoring tool
- Adhesive
- Stamps
- Ink
- Additional cardstock, patterned paper and embellishments for decoration
Step-by-Step
-
Step 1
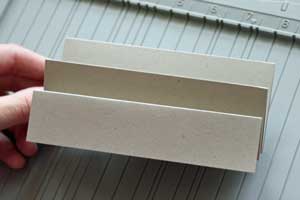
Line cardstock up on Scor-Pal and score at 2 1/2", 4 1/4" and 6".
Hint:
If you are using a paper trimmer or different scoring tool, score at 1 1/4", 2 1/2", 4 1/4", 6" and 8 1/4".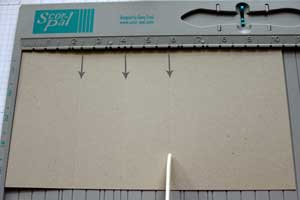
-
Step 2
Align the left edge of the cardstock at 3" score groove of the Scor-Pal and score at 4 1/4".

-
Slide your 6" score line on your cardstock to the 2" score groove of your Scor-Pal™ and score again at 4 1/4"
Why the extra steps?
The Scor-Pal doesn't have markings at 1 1/4" or 8 1/4", but with the adjustments shown here, you can use it for scoring at these measurements.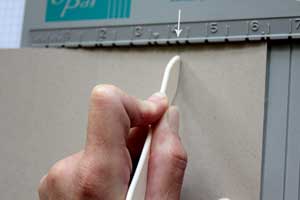
-
Step 3
Prefold all score lines.
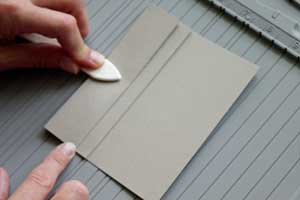
-
Fold the cardstock mountain/valley style (up and down) to create the card base.
-
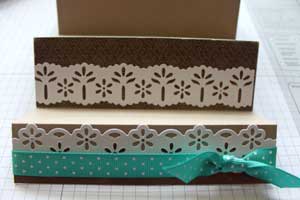
Step 4
Start decorating the stair steps.
The first one measures 1 1/4" x 5 1/2".
Hint:
I cut, embossed and stenciled white cardstock with Eyelet Borderabilities from Spellbinders.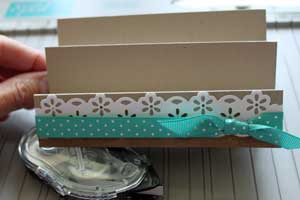
-
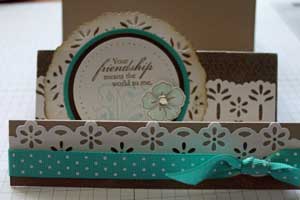
Step 5
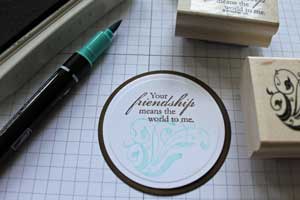
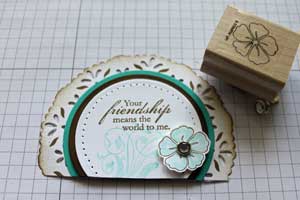
Stamp your main focal point.
-
Embellish if desired. (Eyelet Pendant templates from Spellbinders were used for the last layer.)
-
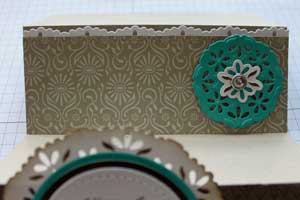
Step 6
Decorate your second stair step. This one measures 1 3/4" x 5 1/2".
-
I added my focal point to this stair step.
-
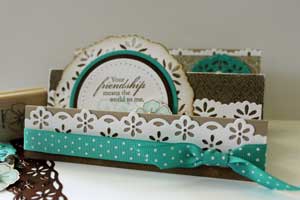
Step 7
Decorate your last stair step. This fold measures 2 1/4" x 5 1/2".
-
Finished card.
Video!
Variations
Clear Choice
Create your card base in Acetate for a different look.
Landscape it
Use this fold as a base for wonderful landscape scenes.
Fancy Settings
Create beautiful place settings with this fold.
Your Turn
You've seen the tutorial, now you try it! We've got a section of the gallery set aside for Stair Step Fold. Try this technique, then upload your artwork to the gallery. Show us your creations!
***Please note - Internet Explorer/Edge is not a supported browser, and will not allow you to see the videos. Please use Chrome, Firefox or Safari to view our tutorial videos.
Questions and Comments
We'd love to get your feedback or questions. Leave your comment below.
Because of the thickness of the card, I mailed mine in 4 3/4" x 6 1/2" envelopes.
Hugs and smiles
I either unfold my stair step fold card and write on the parts that you can't see (backside of steps), or you can write on the back of the card.
Hugs and smiles
Check step 4. You will find a link there to the Eyelet Borderabilities I used for this card.
Page 2 of 2 pages < 1 2