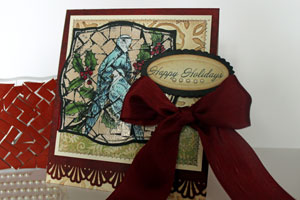
Stained Mosaic

by Beate Johns

Create a mosaic look with a homemade background stamp.

Supplies
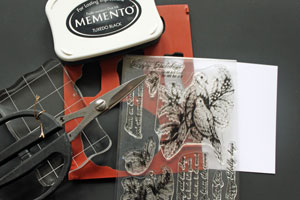
  • Acrylic stamp handle

  • Rubber trimmings (here, adhesive-backed)

  • Rubber Scissors

  • Neutral colored Cardstock

  • Outline Stamp, Flourishes Dove and Holly used here

  • Black Ink

  • Versamark™ ink pad, or other clear embossing ink (not shown)

  • Clear Embossing Powder (not shown)
  • Heat Gun (not shown)

Step-by-Step

  1. Step 1

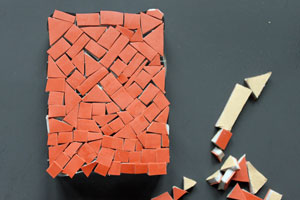
    Cut your rubber trimmings into small pieces.
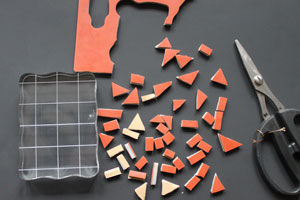
  2. Step 2

    Adhere the rubber pieces to an acrylic block.
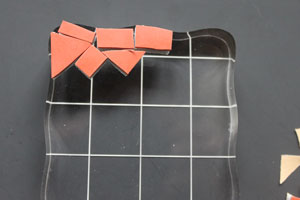
  3. Adhere the pieces close together and fill your entire acrylic block.
  4. Step 3

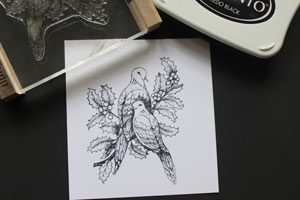
    Stamp an image with black ink on neutral cardstock.
  5. Step 4

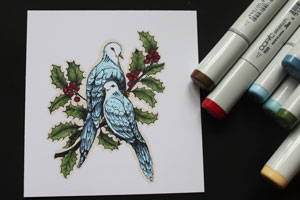
    Color your image with vibrant colors.

  6. Step 5

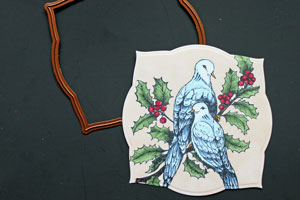
    Cut your image to the desired finished shape and size. (Label 4 Nestabilities used here.)
  7. Step 6

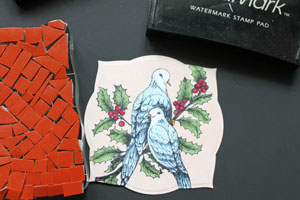
    Ink mosaic stamp with Versamark™ ink and stamp it over your colored image.
  8. Step 7

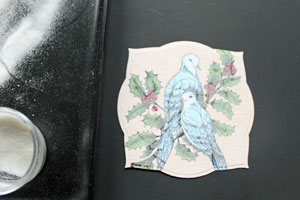
    Add clear embossing powder over your image. Tap off excess.
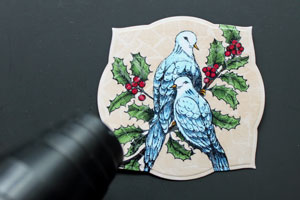
  9. Heat embossing powder with heat gun until it's completely melted.
  10. Step 8

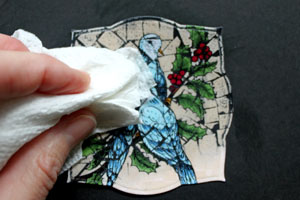
    Rub your black ink pad over the image.
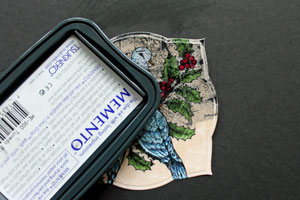
  11. Buff image with paper towel to take black ink off the embossed parts of your image.
  12. Step 9

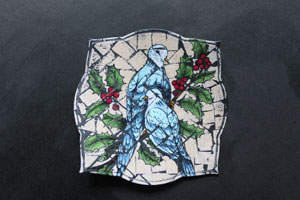
    Repeat step 8 if neccessary. Your stained mosaic piece is done.
  13. Step 10

    Finish your card.

Video!

Your Turn

You've seen the tutorial, now you try it! We've got a section of the gallery set aside for Stained Mosaic. Try this technique, then upload your artwork to the gallery. Show us your creations!

***Please note - Internet Explorer/Edge is not a supported browser, and will not allow you to see the videos. Please use Chrome, Firefox or Safari to view our tutorial videos.

Questions and Comments

We'd love to get your feedback or questions. Leave your comment below.

This is real cool! Made a trip just to get me a block and have one made getting ready to use it! thanks! for the idea.
winona white  |  Thu Feb 4, 2010 at 9:59 AM
OMG !!!
GREAT !!!!!!!
You are a genius !!
Celiagart  |  Sat Mar 27, 2010 at 9:16 AM
very very nice.really nice work.What is vibrant colour?I dont know as i always use water clour.can u tell me plz what is vibrant clour.
priyanka  |  Sun May 30, 2010 at 11:09 PM
absolutely amaizing.really nice. very very nice work.what is vibrant colour?I dont know really can you tell me plz
priyanka  |  Sun May 30, 2010 at 11:12 PM
Hi Priyanka,
I used copic markers to color my image. You can watercolor it. Just don't use really light colors. The effect is better when you use brighter colors.
Hugs and smiles
Beate
beate  |  Mon May 31, 2010 at 2:59 AM
Wow! Mucho impressed! I save all these pcs also. But I just cut lines, squares, circles, grassllike pcs to stamp background. I hadn't thought of doing this. Thank you so much. Beautiful
MemeGeorgia  |  Wed Jul 21, 2010 at 5:46 PM
That's awesome!!! What a great idea.
Lisa Doucette  |  Wed Jul 21, 2010 at 8:59 PM
I, too save the stamp trimming and it is great to have another use for it. I cut in small pieces, remove the rubber backing and use in place of pop dots on my cards.
Joy Hende  |  Wed Jul 21, 2010 at 9:52 PM
What kind of black ink Pigment or dye?
Beverly  |  Sun Jul 25, 2010 at 5:34 AM
Hi Beverly,
I only used Black Memento Ink for this technique. But you should be able to use Pigment ink also. Just wipe over your embossed image after you added the ink so you clean the ink off from there.
beate  |  Sun Jul 25, 2010 at 8:04 AM
Beate - this is another of your spectacular ideas. Thanks so much for this wonderful technique. Now I can honestly say that I have a good reason to keep the scrap pieces of rubber. I have enjoyed trying this technique - will be doing lots more.
Annette  |  Thu Jul 29, 2010 at 7:51 PM
Thanx a lot from France! I love the ressources of your site! There are lots of good ideas! It's a real pleasure to read all the techniques! Thank you very much! No longer than 5 years we discovered "scrapbooking" in France!
We have lots of things to learn from you! ;o)

Go on still a long time!
(excuse me for my english, very bad...)
Kitkathy  |  Sat Feb 26, 2011 at 8:11 AM
Very Cool - thank you for this brilliant tutorial. Love this idea grin
xx
Ike  |  Wed Jul 27, 2011 at 8:29 AM
Beautiful card. Great idea and a great way to use up some of the rubber from stamps. Thanks for sharing.

Linda D.
Linda Duensinsg  |  Wed Jul 27, 2011 at 10:28 AM
How interesting. I"ve saved all my rubber scraps, so now I have a way to use them up. Thank you for this great tutorial.
Mary Ann Huntington  |  Wed Aug 10, 2011 at 2:44 PM
Oh my goodness - LOVE this technique!!!!! smile I saw this yesterday and realized I've thrown away my rubber stamp scraps! :( NOW I too (like others) now have a perfect reason to keep those scraps! smile Thank you SO much for this tutorial - love the card at the end too! smile
Margo Davis  |  Fri Nov 21, 2014 at 9:54 AM

Page 4 of 4 pages « First  <  2 3 4

You need to be logged in to comment

GET OUR NEWSLETTER


Splitcoaststampers's privacy policy