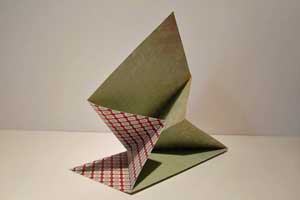
Spring Card

by Sandy Hulsart

Proudly display a beautiful scene or meaningful sentiment on this fancy-fold card.

Supplies
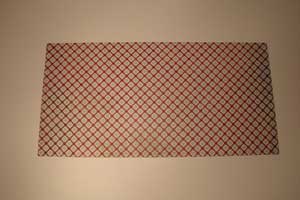
  • One piece of cardstock 5 ¼" x 10 ½"

  • Scoring tool

  • Pencil

  • Ruler

  • Scissors

Step-by-Step

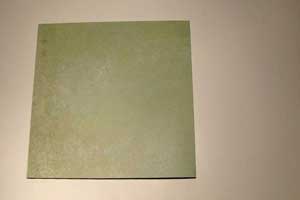
  1. Step 1

    Fold paper in half, patterned sides together to make a 5 ¼" square.
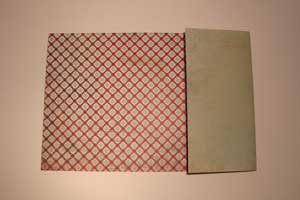
  2. Step 2

    Open the paper and with the patterned side up, fold the right side back to the center, creating a quarter fold on the right end.
  3. Step 3

    Open the paper again, but with the patterned side down.

    Grab the lower left hand corner, pull it up and over until the lower edge is even with the score created in Step 2. Crease.
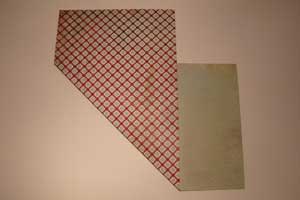
  4. Step 4

    Open the paper again, still patterned side down.

    Grab the top left hand corner, pull it down and over until the upper edge is even with the score created in Step 2. Crease.

  5. Step 5

    Open the paper, patterned side down to see the score lines.

    Mark the center of the left hand edge and draw a line from that point to the score marks a quareter of the way to the right, top and bottom.

    These are the cutting lines.
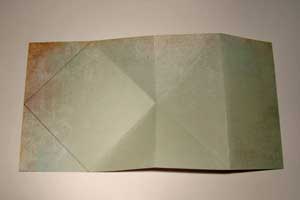
  6. Step 6

    Cut along the pencil lines to create a point at the top of the card.

    If everything was creased in the correct direction, it should fold up perfectly. This is what it looks like from the back. A little bit of adhesive was added under the front point on the bottom to get it to stay upright.
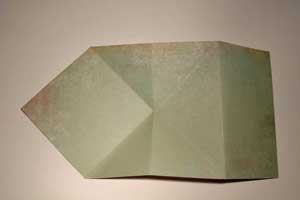
  7. And a side view.

  8. Step 7

    Finished card folds flat and is 5 1/4 " square. When taken out of the envelope, it will "spring" up, thus the name. For mailing, use a 5 1/2 square envelope.
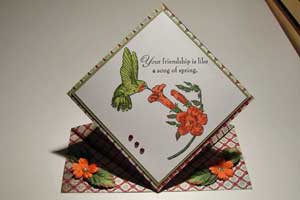
Video!

Your Turn

You've seen the tutorial, now you try it! We've got a section of the gallery set aside for Spring Card. Try this technique, then upload your artwork to the gallery. Show us your creations!

***Please note - Internet Explorer/Edge is not a supported browser, and will not allow you to see the videos. Please use Chrome, Firefox or Safari to view our tutorial videos.

Questions and Comments

We'd love to get your feedback or questions. Leave your comment below.

I love the card but have a small problem...mine keeps topling over backwards. Any suggestions? It is the exact measurements as your card.
PueblaChic  |  Sat Jul 19, 2008 at 11:42 AM
Great idea, Sandy! My MIL always displays my cards and this is perfect for her Sept. birthday. How careful do I need to be with respect to "loading" up the card? I love to layer paper and embellishments and wonder if it might get too heavy and not spring or stand-up. Any thoughts or tips? Many thanks,
Kathy
Kathy Butler  |  Mon Jul 21, 2008 at 9:07 AM
This is such an elegant card...you have made my night. A GREAT SPECIAL OCCASION CARD!
Thanks
stampintrix  |  Wed Mar 11, 2009 at 10:08 PM
Merci,

Je ne comprend pas l'anglais!
Mais votre tuto est tr�s clair...

Thanks you
sandyvon  |  Mon Apr 27, 2009 at 5:18 AM
Thanks for a fabulous tutorial.
Stampin Fanatic  |  Wed May 13, 2009 at 8:15 AM
Sandy- This is adorable! The hummingbird image with this technique was a perfect choice. I definitely want to try this technique!
Stampinak  |  Sun Sep 13, 2009 at 10:43 AM
Bravo, Bravo, Bravo, un gran tutorial , me parecia super dif�cil, pero explicado por ti lo haces f�cil, lo intentar�, este tutorial lo guardo en mis favoritos. Saludos. desde Canarias.
Marimer  |  Sat Oct 24, 2009 at 9:27 AM
Thank you for this beautiful card
I have made it ! It's wonderful
Merci beaucoup
Mamiog�e  |  Wed Mar 3, 2010 at 4:46 AM
The best instructions on paper folding, great pictures. I did not needed the video, looked at it just for fun.
Thanks so much
Elvira  |  Thu Apr 1, 2010 at 4:29 PM
I am making these for table place cards at my daughters wedding, they will look beautiful all standing together waiting for the guests to pick them up! I'm adding a square of mulberry paper behind the pop up square to make it just a little bit fancier. Thanks for the idea, great instructions, easy to follow!
Donna Sullivan  |  Fri May 7, 2010 at 9:43 PM
I love your spring card I have made it looks lovely
Esther  |  Sat Jul 24, 2010 at 8:48 PM
I love this card. I really like trying new ideas. Thanks for some great ones.
Sally  |  Sat May 28, 2011 at 7:37 PM
super card, terrific how to, uncluttered and easy to follow! Thanks!
Girona  |  Thu Oct 20, 2011 at 4:54 PM
Thank you for the great tutorial. I have been looking for something for a special card for my daughthers wedding. Found it!!!
Patricia Willoughby  |  Sun Feb 12, 2012 at 10:52 PM
Fantastic tutorial and wonderful video! Thank you So Much for Sharing, I know we all appreciate that! Cheers!
D. Daisy  |  Wed May 30, 2012 at 9:51 AM
I have been a fan of splitcoaststampers for a long time and enjoy your resources for all my crafting needs. I would really love to download some projects and keep them in a PDF file to refer back to. Printing is great, but some do not have access to a printer at all times.
Kim D  |  Tue Jun 26, 2012 at 8:54 AM
Hi Kim D! You can actually create a PDF using the print function. There are many free programs out there to do this, but here is one recommended by cnet: http://download.cnet.com/PDF-Printer/3000-2088_4-10536746.html

I use Adobe Acrobat Pro to do this all the time - I very rarely print anything anymore. But AA Pro isn't free, and there are so many free programs that will do exactly what you want. Thank you for your kind words!
lydia  |  Tue Jun 26, 2012 at 2:49 PM
Here's a video tutorial for those of you who want a video tutorial. I found this one, and it is very similar to the one that was posted above.
Jacqueline Dorer-Russell  |  Sat May 25, 2013 at 7:11 AM
OH...Sorry ! I forgot to post the LINK for the TUTORIAL for the Graduation SPRING card I found ( sorry ! )
Anyway, here's the link !
http://runningwscissorsstamper.blogspot.com/2013/04/graduation-spring-card.html
Jacqueline Dorer-Russell  |  Sat May 25, 2013 at 7:13 AM
This is a wonderful card. I made one using this type of fold to create a graduation cap. I used the graduate's school colors with a matching tassel attached by a brad and decorated for the grad. I added a pocket on to the base for a gift check.

Thanks for your informative tutorial!
Melanie R  |  Thu Dec 19, 2013 at 11:00 PM

Page 4 of 5 pages « First  <  2 3 4 5 >

You need to be logged in to comment

GET OUR NEWSLETTER


Splitcoaststampers's privacy policy