Sponging
by Beate Johns
Add warmth and dimension to your image with a sponge and ink. Sponging is a great way to distress and/ or age your cardstock.
Supplies
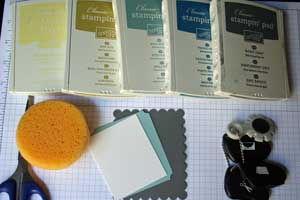
- Cardstock
- Sponge
- Scissor
- Ink pads, both dye as well as pigment ink will work
- Stamps
- Cutter Kit or other distressing tool (optional
- Embellishments
Step-by-Step
-
Step 1
Cut a sponge into smaller pieces.
Variation:
Try sponge daubers or cosmetic sponges, also. Each sponge will give you a different look. I prefer the sponge shown for a soft look.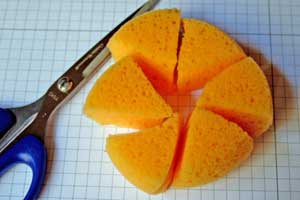
-
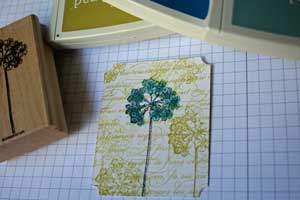
Step 2
Stamp an image.
-
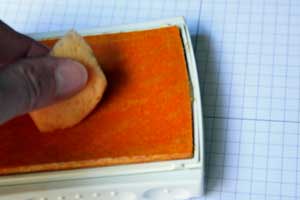
Step 3
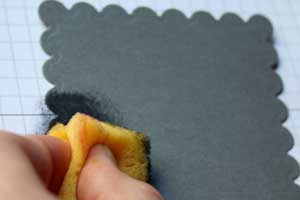
Ink one a sponge wedge with the lightest color ink by tapping it on the ink pad.
-
Hold the cardstock in one hand, the sponge in the other. Apply the ink by moving the sponge over the edge of the cardstock in an up and down motion.
Repeat several times before reloading the sponge with more ink.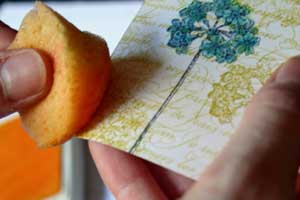
-
Step 4
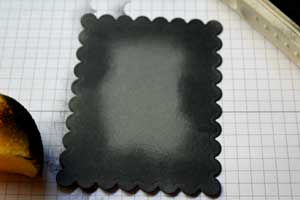
Sponge all the edges of your cardstock. If neccessary, go around the cardstock again for a richer look.
Hint:
Don't apply too much ink at once. You can always go over it again. Once you have too much ink on it, it can't be taken off. You can only go darker, not lighter!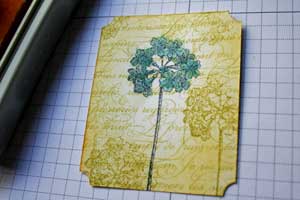
-
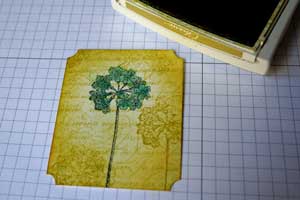
Step 5
For an even richer look, go over the edges again with a slightly darker color.
-
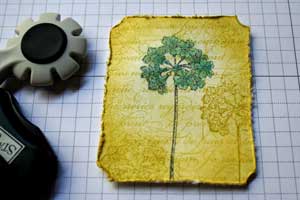
Step 6 (Optional)
Distressed edges look really good with sponged cardstock.
Take an edge distressor (or cutter kit tool) and slide it over the cardstock edges, applying a little pressure.
-
-
Step 7
When sponging cardstock that will be a lower layer of a card, just ink the sponge and rub over the cardstock edge.
-
The sponging will make the cardstock color richer. No need to try to make it look gradual. Only the outer part of the cardstock will show.
-
Step 8
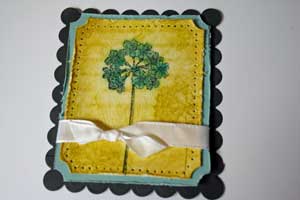
Tape your layers together.
-
Finish your card.
You can find this card in the gallery HERE with all supplies listed.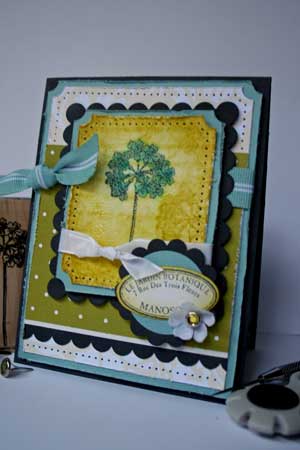
Video!
Variations
- Chalkboard
- Collage
- Embossing Resist
- Faux Leather
- Faux Mother of Pearls
- Faux Postage
- Faux Tearing
- Gesso Resist
- Grid Technique
- Paper Tole
- Poppin' Pastels
- Retiform
- Tapestry
Different texture
Different sponges will give you different results. The denser the sponge, the higher the ink transfer.
Techniques that involve sponging
Questions and Comments
We'd love to get your feedback or questions. Leave your comment below.
http://www.cropstopcommunity.com/forum/viewtopic.php?f=69&t=928&p=8595#p8595
Thanks for your inspiration! I love your work!
Try inking your sponge, then before starting to sponge your cardstock, tap the sponge once on scrap paper. It will take some of the ink load of the sponge and should prevent the first sponge "stroke" to be too dark.
Krystal
your ideas. I've bought those sponges from Michaels. They are located in the Art section by the brushes and palettes.
I was curious to know a little more about the tape you mention ''�clipes tape''. You suggested it to use to hold your masked (bird) Is that the product's name and can you tell me where I could get some, please. Thank you kindly, Madeleine
You can purchase it at Eclecticpaperie.com, EllenHutson.com and many other online stores.
This was a beautiful card and I love all of your videos!! It's much easier to learn by watching!!!
Thank you!
Geri
Thanks so much for your kind words!
In the video I am using Eclipse tape. If you google the name you can find a lot of online stores carrying that tape. I know Eclecticpaperie.com and ellenhutson.com carry it.
Ellen
The adhesive I used in the video is unfortunately not yet available in the US. It will be though sometime in March.
Hugs and smiles
Beate
It was really educational
Page 2 of 2 pages < 1 2