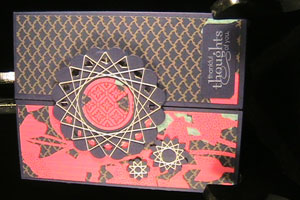
Spirelli

by Susie Nelson

Create beautiful string art with die cuts and embroidery floss.

Supplies
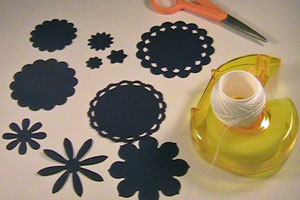
  • Cardstock scallops either cut with punches or dies

  • Crochet thread or embroidery floss

  • Tape

  • Scissors

Step-by-Step

  1. Step 1

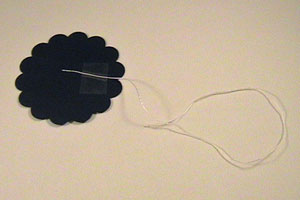
    Tape one end of the thread to the back side of the scallop.

    Hint:
    DO NOT cut the thread until the spirelli is complete.
  2. Step 2

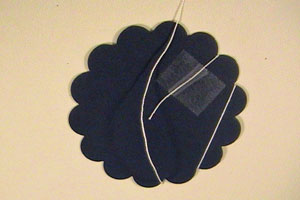
    Run thread from a scallop valley to another scallop valley. Skip at least 3 scallops for the “wrap.” Make sure it’s taut.
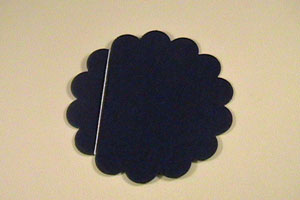
  3. The back of the scallop will look like this.
  4. Step 3

    Continue “wrapping” in one direction only, always skipping the same amount of scallops. (If you work counter clockwise, always continue in the the counter clockwise way.)
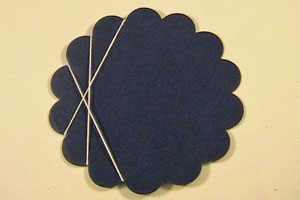
  5. The back of the scallop will look like this.
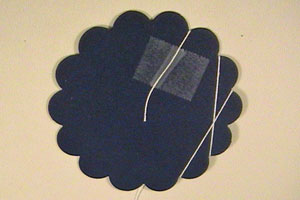
  6. Step 4

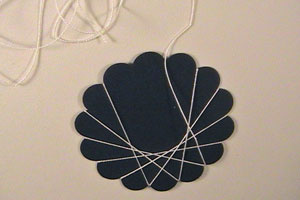
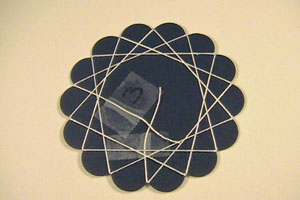
    Continue “wrapping” always moving in the same direction. You will be doubling up on each scallop valley with the thread until all valleys have 2 threads each.

    Partway through the wrap, the scalloped circle will look like this.
  7. Step 5

    Tape the thread on the back when the wrapping is finished.
    Cut the thread.

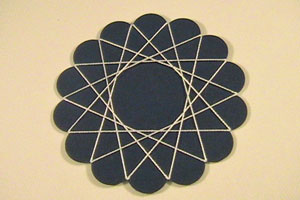
  8. Step 6

    This is how the spirelli will look when completed. You should have two threads in each valley of the scallop.
  9. Step 7

    Finish your card.

Video!

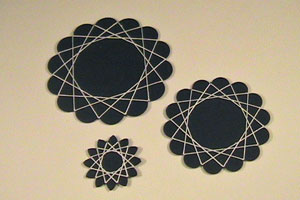
Variations

  1. Different scallop shapes give you a different look.
Your Turn

You've seen the tutorial, now you try it! We've got a section of the gallery set aside for Spirelli. Try this technique, then upload your artwork to the gallery. Show us your creations!

***Please note - Internet Explorer/Edge is not a supported browser, and will not allow you to see the videos. Please use Chrome, Firefox or Safari to view our tutorial videos.

Questions and Comments

We'd love to get your feedback or questions. Leave your comment below.

Susie -
You're always so creative with new ideas ! I'll give this one a try.
Joyce Stephen  |  Thu Nov 24, 2011 at 12:46 PM
This is so Kool, I love the use of the thread in this to give it the multi-diagonal look, just what an old math lover would like.

Hope that all had a very Happy Thanksgiving Day w/o the added ####

Bless U

Betty
BETTY CALLAHAN  |  Thu Nov 24, 2011 at 7:16 PM
love the tutorial. tried to veiw niki's cards and splitcoast had a frenzy. i cut and pasted link so i didn't type it wrong. it showed the card for a second then started flashing. any ideas what's up?
cd  |  Fri Nov 25, 2011 at 8:29 AM
You can do string art (its old name) by simply drawing an angle with arms of equal (easiest) or different lengths. Mark them into points that are equal distances apart, the same number of points on each arm. Use your stylus to poke a small hole at each point. Then sew thru each hole with light weight embroidery thread. Start at the point closest to where the arms touch on the angle (the apex) and pull the thread out to the furtherest away point on the other arm. Return to the first arm and go through the next hole and stitch up to the second arm on its next hole. You'll work out from the apex of the angle on the one arm right out to the end of that arm as you stitch eeach hole, while working from the outermost hole on the second arm back to where the two arms meet (the apex). It sounds harder than it is but it is easy once you get the hang of it. Then you can try different geometric shapes and even pictures and words. This was very poplular in the mid-seventies and I taught this to Junior High age young people. Several of them made pictures and sold them and did quite well. Pictures that have angles , like sail boats, look great. You could make a neat card for the sailor in your life. Suzyque
Sue Laine  |  Sat Nov 26, 2011 at 2:19 PM
Tr�s belle carte, originale et gaie. Merci pour le tuto. Bravo pour toutes ces merveilleuses r�alisations. Amicalement.
Micha  |  Tue Nov 29, 2011 at 8:03 AM
What size crochet thread do you use for this? I made it w/en=mbroidery floss and it looked to heavy to me.
Roberta Belleare  |  Wed Nov 30, 2011 at 3:56 AM
I haven't done this technique in years. Thanks for reminding me how fun it is!
Cherylynn  |  Sun Dec 4, 2011 at 4:26 PM
one to see with ribbon !
niki
niki1  |  Wed Dec 28, 2011 at 1:33 PM
niki
niki1  |  Wed Dec 28, 2011 at 1:36 PM
This time I made one with ribbon...
http://www.splitcoaststampers.com/gallery/photo/2112038?&cat=500&ppuser=205884
niki
niki1  |  Thu Dec 29, 2011 at 7:54 AM
Great tutorial. I was looking for something to
finish off my scrapbook page. Think you have just given me the finishing touch. TFS
Donna Wyant  |  Wed Feb 22, 2012 at 11:26 AM
This was wonderful. I made several as tags for my Christmas presents and then used smaller ones as 'embellies' on my Christmas cards. We often travel to one of the kids for Christmas so this was a great thing for me to do in the car:)
Sandy C.  |  Wed Feb 22, 2012 at 12:00 PM
great technique, I have to do it today! thank you so very much.
marlene  |  Wed Feb 22, 2012 at 12:21 PM
Thanks for this tutorial. I used to make these all the time, but then got away from them. A couple of weeks ago, I tried to make one and really goofed it up. I like to leave enough room in the middle to stamp a small image.
Shala  |  Wed Feb 22, 2012 at 7:51 PM

Page 2 of 2 pages  <  1 2

You need to be logged in to comment

GET OUR NEWSLETTER


Splitcoaststampers's privacy policy