Sparkly Stained Glass
by Beate Johns
Create a stained glass look by stamping on acetate and applying glitter on the back side of it.
Supplies
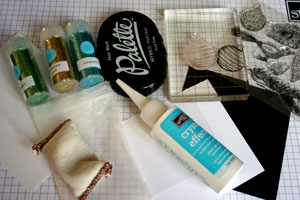
- Line Image Stamp, Flourishes All That Glitters used here
- Palette ink™ or other ink that stamps on plastic
- Glitter in several colors
- Crystal Effects™ or other clear drying glue
- Acetate
- Neutral colored cardstock
- Embossing Buddy
Step-by-Step
-
Step 1
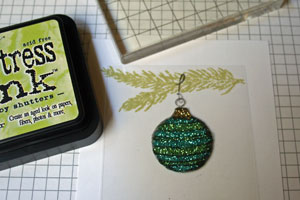
Stamp image with Palette ink on acetate.
Let dry or carefully heat set.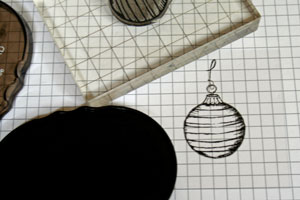
-
Step 2
Flip acetate over and rub Embossing Buddy all over the back side of the image.
This will help keep the glitter from sticking to unwanted parts of the acetate.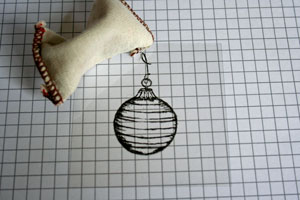
-
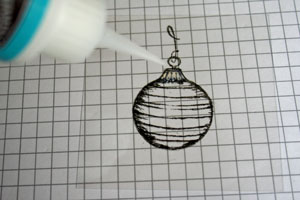
Step 3
Add Crystal Effects™ to all parts of the image that will be covered with the first glitter color.
-
Step 4
Pour glitter over the glue.
Martha Stewart Florentine Gold used here.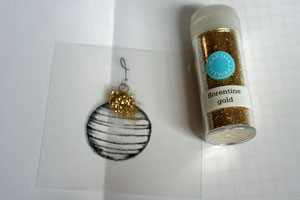
-
Step 5
Tap excess glitter off and add more Crystal Effect™ for the second glitter color.

-
Step 6
Pour second color glitter over the image.
Martha Stewart Turquoise used here.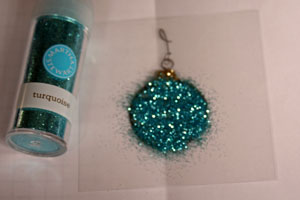
-
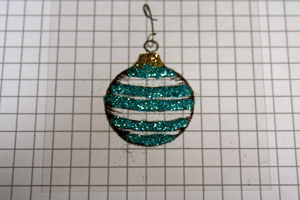
Tap off excess glitter.
-
Step 7
Add more glue and the third glitter color to fill image completely.
Martha Stewart Verdelite was used here.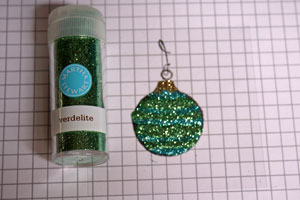
-
Step 8
Stamp neutral cardstock.
-
Step 9
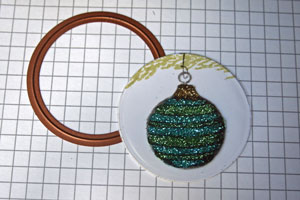
Cut both neutral cardstock and acetate if needed.
Flip the acetate so that the glitter side of it will face towards your cardstock. That will keep your glitter contained.
-
Step 10
Finish your project.
You can find a complete list of product used here.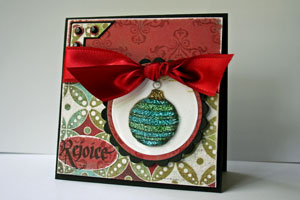
Video!
Variations
A different kind of sparkle
Substitute the glitter for Pearl Ex™ powders.
Instead of glue, use a Versamark™ pen, then add embossing powders instead of glitter. Make sure you have heat resistant acetate for this version.
Leave out the sparkle
After stamping your image on the acetate, turn it over and color with alcohol based markers.
Try mixing Crystal Effects™ with reinkers and coloring the back of the image with the mixture and a paintbrush.
Add even more shine
Emboss the image instead of stamping it in Palette ink.
Your Turn
You've seen the tutorial, now you try it! We've got a section of the gallery set aside for Sparkly Stained Glass. Try this technique, then upload your artwork to the gallery. Show us your creations!
***Please note - Internet Explorer/Edge is not a supported browser, and will not allow you to see the videos. Please use Chrome, Firefox or Safari to view our tutorial videos.
Questions and Comments
We'd love to get your feedback or questions. Leave your comment below.
If you carefully place the Acetate piece on your cardstock before it's all the way dry and then let it dry on the cardstock, it will stick to it. You can also just let it dry, add a little crystal effect back over the glitter and press it on your cardstock.
is it possible that your Crystal Effects bottle's opening is a bit too big and it might be coming out too fast?
If the glitter sticks to other parts of the acetate than the ones with the glue on, wait until the image is completely dry and then use a brush to wipe off the access glitter before moving on to the next step.
Hugs and smiles
I do have another question now. How do you get the excess powder from the anti static off the acrylic, so it looks clear again, without scratching the acrylic?
Try blowing the glitter away. If that doesn't work because of the static, try a swiffer cloth.
You are fantastic! Thank you for taking the time to make these tutorials (especially the videos) for me/us to learn.
I am curious if you have a degree in art or something, or if you are just amazingly creative and talented!
Remember,
He IS Able,
Traci S.
www.stampersjoy.typepad.com
Page 2 of 2 pages < 1 2