Snowflake Garland
by Beate Johns
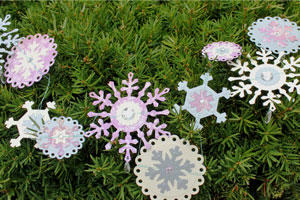
Create a garland out of snowflake die cuts.
Supplies

- Grand Calibur, or other big die cut machine
- Snowflake Pendant, or other snowflake die
- Create-a-Flake 2, or other snowflake die
- Eyelet Circle Nestabilities™, or other matching dies
- Cardstock
- Patterned paper
- Adhesive
- Sewing machine
- Embellishments
Step-by-Step
-
Step 1
Place your dies cutting side facing up on the base plate (A) of the Grand Calibur.

-
Add cardstock over the dies and top with cutting plate (C).

-
Step 2
Pull tray out of the Grand Calibur until you hear a clicking sound.

-
Keeping the sandwich straight, insert into the Grand Calibur tray.

-
Step 3
Turn handle until the sandwich comes out on the other side. Your shapes are cut. Remove excess cardstock.

-
Leave cardstock in dies and top first with tan embossing mat, then with Embossing Plate (B). Run through machine.

-
Step 4
Your shapes are now embossed.
Repeat steps 1-3 with cardstock in a different color and/or patterned paper.
-
Step 5 (Optional)
Stack the shapes to add more interest.

-
Step 6
Sew shapes in a line one after another - keeping them an even or uneven distance apart, according to your preference.

-
Step 7
Add Embellishments.

-
The garland is complete.
Your Turn
You've seen the tutorial, now you try it! We've got a section of the gallery set aside for Snowflake Garland. Try this technique, then upload your artwork to the gallery. Show us your creations!
***Please note - Internet Explorer/Edge is not a supported browser, and will not allow you to see the videos. Please use Chrome, Firefox or Safari to view our tutorial videos.
 *
*
Questions and Comments
We'd love to get your feedback or questions. Leave your comment below.
Eveline.
Mandy
Page 1 of 1 pages