Sliding Pop-Up Card
by Kim Score
Create a card that moves, pops and stands all at once with this sliding pop-up technique.
Supplies
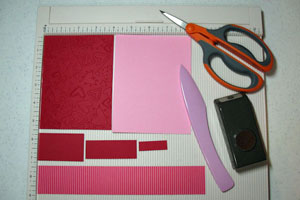
- Score board and bone folder, or scoring blade for paper cutter
- Strong adhesive
- 1" Circle punch
- One 5 1/2" x 4 1/4" piece of heavy cardstock for card base
- One 5 3/8" x 4" piece of heavy cardstock for pop-up back
- One 1 1/2" x 9" piece of patterned paper for sliding wrap
- One 1 1/2" x 2 1/2" piece of heavy cardstock for pop-up front
- One 1" x 2 3/4" piece of heavy cardstock for back pop-up mechanism
- One 1/2" x 1 1/2" piece of heavy cardstock for front pop-up mechanism
Step-by-Step
-
Step 1
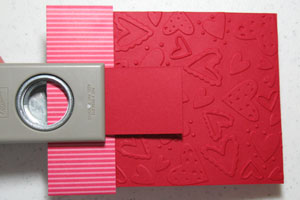
Stamp or emboss pop-up back as desired.
Score the following pieces as follows:
5 3/8" x 4" - score at 1 1/2" on long side
1 1/2" x 2 1/2" - score at 1/2" on long side
1" x 2 3/4" - score at 1/2" on each end
1/2” x 1 1/2” - score at 1/2" on each end
Apply adhesive below score lines. For 1" x 2 3/4" piece, tape one end then flip to other side and tape other end.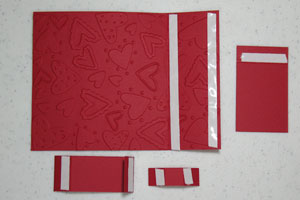
-
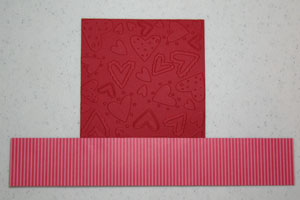
Step 2
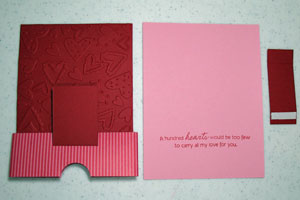
Attach sliding wrap at bottom of pop-up back.
-
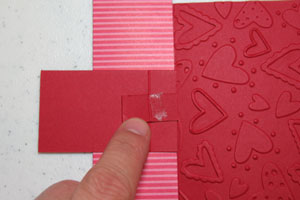
Attach pop-up front piece on score line of pop-up back.
Attach front pop-up mechanism at score line of pop-up front piece.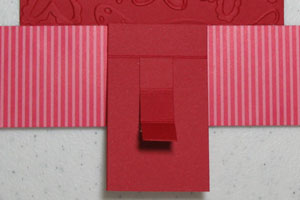
-
Step 3
Fold front pop-up mechanism towards score line of pop-up back.
-
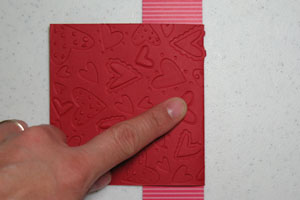
Step 4
While holding pop-up mechanism in place, fold pop-up back forward to adhere to pop-up mechanism.
-
Pop-up front should now be assembled as shown.
-
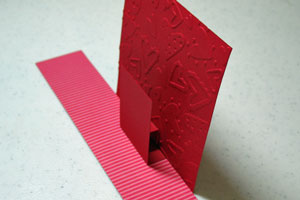
Step 5
Fold down flat and apply tape to one end of wrap. Place card base behind pop-up back with bottom edges aligned. Turn over and adhere wrap piece in back (don’t stick to card base!). Wrap should be snug but allow card to lay flat.
-
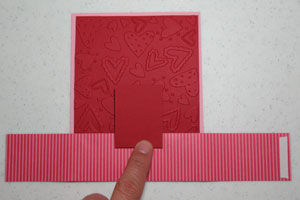
Step 6
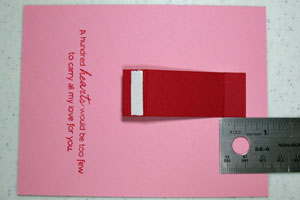
Slide card base out from wrap and stamp greeting about 1” from bottom. Punch through pop-up back piece as shown.
-
-
Step 7
Adhere back pop-up mechanism 1” from edge of card base and lay flat.
-
Step 8
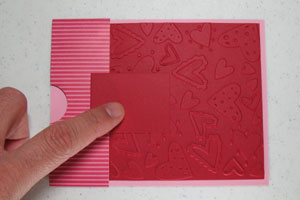
Slide wrap piece onto card base. Line up sliding wrap at bottom of card base and then fold flat, adhering to back pop-up mechanism.
-
Add stamped or punched pieces to front of pop-up.

-
Step 9
Your image will pop up when you pull on the card base.

Video!
Your Turn
You've seen the tutorial, now you try it! We've got a section of the gallery set aside for Sliding Pop-Up Card. Try this technique, then upload your artwork to the gallery. Show us your creations!
***Please note - Internet Explorer/Edge is not a supported browser, and will not allow you to see the videos. Please use Chrome, Firefox or Safari to view our tutorial videos.

Questions and Comments
We'd love to get your feedback or questions. Leave your comment below.
It would make it much easier to score cards with a product like that, but I am going to try right now.
Thank you.
1) I used the Sizzix Valentine set #4 embossing folder
2) Please see my SCS gallery for details on the Raggedy Andy punch art
3) I will be posting the Raggedy Ann tutorial on my blog this coming Saturday
4) I use the Martha Stewart score board which you can get at Michaels.
So glad that you did the video,it helps so much to actually see it.
Thank you so much for taking the time to do it, I really appreciate it!!
You did a great job on the directions. I am a visual learner and you made this so easy. I can't wait to try it. Thank you so much!
While I was watching the video I FOUND it hard to see in red. Same thing when I printed the directions out. The red against red is very difficult to see.
Page 2 of 4 pages < 1 2 3 4 >