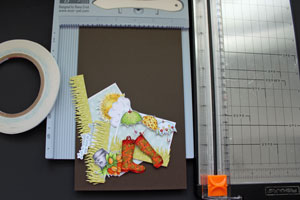
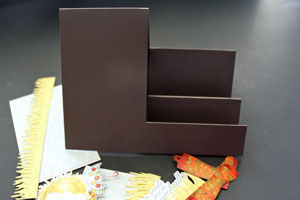
Side Step Card
by Beate Johns
Create a card that has step folds on one side.
Supplies
- One 5 1/2" x 8 1/2" piece of cardstock
- Scor-Buddy™, or other scoring tool
- Paper cutter
- Additional cardstock and embellishments to decorate the card
Step-by-Step
-
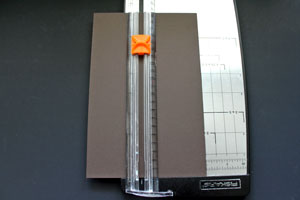
Step 1
Line up the short side of the cardstock at 3" in a paper cutter.
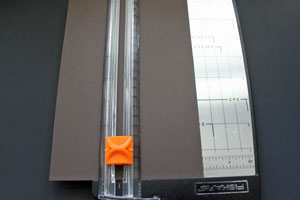
-
Start at 1" and cut all the way to 6 1/2".
-
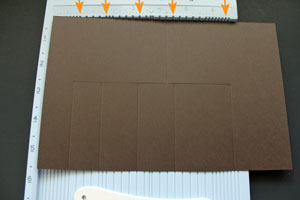
Step 2
Score the 2 1/2" wide section of the card at 4 1/4".

-
Step 3
Score the 3" wide section at 1", 2", 3 1/4", 4 1/2" and 6 1/2".
-
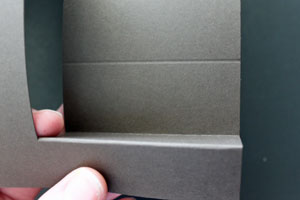
Step 4
Fold the score line at 4 1/4" down.
-
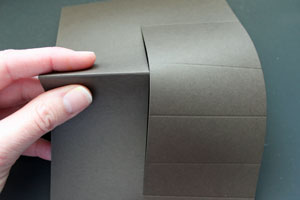
Step 5
Fold the first score line on the right hand side of the card down (mountain fold),
-
fold the second fold up (valley fold).
-
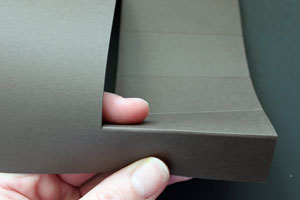
Step 6
Continue to fold the score lines mountain valley style.
-
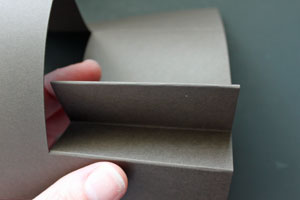
Step 7
Fold the last score line down to finish the card base.
-
Step 8
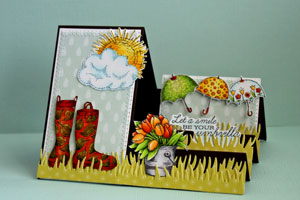
Finish the card by decorating the long side as well as the steps.
Video!
Your Turn
You've seen the tutorial, now you try it! We've got a section of the gallery set aside for Side Step Card. Try this technique, then upload your artwork to the gallery. Show us your creations!
***Please note - Internet Explorer/Edge is not a supported browser, and will not allow you to see the videos. Please use Chrome, Firefox or Safari to view our tutorial videos.
 *
*
Questions and Comments
We'd love to get your feedback or questions. Leave your comment below.
I was wondering where you write your personal greeting with this card? Is there an "inside" or is it meant to be only viewed as is? I made a version of this card and it looks kind of messy if you open it up to look for an inside greeting. Any thoughts?
Thanks for sharing another beautiful creation!
I used Copic Markers to color the images. You can find a listing of all the supplies used in my gallery upload in the technique gallery.
Amy,
There is no good place to add a personal message, unless you add a panel to the back side of the bigger step maybe.
I am in awe of your beautiful card... it is a work of art! Where did you get the "raindrop" cardstock and the grass cardstock? TFS
Nancy Ward
PaperFriendly
http://www.nancywardcrafts.com
Thank you so much for this tutorial! In a couple of days I'll be posting a link to your tutorial on my blog, if that's ok for you.
Have a nice day! Thanx again
I love your videos with the written portion. I usually need both. I have saved this to my Favorites.
Thank You and by the way you have a nice looking husband.
Diana
I have written to you before.
I love having the instructions written and the video as I find it easier with both.
Thank You Beate
Diana
Just seen your exciting tutorials. I wanted to find out where I could get hold of the Flourishes 'When it rains, it pours' stamp set. I am unable to find it over here. Thank you.
I am sorry. The set is called April Showers.
Hugs and smiles
Page 3 of 4 pages < 1 2 3 4 >