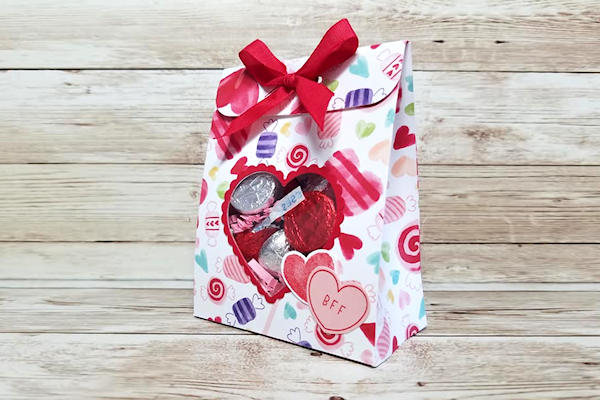
Shaped Window Treat Box
by Twila Davis
Show off the treats in this box through a diecut window.
Supplies
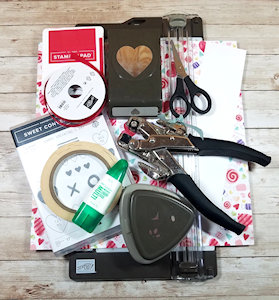
- Cardstock (scraps of Stampin' Up!® Real Red, Basic White, & Petal Pink used here)
- Patterned paper (SU Sweet Talk used here)
- Paper trimmer
- Scoring tool
- Crop-a-dile or other heavy duty hole punch
- Scissors
- Shaped punch or die (Heart Duo & Detailed Trio used here)
- Corner rounder
- Ribbon (Real Red 3/8" Faux Linen Ribbon used here)
- Adhesive (Mono Liquid Glue, Tear Tape and Dimensionals used here)
- Clear plastic sheet
- Chocolates and paper shred or filler of your choice
- Other supplies as needed to complete the project (SU supplies used here: Real Red ink, Sweet Conversations stamp set)
Step-by-Step
-
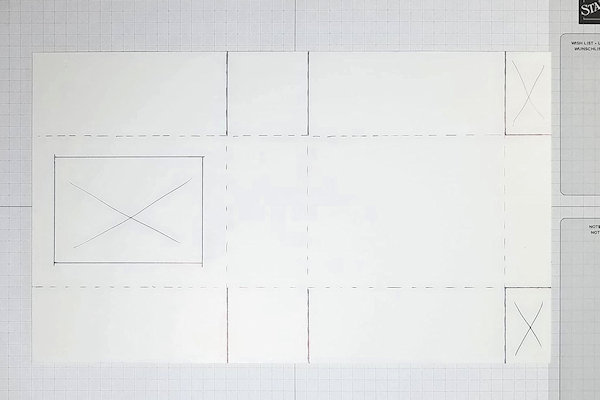
Step 1
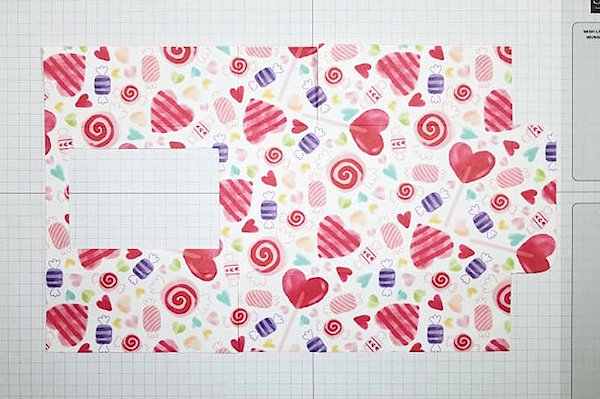
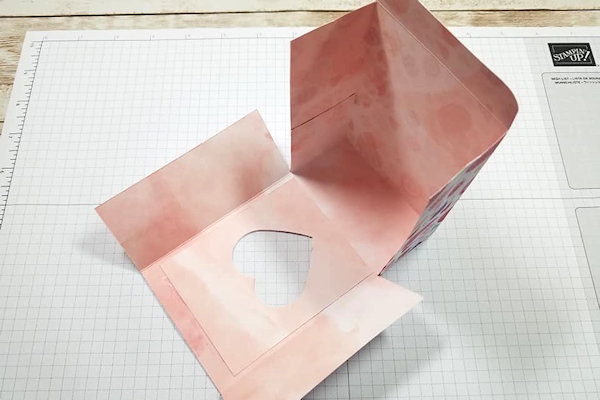
Cut a piece of the patterned paper to 6 3/4" x 11 1/4". On the long side score at 4 1/4", 6", 10 1/4". On the short side score at 1 3/4" & 5".
Cut out the two corners as shown by (X's) in the picture.
NOTE:
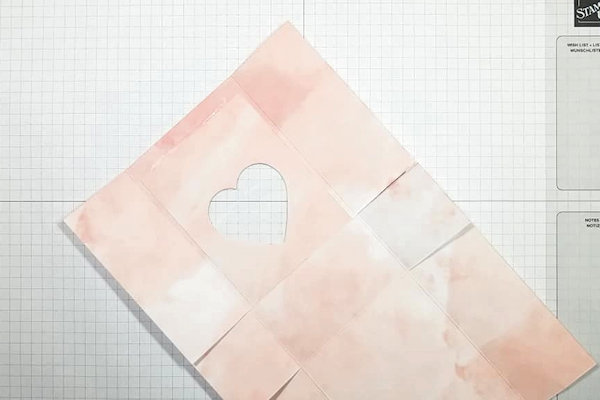
A piece of white paper is used in the picture so you are able to see better where the scorelines and cutting lines are. Score on broken lines and cut on solid lines.
-
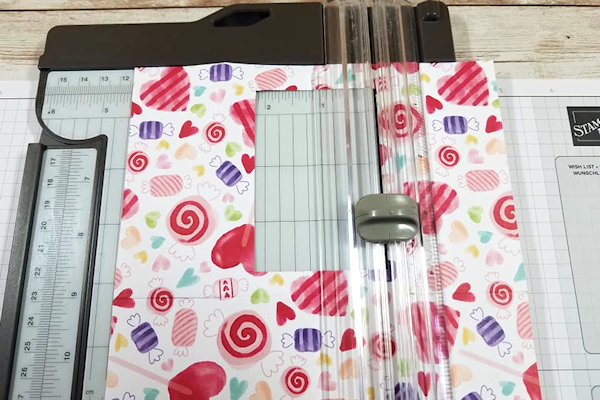
Step 2
Using a paper trimmer or scissors, cut out the last spot marked with an (X) 1/2" away from the score line. This will be the window.
-
Step 3
Use a corner rounder punch to round the corners of the small flap.
-
Step 4
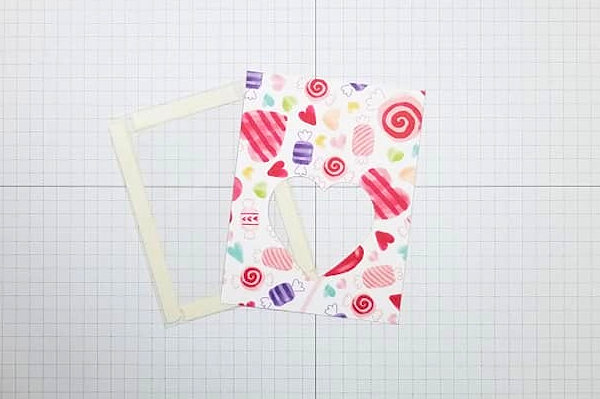
Cut a piece of the patterned paper 3 1/4" x 4 1/4", and a piece of the clear plastic sheet 3" x 3 3/4". Add double-sided tape to the outside edges of the clear plastic sheet.
Using a punch or die, punch out a window as shown in the patterned paper. -
Step 5
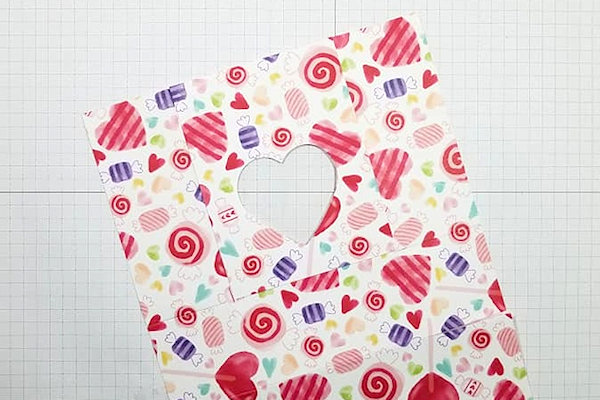
Pull the Tear Tape liner off and attach the clear plastic sheet to the window. Glue the pattern paper over the clear plastic sheet.
-
Step 6 (Optional)
For a clean look cut another piece of pattern paper 3 1/8" x 4". Use the heart punch to punch out a heart from the pattern paper and glue it to the underside of window.
-
Step 7
Start putting your box together by folding up the small side flaps; glue them to the back flaps first then the front flaps.
-
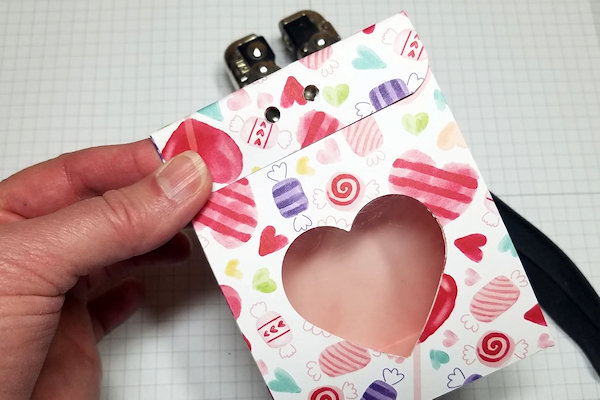
Step 8
Pinch the two sides together and bring the flap over to close the box. Using the Crop-a-dile punch two holes 1/2" apart in the middle of the flap and box.
-
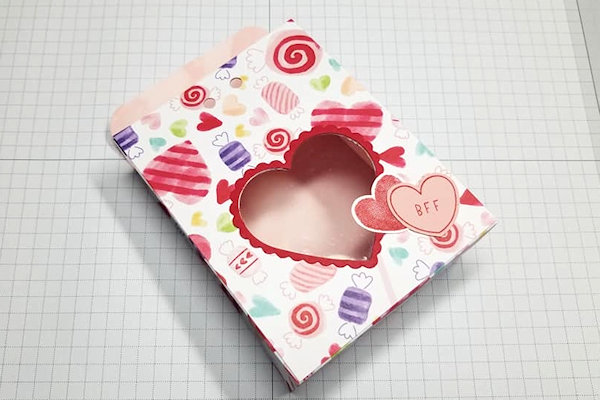
Step 9
Embellish the box front as desired.
-
Step 10
Add some paper shred and chocolates or other filler to your box. Cut a piece of red ribbon 12" long and thread through the holes at top of box and tie a bow. Your box is now complete.
Video!
Your Turn
You've seen the tutorial, now you try it! We've got a section of the gallery set aside for Shaped Window Treat Box. Try this technique, then upload your artwork to the gallery. Show us your creations!
***Please note - Internet Explorer/Edge is not a supported browser, and will not allow you to see the videos. Please use Chrome, Firefox or Safari to view our tutorial videos.

Questions and Comments
We'd love to get your feedback or questions. Leave your comment below.
(Lyn)
Page 1 of 1 pages