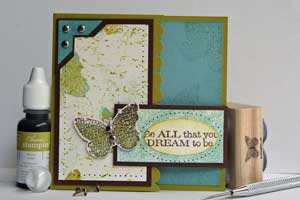
Rolling Marble Background

by Beate Johns

Create a marbled background with reinkers and marbles.

Supplies
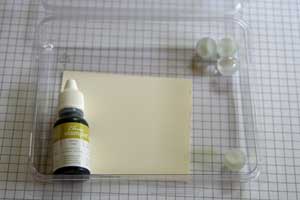
  • Reinker

  • Marbles

  • Plastic box

  • Cardstock

  • Removable adhesive


Step-by-Step

  1. Step 1

    Add several drops of reinker to a plastic box.
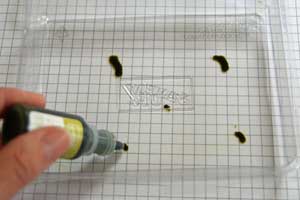
  2. Step 2

    Add several marbles to the plastic box and close the lid.
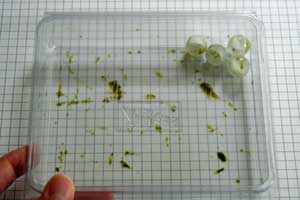
  3. Step 3

    Shake box sideways until the marbles are inked. The ink drops will be replaced by ink tracks in the box.
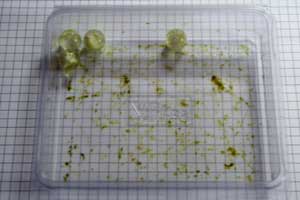
  4. Step 4

    Place cardstock into the box (use removable adhesive if desired) and close the lid.
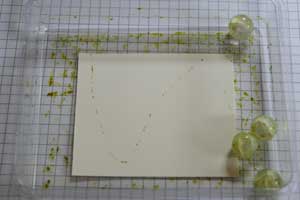
  5. Step 5

    Let marbles roll over the cardstock to create a pattern.
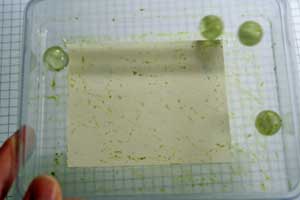
  6. Step 6

    Continue to roll the marbles over the cardstock until you like the look of the background.
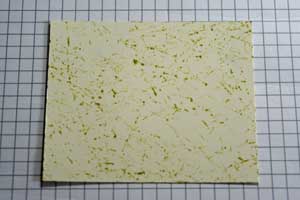
  7. Step 7

    Finish your card.

Video!

Variations

    Multi-color
    After finishinig one color, clean out your plastic box and repeat the steps with another color of reinkers.

    Not just for backgrounds
    Stamp an outline image over the background you created and cut out the image.

Your Turn

You've seen the tutorial, now you try it! We've got a section of the gallery set aside for Rolling Marble Background. Try this technique, then upload your artwork to the gallery. Show us your creations!

***Please note - Internet Explorer/Edge is not a supported browser, and will not allow you to see the videos. Please use Chrome, Firefox or Safari to view our tutorial videos.

Questions and Comments

We'd love to get your feedback or questions. Leave your comment below.

Om my gosh, Beate! Where do you come up with this stuff!!!! Thanks for the fun tutorial, and I love the background that you created!
Darla Ryan  |  Thu Aug 21, 2008 at 10:07 AM
Like others, my kids have done this, but never thought of using reinkers & doing this for cards! I really don't know if I can do this though. I fear I have indeed lost my marbles!
Lori (Chef Mama)  |  Thu Aug 21, 2008 at 4:49 PM
I had just been thinking about trying this technique. I had borrowed some marbles from my son and he was asking for them back. I told him what I was going to do with them, I came to work and logged onto my computer to see this tutorial. I just found the coincidence humorous.
MariLynn  |  Thu Aug 21, 2008 at 5:31 PM
Works well with bigger sized round objects too.. ok now - please don't immediately rush into your childs room and steal all the round shaped objects. Seriously people - you can buy your own smile
Shayla  |  Thu Aug 21, 2008 at 7:34 PM
This is fabulous!! I can't wait to try this out:) Thanks so much for the work you gals put in to the tutorials (and the site)-
Marcee  |  Fri Aug 22, 2008 at 11:23 AM
waaaahhhoo another good idea now i have to get marbles to try this idea of a card u make s uch pretty card's smile)
Roberta  |  Fri Aug 22, 2008 at 11:54 AM
Oh great and wonderfu Beate. You did it again!
Rosetta  |  Sat Aug 23, 2008 at 2:43 PM
Try it with golfballs. They leave an interesting pattern in the ink.
Sarah  |  Tue Sep 2, 2008 at 7:18 AM
I am so eager to try this, but I can't find marbles! Well, I did find them one place, but they were realy expensive. I guess kids don't play with these anymore. Anyone have an idea where I can find some for cheap?
LP  |  Wed Sep 10, 2008 at 3:55 AM
We did this technique at my Stamper's Club meeting (Speedystamper is my demonstrator - great Stamper) and really enjoyed it. Went out and bought my marbles so I can show this technique to my card club. Where on earth do you come up with all of your ideas????
Lynn Lehrman  |  Tue Sep 16, 2008 at 3:38 AM
I am doing a 10 card christmas card class at my mom's retirement center and I want to do maybe 6-8 different media techniques, including this one.. Any, any suggestions at all of ones that would not take alot of thinking,cost and can be done in a group quickly? I precut and assemble alot for them, so it is just a step process, but not alot.
They love to make cards and send them out but God Bless them they get confused. I am new to posting so I hope I am in the right spot. Apologies if I am not. Thanks for any help- this group is the greatest!
Theresa  |  Wed Oct 8, 2008 at 3:09 PM
i am glad you had a visual as i would have
used alot more ink in the box and had a royal mess. glad it is only a few drops. looks like fun and it has a great look!
martha  |  Mon May 11, 2009 at 10:54 AM
WHere is one able to see the details for making the card that is in the rolling marble tutorial.
joyce gill  |  Wed Mar 10, 2010 at 1:22 PM
That is great for sponging and also great because you have time to heat emboss with these inks. I colored the wings of the fairies with Copic Markers...
vikkey  |  Wed Sep 1, 2010 at 9:00 AM
A great reminder about a fun and lovely technique!
gaylestamps  |  Sun May 7, 2023 at 11:36 AM

Page 2 of 2 pages  <  1 2

You need to be logged in to comment

GET OUR NEWSLETTER


Splitcoaststampers's privacy policy