Ribbon Blossom

by Pam Bassett

Create a beautiful ribbon blossom with a few steps.

Supplies
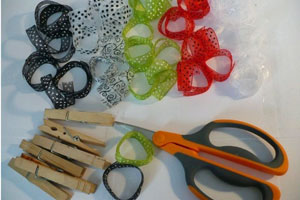
  • 6" length ribbon pieces (as many as you want, 50 used here)

  • Two 8" length ribbon pieces
  • Clothespin

  • Scissors

Step-by-Step

  1. Step 1

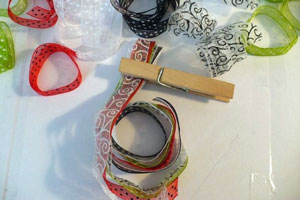
    Separate 6-inch pieces of ribbon by color/style, then arrange in a pleasing color pattern.

    Use clothes pins to organize.
  2. Step 2

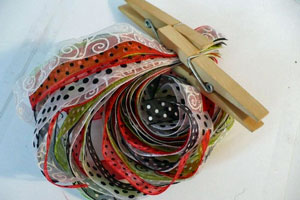
    Gather all ribbon pieces together in one bundle.
  3. Step 3

    It's easiest to make the blossom right on the card.

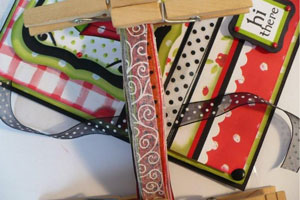
    Add ribbon to the base of your card (here, white ribbon with black polkadots), then run the first 8-inch piece of ribbon underneath.

    Attach the ribbon bundle by TIGHTLY tying the 8-inch piece in a knot around the center of the ribbon bundle.
  4. Step 4

    TIGHTLY knot second 8-inch piece of ribbon around center of bundle.

    It's best to use two pieces of ribbon to attach the blossom so there is still one piece of ribbon holding it together if one ribbon should tear.
  5. Step 5

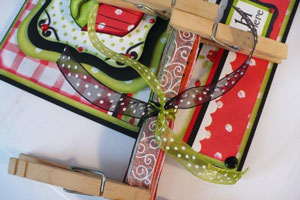
    Starting on the RIGHT side of the knot used to attach the blossom, pull back all of the ribbons from that side leaving the bottom two pieces.

    Tie the two pieces together, pulling tightly until the knot slides all the way to the center ribbon/knot attaching the bundle to the card. One of these pieces will now be pointing to the TOP of the card, the other will be pointing to the BOTTOM of the card.

    Continue tying two ribbons at a time until there are about 5 ribbons remaining (not yet tied) on the ribbon bundle you're working on.
  6. Step 6

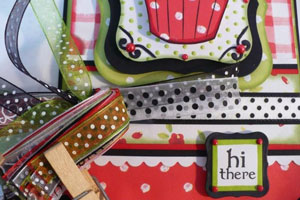
    This is how the RIGHT side of the bundle will start to look as you continue to tie two ribbons together at a time.

    The ends will fan out more and more as you work your way through the bundle on this side.
  7. Step 7

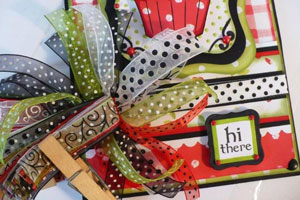
    Moving on to the LEFT side, start with the bottom two ribbons, and repeat Step 5.

    Save the last 5 pieces of ribbon on the LEFT side, too. Clip them together so you can identify them easily.
  8. Step 8

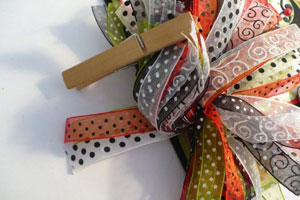
    This is how it will look when all but the last 5 pieces of ribbon on the LEFT side have been tied.
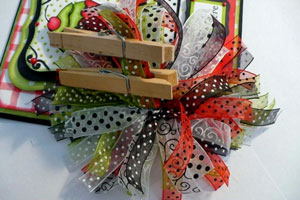
  9. Step 9

    The remaining 5 pieces from both the RIGHT and LEFT sides of the bundle have been clipped together.
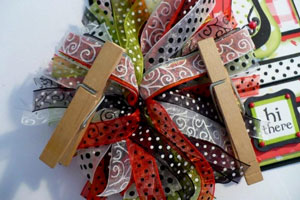
  10. Step 10

    Now, from each set of the remaining ribbons, pull the fifth ribbon from each side toward the BOTTOM direction of your card, and, again, tie a TIGHT knot. By having the knot pulled as tightly as possible toward the center, these knots will not be visible when looking at the finished blossom.

    Continue, tying ribbons, turning the card as needed.
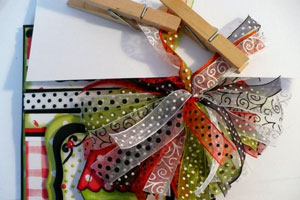
  11. Step 11

    After all knots have been pulled tightly and toward the center, no adhesive is needed to hold it all together.
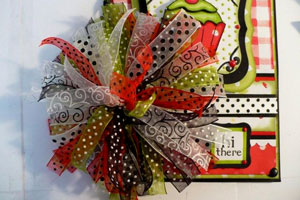
  12. Step 12

    Starting at the center top, use sharp scissors to begin trimming to shape the blossom.

    The ribbon pieces toward the center (on top) will be shorter, and the length of the remaining pieces longer and longer as you work your way to the outer/lower pieces.
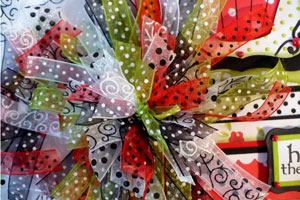
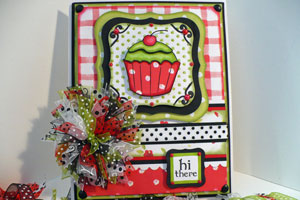
  13. Step 13

    Upon completion, this blossom measures approximately three inches across.
Video!

Your Turn

You've seen the tutorial, now you try it! We've got a section of the gallery set aside for Ribbon Blossom. Try this technique, then upload your artwork to the gallery. Show us your creations!

***Please note - Internet Explorer/Edge is not a supported browser, and will not allow you to see the videos. Please use Chrome, Firefox or Safari to view our tutorial videos.

Questions and Comments

We'd love to get your feedback or questions. Leave your comment below.

I have tried the bow, but am stuck on Step 10 where you are to pull the fifth ribbon from each side toward the bottom direction of your card and tie a knot. I'm not sure what she means toward the bottom of the card. The ribbon pieces are tied to the ribbon that is across the card, so how do you tie it toward the bottom. Am I missing something?

Thanks.
Linda D.  |  Sat Jan 24, 2009 at 2:28 PM
I too was a bit confused about those last ribbons. Can someone explain where the actual knots will be?
Cami Manson  |  Fri Jan 30, 2009 at 10:14 AM
I tried this--ended up with a big pile of knots! :-(. I have a feeling the sheer ribbon is important here. Is it???
kimb0  |  Mon Feb 2, 2009 at 12:55 PM
Pam: I am new to this site but very excited about my new hobby. This card is beautifuland very original. I am going to try this project and post it. Let's see what comes out.
Inn By The Sea  |  Tue Feb 3, 2009 at 11:33 AM
WOW! THe pictures sure helped me figure out what was going on. THanks so much for all of your hard work and wanting to help all of us out here in cyber land.
Phyllis McKay  |  Fri Feb 20, 2009 at 8:03 AM
Thanks from the bottom of my heart ,Pam. I have been checking every other day since forever for the tutorial!They are stunning(yours are anyway).Bless you and your creativity
Valerie  |  Fri Mar 13, 2009 at 3:55 PM
Thank you very much for this tutorial. I have waited for it had doubts whether I would see it . thanks again. I will try it and try to post the results.
Jessie McRae  |  Mon Mar 30, 2009 at 2:48 PM
Hi!

Today I posted an entry on my blog with a link to this tutorial.

Would you let me know if that's OK?

Thanks,

Nancy Ward
http://paperfriendly.blogspot.com
Nancy Ward  |  Mon Apr 6, 2009 at 3:41 PM
Ooh, I love it!!! Thanks for sharing the instructions.
Ashlee  |  Wed Apr 8, 2009 at 7:32 AM
Pam: I may have told u this several times before, but I just want u to know how dear u are to so many of us. U are one of the most creative, talented and inspiring women I know. Also you are very sharing. Can't get enough of my Pam. Yes, you are ours. May God continue to bless you. He sent us an angel and it is you.
R  |  Thu Jul 2, 2009 at 9:51 AM
Love this tutorial, thank you very much for sharing your skills
Ann
Ann  |  Fri Oct 9, 2009 at 11:51 AM
Pam - Thank you so much for the tutorial. I had tried to make one and got to one of steps and could not figure it out. I will get it out again and see if I can get it finished.

Thanks Again.

Linda D.
Linda Duensing  |  Fri Oct 9, 2009 at 3:02 PM
I just found this tutorial and have to say I love the ribbon blossoms. I'm going to check on my ribbons.
Dotti S.  |  Fri Jan 28, 2011 at 7:27 PM
miss seeing your cards---you are very talented and altho you aren't on Splitcoast I hope you are still enjoying your craft. Have a nice weekend! Candee Porter
candee porter  |  Sat Feb 19, 2011 at 7:17 PM
Absolutely beautiful and you make it look so easy. I will most certainly be giving these a try and adding them to my cards....though they will have to be a smaller version.

Thank you for the tutorial.
Christina  |  Tue Mar 29, 2011 at 12:36 PM
Como siempre me encanta todos sus proyectos este es hermoso y lo voy a tratar de hacer, mil gracias por compartir sus habilidades. Que Dios la bendiga.
ILEANA ALFARO  |  Wed Jan 4, 2012 at 7:19 PM
Would also like to know how to make it much smaller -50 pieces of ribbon is way too much for me to handle. I'll have to watch the video again to see if it can be reduced to no more than a dozen pieces of ribbon and still get a nice effect.
janetannc  |  Wed Sep 2, 2020 at 12:32 PM
I have tried this tutorial many time and it never seems to work for me. I think I am trying so hard to get it to look like yours that I am not concentrating on the instructions. It is beautiful and I so wish that I could make one that is pretty.

Linda D.
stamper1942  |  Fri Sep 4, 2020 at 1:50 PM

Page 5 of 5 pages « First  <  3 4 5

You need to be logged in to comment

GET OUR NEWSLETTER


Splitcoaststampers's privacy policy