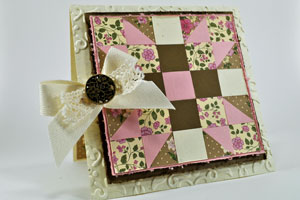
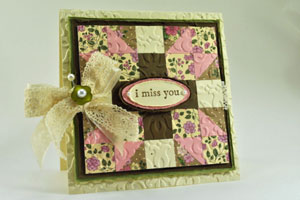
Quilted Card
by Jenna Barber
Create a quilt top card front.
Supplies
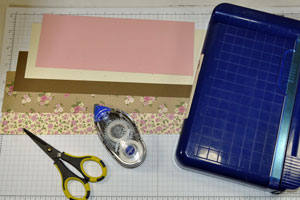
- Scissors
- Grid paper
- Paper cutter, or 3/4" square punch
- Two different types of Patterned paper
- Three pieces of different colored cardstock
- Double-sided tape or glue
Step-by-Step
-
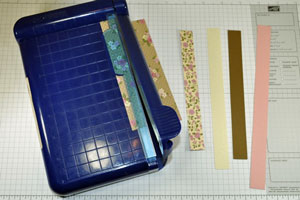
Step 1
Take two pieces of patterned paper and three sheets of cardstock and cut one strip from each of them. The strips should measure 5 3/4" x 3/4".
-
Step 2
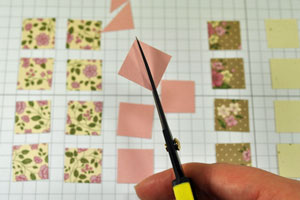
Cut the 5 3/4" x 3/4" strips into 3/4" squares.
Variation:
If you have a 3/4" square punch, punch eight squares from each paper.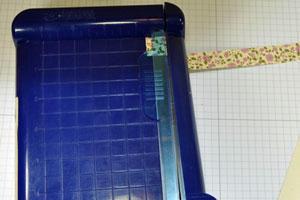
-
You should have 40 squares cut, however you will not need all 40. So don't worry if you are short.

-
Step 3
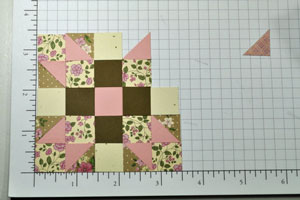
You can use this diagram as a reference at any time.
Now that you have decided where your squares will go, let's get them organized a bit!
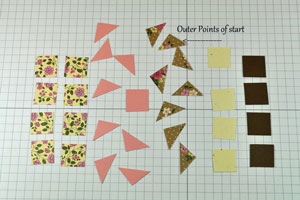
Starting with the patterned paper which will be the four corners of the outer quilt, count out 8 squares. Four of them are for the four corners of the outer quilt, and four of them are for the inner corners of the quilt.
• Now, choose the paper for the outer points of the star. Count out 4 squares and put them to the side.
• Next, decide which paper you will use for the points of the star. Then count out 5 of those squares and set those to the side.
• Once you have chosen the color for your inner star, count out 4 squares and put them to the side.
• Now you should have a total of 25 squares for your quilt.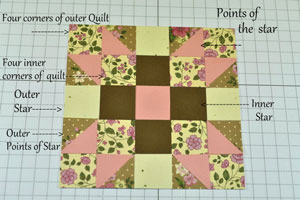
-
Step 4
Take all 4 of the 5 squares you set aside for the points of the star and cut those 4 squares in half, leaving one whole square remaining.
-
Step 5
Take the 4 squares set aside for the outer points of the star, and cut all 4 in half.
-
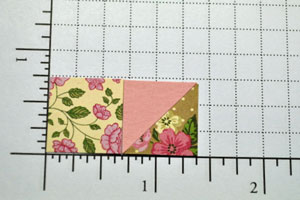
Step 6
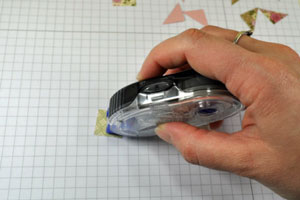
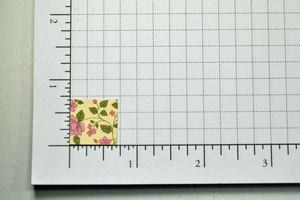
To begin making the quilt - take 1 of the 8 squares you chose for the outer and inner corners of the quilt, add adhesive and glue them down onto the grid paper, keeping it as straight as possible
-
This is what it should look like.
-
Step 7
Now you will use the half square for your first point of star. Be sure to adhere it as closely as possible to that first corner piece. Continue with the outer point of star, and adhere that as well.
-
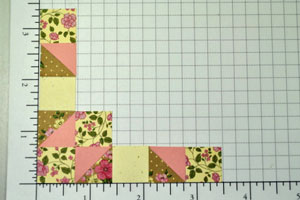
Step 8
Adhere a square for the outer star. If at any point you get confused, don’t hesitate to look above at the diagram.
After the first row is complete, the best route to go is up. Start from that first corner and work your way up.
-
Step 9
After the two rows are complete, you should have what looks like an “L” shape. Starting from the inside corner of the “L” adhere one of the inner corners as shown here.
-
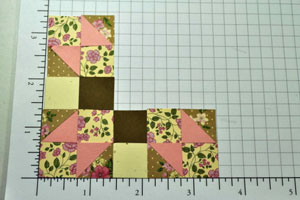
Step 10
Continue to make another “L” shape following the pattern above. You should already start to see your pattern come to life… Neat, right?
-
Step 11
After you have finished your second, “L” you will now need the square for the center of the star. This is the square left over from the points of the star. Continue to adhere the pattern, moving towards the right.
-
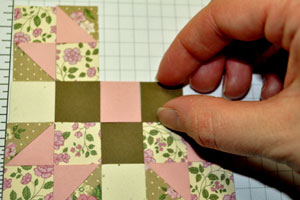
Step 12
Now you will need to work your way back up again.
-
Step 13
Continue to use up leftover squares to complete the paper quilt, following the pattern above.
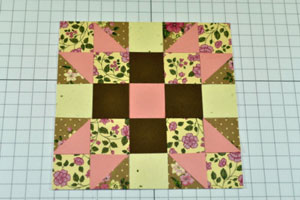
You may have some uneven edges. Using your paper cutter, cut each side of the quilt to make a straight and even line. The paper quilt is complete.
-
Step 14
Use the finished quilt on a project.
Video!
Variations
-
Add Texture
Add more texture to your quilt by embossing it with an embossing folder.
Try different patterns
There are numerous different Quilt Block patterns available. Check this site and get creative.
Your Turn
You've seen the tutorial, now you try it! We've got a section of the gallery set aside for Quilted Card. Try this technique, then upload your artwork to the gallery. Show us your creations!
***Please note - Internet Explorer/Edge is not a supported browser, and will not allow you to see the videos. Please use Chrome, Firefox or Safari to view our tutorial videos.

Questions and Comments
We'd love to get your feedback or questions. Leave your comment below.
Thanks for posting it.
Are you sure it's 5 3/4"? I ask because that length, cut into 3/4" squares will not yield eight squares per strip...
Am I doing something incorrectly?
Ted:
I think the measurement IS wrong! I'm sorry about that! I'd say, to be safe, cut your strips into 6 3/4". That should give you more than enough squares to work with! :o) Thank you for the heads up!
BTW: If I had a Xyron, I probably would have used it as well! I tried to create the tutorial for those who have may not have as many supplies as others. I love that some of you have posted easier ways of creating your quilts!
And again, I used SU!'s grid paper which includes measurements on all sides!
~jenna
I tried running tape across the grid and although it's a good idea, it just wasn't something I should do. It kind of goes along with the time my MIL tried to teach me how to knit. She took the needles away from me and told me to stick with crocheting. I better stick with my Xyron.
Beautiful card! I love it! Plan to make it tomorrow night after I get the measurements. Thanks so much!
Christine
Blessings!
Kathy
Beautiful card...I just completed my first quilted card front and it looks great...thanks for such an easy tutorial to follow.
~Rhonda~
Page 5 of 6 pages « First < 3 4 5 6 >