Pop-Up Box Card

by Dina Kowal

Tuck a surprise inside a box-shaped pop-up card! Many thanks to Monica Gale for her inspiration.

Supplies
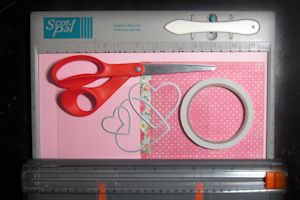
  • 12"x12” Cardstock

  • Coordinating patterned paper

  • Adhesive

  • Die cuts, Quickutz heart dies used here

  • Acetate, cut into narrow strips (optional)

  • Scoring tool

  • Paper trimmer

  • Stamps, Sweet 'n Sassy Stamps So Sweet Cocoa used here

Step-by-Step

  1. Step 1

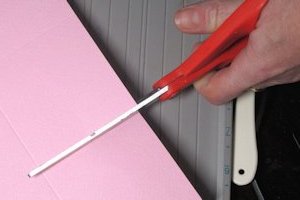
    Cut cardstock to 8.5” x 12”. Score on the long side at 2.75”, 5.5”, 8.25”, and 11”.
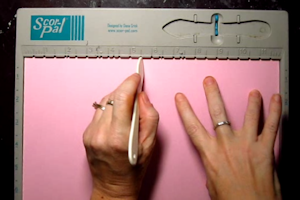
  2. Hint:
    For scoring boards not marked at quarter inches, score at 5.5” and 11” first. Move the cardstock .25” to the right, then score the other lines at 3” and 8.5”.
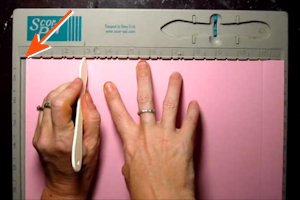
  3. Step 2

    Cut off a 2”x12” strip , and set it aside. This will be used later.
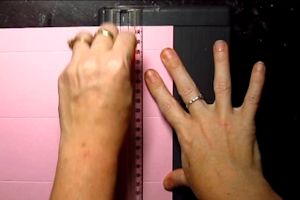
  4. Step 3

    Turn the 6.5” x 12” panel a quarter turn to the left, and score at 2.75.”

    Hint:
    For scoring boards not marked at quarter inches, move the cardstock .25” to the right, then score at 3”.
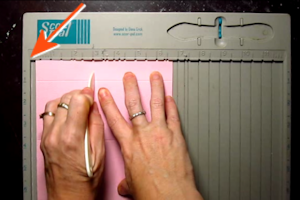
  5. Step 4

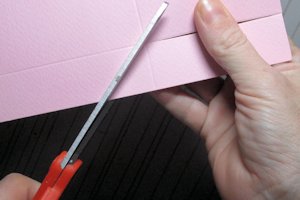
    Cut down 2.75” to this score line along each of the 4 perpendicular score lines.

  6. At the 11” score line, cut in at a slight angle up from the edge of the cardstock to remove the excess above the score line and create a tab.

  7. Step 5

    Cut the 2”x12” strip at 4.75” from the end with the 1" score line. Cut the strip in half the long way to create two strips, 1”x4.75”.
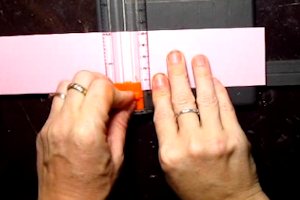
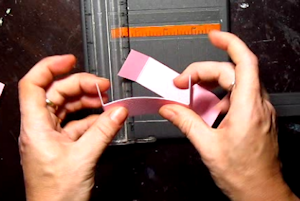
  8. Both strips should be scored in 1” from each end. Fold both tabs back.
  9. Step 6

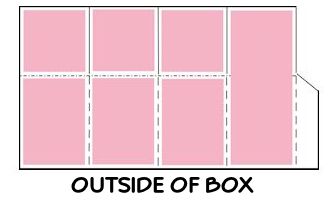
    Cut patterned paper to decorate each panel, as follows:
    1 inside back panel - 2.5”x6.25”
    3 lower panels (outside only) – 2.5”x3.5”
    6 upper panels (sides and front, inside and outside) – 2.5” square

    Cut one 2.5”x6.25” outside back panel from white cardstock.
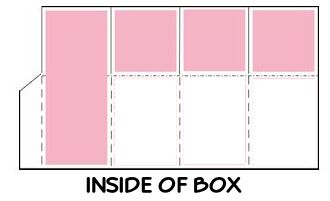
  10. Center and adhere each panel as indicated above.

    Hint:
    Attach the longest decorative panels to the section next to the tab.
  11. Step 7

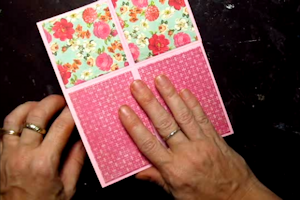
    Fold the decorated card on the 5.5” score line, and attach the tab inside with adhesive.
  12. Step 8

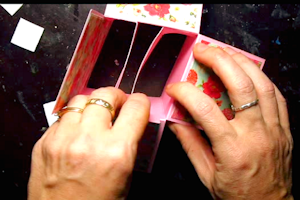
    Apply adhesive to the end tabs of the 1”x4.75” strips, and adhere them to the inside of the opened box, aligning them with the top of the opening. Turning both tabs toward the outside front or back of the box will help ensure straight placement.

    Hint:
    Close the box in both directions and secure the score lines to ensure that it will lie flat for mailing.
  13. Step 9

    Adhere die cuts, stamped images, and/or other embellishments to the strips and inside front and back of the card. Stick them down lightly at first, as they may need to be repositioned. Inside elements should be placed so that they are not seen when the card is closed.

    Hint:

    A 3" square sticky note is the approximate size of the visible area to be decorated, and can be used as a template to plan the arrangement of the diecuts and other inside elements.
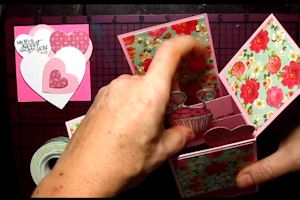
  14. Smaller die cuts can be attached to 3.5" strips of clear acetate. These will wave slightly when the card is opened.

  15. Step 10

    Embellish the inside front flap if desired.
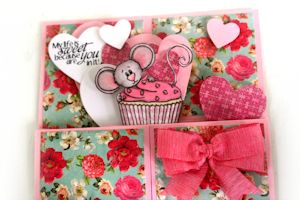
  16. Step 11

    Complete the project.

    Note:
    Finished card fits in a 6"x9" envelope.
    Measurements for standard A2-sized cards are listed below the video.
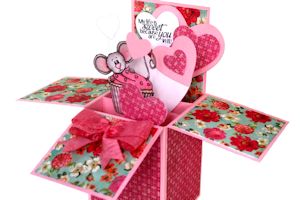
Video!

Variations

  1. For a standard A2 card (vertical): Cut cardstock to 7 1/2"x9 1/4". Score at 2 1/8", 4 1/4", 6 3/8" and 8 1/2". Rotate the cardstock to the left. Cut off 2" as above. Cut the 2" strip at 3 5/8" and cut in half lengthwise as above for the inside tabs. On the card base, score at 2 1/2" and cut down to the score lines. Assemble as above.

    DSP sizes are as follows:
    5. 1/4" x 2" - one patterned and one white/neutral for the back.
    1 7/8" x 2 1/4" - six of these.
    2 3/4" x 1 7/8" - 3 of these.

  2. For a standard A2 card (horizontal): Cut cardstock to 6 1/4"x12". Score at 2 3/4", 5 1/2", 8 1/4" and 11". Rotate the cardstock to the left. Cut off 2" as above. Cut the 2" strip at 4 3/4" and cut in half lengthwise as above for inside tabs. On the card base, score at 2" and cut down to the score lines. Assemble as above.
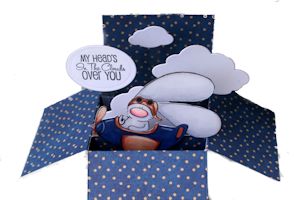
Your Turn

You've seen the tutorial, now you try it! We've got a section of the gallery set aside for Pop-Up Box Card. Try this technique, then upload your artwork to the gallery. Show us your creations!

***Please note - Internet Explorer/Edge is not a supported browser, and will not allow you to see the videos. Please use Chrome, Firefox or Safari to view our tutorial videos.
Questions and Comments

We'd love to get your feedback or questions. Leave your comment below.

Finally gave this a try this evening. I have so many Valentine's cards made this year, but I just had to make a pop-up box card too. Sweet! Thank you so much for the easy-to-follow directions. Heading for the gallery now to link it up smile
Kelly Little  |  Wed Feb 12, 2014 at 9:40 PM
I JUST FELL IN LOVE ! This tuto is just wonderful and the result is awesome !!! I hope you won't mind, but as I belong to the DT of french brand of scrapbooking supplies InfoCr�a, I did use your tutorial to make one myself, I translated it, etc, and you can have a look at it here : http://blog.editions-infocrea.fr/2014/02/16/carte-boite-pop-up-tutoriel-cecile/ Thank you thank you thank you !!! (please tell me if it a problem, my sharing this tutorial...)
C�cile Pavesi  |  Sun Feb 16, 2014 at 4:09 PM
This is a wonderful tutorial and helped me create 7 unique Valentines. I have posted theme here http://www.creatinginacottage.com/2014/02/labor-of-love.html
Cathy Michels  |  Mon Feb 17, 2014 at 12:44 PM
I would love to create this card but where would I buy the envelopes to fit it? Thank you for the wonderful directions.
Isabel  |  Tue Feb 18, 2014 at 5:45 AM
Hi Isabel! Any office supply store would carry 6"x9" envelopes - they're the perfect size. Also, see the Variations for card measurements that fit standard invitation envelopes.
dina  |  Tue Feb 18, 2014 at 6:06 AM
Thank you so much. I will take a drive to the local office supply store. If not, I will make a smaller one for an A2 card.
isabel zito  |  Tue Feb 18, 2014 at 1:42 PM
ADORABLE! Great tutorial!
Susanne Gleason  |  Fri Feb 21, 2014 at 7:31 PM
Wow Amazing Card love it
Angel Davenport  |  Tue Feb 25, 2014 at 7:56 PM
I love your card and found the instructions easy to follow. I made one as a sample to bring with me to crops. Thanks so much.
Beneta  |  Thu Mar 6, 2014 at 7:26 PM
Thank you so much for the fun tutorial. I have made a fun spring/birthday card for my grand-daughter. She is turning 3 this month.

Beautiful and quite easy!
peggy  |  Fri Mar 21, 2014 at 11:07 AM
Thanks for the description, this has become my favorite folding
Laila  |  Wed Mar 26, 2014 at 8:08 AM
Love this card. One helpful note...when positioning the 1 x 4.75 inch strips inside the box, be sure that the strips are perpendicular to the BACK wall of the box! Trust me on this, it can be easy to miss! The easy way to make sure this is right, IMO, is to make surer that the first tab you place inside covers the inside tab that holds the box together. I am really having fun with this card, mistakes aside. Nifty project! Thanks again, Monica!
Joni  |  Wed Mar 26, 2014 at 9:05 PM
Thanks for this gorgeous gift box card Dina! I will definitely have to give this a try - it looks so beautiful ♥

Jocelyn aka JoBear2 on SCS x
Jocelyn Knight  |  Fri Mar 28, 2014 at 12:00 AM
Made this for my son's 28th birthday and tucked a little money in the back like a fan. He love the card more than the money. Thank you for helping this very busy full time student (at 56) be able to make a beautiful card for her son.
Cathy  |  Mon May 19, 2014 at 11:15 AM
I can't wait to try this for my friends retirement
Sharon Kline  |  Mon May 19, 2014 at 5:54 PM
Dina, I've wanted to try this style for a long time, but thought it was just too difficult....well, after viewing your video I tried one and WOW I love them!

I'm on my third card! Thanks for the video.

Diane
Diane DeMartini  |  Wed Jun 4, 2014 at 10:44 PM
This is such a cool project. Using your directions, I have made two of them -- and my neighbor just asked me to make another one for her. Thanks so much for the precise directions.
Lois Bak  |  Thu Aug 7, 2014 at 6:17 AM
Just made my first pop up box thanks to your excellant instructions and will be making more for special occasions. thank you
eluned jeffery  |  Mon Apr 27, 2015 at 10:53 PM
These are such amazing cards to send. I have gone the first step and looked at the tutorial, next will be to do the "prototype", then, eventually, the real thing. . . don't want to go too fast!! Mahalo nui for sharing such creative ideas and designs!! Can't wait to take the next step!
Goodly Creations  |  Sat May 9, 2015 at 9:24 PM
When you score at 2.75 in step 3, only score 3 of the large sections. It means a cleaner look for your back panel.
Rebecca Ednie  |  Wed May 18, 2016 at 9:46 PM

Page 3 of 4 pages  <  1 2 3 4 >

You need to be logged in to comment

GET OUR NEWSLETTER


Splitcoaststampers's privacy policy