Pixel Embellishments

by Trudy Sjolander

Turn double-sided foam adhesive into pretty embellishments to use on your cards.

Supplies

  • Double-sided foam adhesive squares, Helmar small square white ZapDots used here

  • Perfect Pearls Pigment Powders

  • Soft Dusting Brush

Step-by-Step

  1. Step 1

    Remove top protective film from a row of adhesive squares and lightly dust on first color of pigment powder.
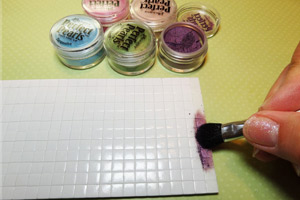
  2. Step 2

    Remove additional rows of protective film and add other colors of pigment. Note that are two colors of pigment on some squares.
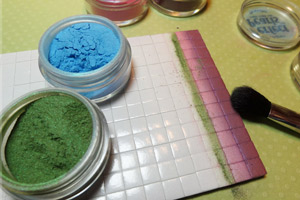
  3. Step 3

    Rub powder into adhesive squares until they are no longer tacky.
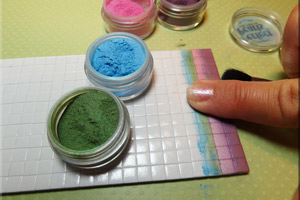
  4. Step 4

    Attach a bow and place "pixels" around card to create a design. Tweezers are helpful here.
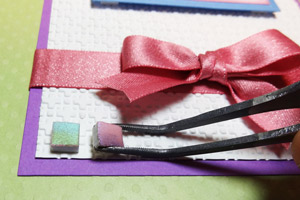
  5. Step 5

    Finish your card.

Video!

Variations

  1. Try other mediums
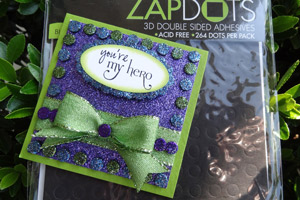
    You can use any shape or color of self adhesive foam shapes and other mediums for coloring them. Here is a card created with black circle foam adhesives and ultra fine glitter.
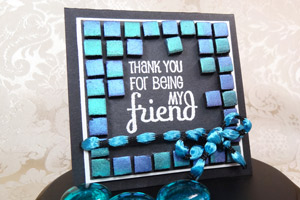
  2. This card was done with small black foam adhesives and Perfect Pearls Pigment Powders.
Your Turn

You've seen the tutorial, now you try it! We've got a section of the gallery set aside for Pixel Embellishments. Try this technique, then upload your artwork to the gallery. Show us your creations!

***Please note - Internet Explorer/Edge is not a supported browser, and will not allow you to see the videos. Please use Chrome, Firefox or Safari to view our tutorial videos.

Questions and Comments

We'd love to get your feedback or questions. Leave your comment below.

hi,WOW-great idea,cant's wait to try it...thank you for sharing ...
Elizabeth f Jennings  |  Wed Jun 27, 2012 at 9:33 AM
What a neat idea. Guess that is why I am not on a design team - don't come up with the ideas you all do. I can't wait to try it. TFS
Donna W  |  Wed Jun 27, 2012 at 9:40 AM
AAACKKK!!! WOW!! So easy and yet such great looking results!! THANK YOU!!
squirrellyshirley  |  Wed Jun 27, 2012 at 10:05 AM
so FUN! i love the look of all your different pixels! thanks for the tutorial!
gabbe  |  Wed Jun 27, 2012 at 10:18 AM
Awesome! Now I have something to use the pigment powders that I purchased years ago and are just sitting collecting dust smile Thank you so much for a great and easy tutorial! Just gotta love SCS!
Joani  |  Wed Jun 27, 2012 at 10:25 AM
Fabulous idea and tutorials True girl. Mighty fine job.
Lisa Lara  |  Wed Jun 27, 2012 at 10:59 AM
great idea. tfs!
cd  |  Wed Jun 27, 2012 at 2:44 PM
I wonder if glitter would work also?
Joyce Watts  |  Wed Jun 27, 2012 at 3:45 PM
what a great idea
thanks marleme
marlene  |  Wed Jun 27, 2012 at 3:50 PM
Glitter does work Joyce. Click on the video and I show an example towards the end. smile

Hugs,
True :D
Trudy Sjolander  |  Wed Jun 27, 2012 at 3:55 PM
tHANKS tRUDY. tHIS LOOKS LIKE SUCH FUN.
Joyce Watts  |  Wed Jun 27, 2012 at 5:16 PM
I love this idea and would love to see more using the powders.
freetimegone  |  Wed Jun 27, 2012 at 5:20 PM
Thought this was good
Sylvia  |  Wed Jun 27, 2012 at 6:20 PM
Love it! How creative!!
Jen:)
Jen Wong  |  Wed Jun 27, 2012 at 7:52 PM
How fun this is - looks like mosaic! For those who are extremely patient, they could just go ahead and 'paint' a face or scenery with the perfect pearls, then line them up just like mosaic. Wow. Brilliant and extremely clever!!!
Rosy Newlun  |  Thu Jun 28, 2012 at 3:30 AM
Love this idea! Thanks
Glenda S  |  Thu Jun 28, 2012 at 4:08 AM
This is so clever!! I am off to make a card~!! Thank you Trudy!
Donna  |  Thu Jun 28, 2012 at 5:21 AM
what a great idea - they look fab , thanks for the tutorial
Clare  |  Thu Jun 28, 2012 at 10:19 AM
I love your tutorial. They give me alot of ideas on
card making. Thanks so much. I look forward to them.
Dearlane Buckland  |  Thu Jun 28, 2012 at 1:09 PM
What is the difference between the pigment powder and archival chalk? Can they both be used for this technique?
Linda  |  Thu Jun 28, 2012 at 2:23 PM

Page 2 of 3 pages  <  1 2 3 >

You need to be logged in to comment

GET OUR NEWSLETTER


Splitcoaststampers's privacy policy