Pinwheel Fun Fold
by Dawn Olchefske
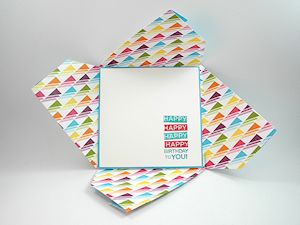
Fold this card up to reveal a fun pinwheel design.
Supplies

- Double-sided paper, 8" square (Stampin' Up! Sweet Taffy Designer Series Paper used here)
- Scoring board
- Simply Scored Diagonal Plate (optional)
- Bone folder
- Scissors
- Other supplies as needed to complete the project (Stampin' Up! products used: Amazing Birthday Stamp Set, Tempting Turquoise Classic Stampin' Pad, Tempting Turquoise and Melon Mambo Stampin' Write Markers, 1-1/4" and 1-3/8" Circle Punch, 1-3/4" Scallop Circle Punch, Whisper White Cardstock (4" x 4") Tempting Turquoise Cardstock (4-1/8" x 4-1/4")
Step-by-Step
-
Step 1
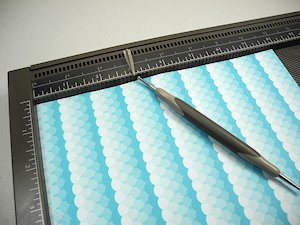
Place diagonal plate onto scoring board and place an 8" square of patterned paper on the board with the "pinwheel" pattern side down (this will also be the "inside" of the card). Score diagonally at 3". Repeat for all four sides.
-
If not using a diagonal plate, mark the paper at 3" from each corner. Align square panel on scoring board with opposite points up and down. Score down from each 3" mark, using a ruler to ensure alignment with the groove.
-
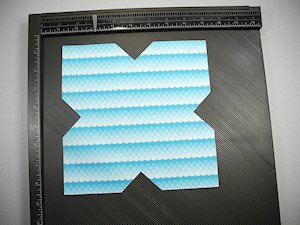
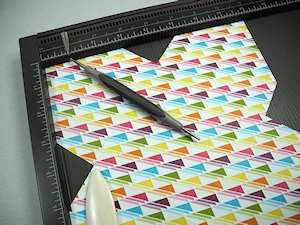
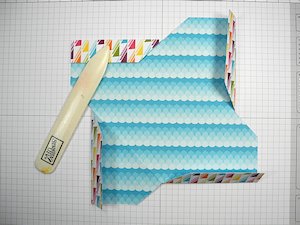
Step 2
Cut away "triangles" where score lines intersect. Repeat for all four sides.
-
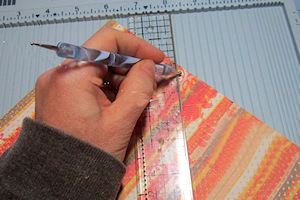
Step 3
Remove diagonal plate from scoring board and turn paper over so the "pinwheel" pattern is up. Score at 1" from top to the half way point/triangle. Repeat for all four sides.
-
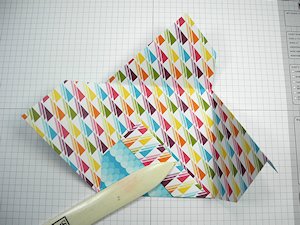
Step 4
Fold at the 1" score lines (away from the "groove"). Repeat for all four sides.
-
Step 5
Fold at the 3" score lines in the opposite direction. Repeat for all four sides.
-
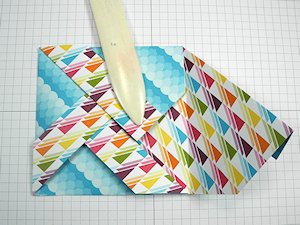
Step 6
To create the Pinwheel Fold: Fold up bottom flap, then fold over the flap to the left (clockwise); repeat with 3rd flap (continuing clockwise).
-
Fold over the last flap and tuck under the first flap (like folding a box).
-
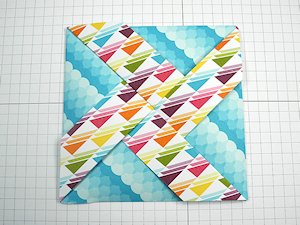
Step 7
Decorate and complete the card.
Inside layering panels are 4" square (white) and 4-1/8" square (turquoise).
-
If decorating the outside, be aware of where embellishments will be adhered so the card can still open and close without any interference.
Finished card size is 4-1/4" square and will fit in an A2 envelope.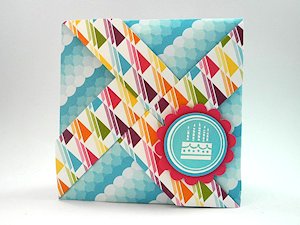
Video!
Your Turn
You've seen the tutorial, now you try it! We've got a section of the gallery set aside for Pinwheel Fun Fold. Try this technique, then upload your artwork to the gallery. Show us your creations!
***Please note - Internet Explorer/Edge is not a supported browser, and will not allow you to see the videos. Please use Chrome, Firefox or Safari to view our tutorial videos.

Questions and Comments
We'd love to get your feedback or questions. Leave your comment below.
Page 2 of 2 pages < 1 2