Pastels on Black
by Beate Johns
Learn how to make images pop on black cardstock with pastel pencils.
Supplies
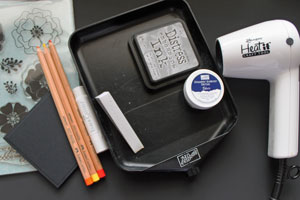
- Outline Stamps (Verve's Great Friend used here)
- Embossing ink
- Silver or white embossing powder
- Heat gun
- PITT Pastel Pencil
- White Gelato Pen optional
Step-by-Step
-
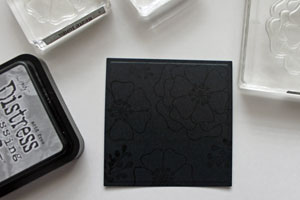
Step 1
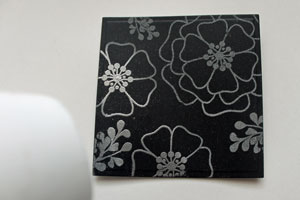
Stamp images on black cardstock with Embossing ink.
-
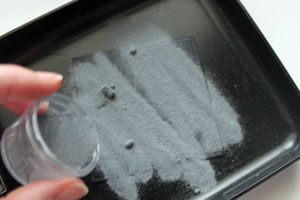
Step 2
Pour embossing powder over over the cardstock.
-
Tap off excess powder.
-
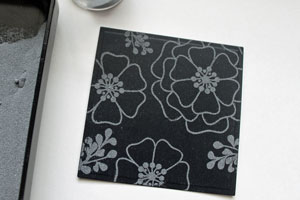
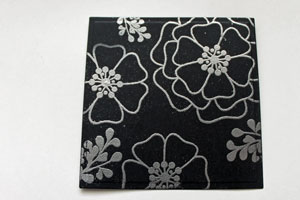
Step 3
Heat the powder
-
until all powder is melted.
-
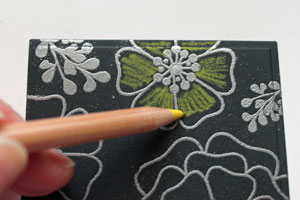
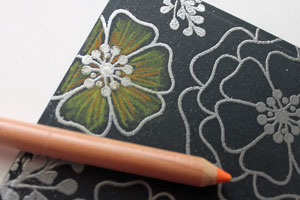
Step 4
Add color with a pastel pencil to the image.
-
Rub slightly over it with your finger to blend your base color.

-
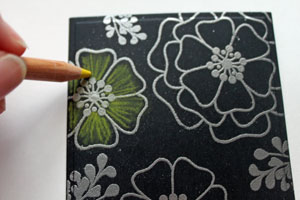
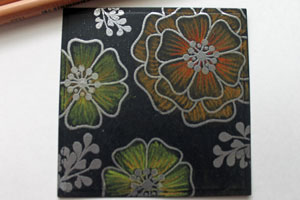
Step 5
Add more detail with a light colored pencil.
-
Then add some more color with a slightly darker pencil.
-
Step 6
Continue to color all the images.
-
Step 7
Color the edges of your cardstock with a white gelato.
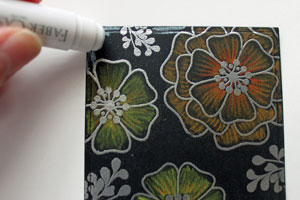
-
Rub the gelato towards the inside of the cardstock with your finger or with a baby wipe to add a soft white edge.
-
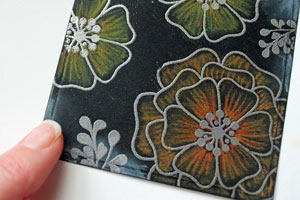
Step 8
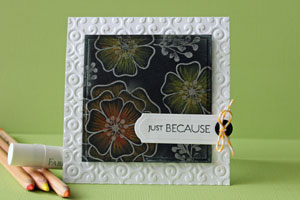
Finish your project.
Video!
Variations
Try other pencil types.
Your Turn
You've seen the tutorial, now you try it! We've got a section of the gallery set aside for Pastels on Black. Try this technique, then upload your artwork to the gallery. Show us your creations!
***Please note - Internet Explorer/Edge is not a supported browser, and will not allow you to see the videos. Please use Chrome, Firefox or Safari to view our tutorial videos.
 *
*
Questions and Comments
We'd love to get your feedback or questions. Leave your comment below.
If you want to try, make sure you spray from far away so only a subtle coding hits the chalk. If it's too strong, it might affect your image as well (like a blender pen or water would. Does that make sense?)
The pencils I used are from Faber-Castell.
http://www.splitcoaststampers.com/resources/products/designmemorycraft/
I'm wondering, though, if the chalk pencils are easily smudged or rubbed off once the card is finished?
Thanks.
Page 2 of 3 pages < 1 2 3 >