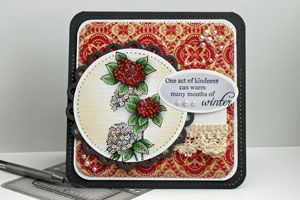
Paper Piercing

by Beate Johns

Use a paper piercing tool and template to create a pierced border.

Supplies
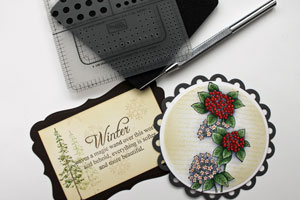
  • Paper piercing tool
  • Paper Piercing template and mat
  • Cardstock

Step-by-Step

  1. Step 1

    Paper Piercing straight edges

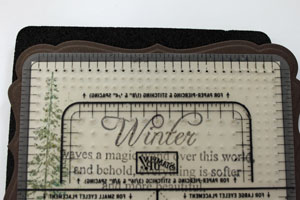
    Place cardstock on the paper piercing mat. Line up the guide line of the Paper Piercing Template with the edge of the cardstock.

    Hint:
    If you plan on layering the paper pierced layer, do that before paper piercing the border. If you adhere the pierced layer to another piece of cardstock after the piercing, the holes might close a bit from the adhesive.
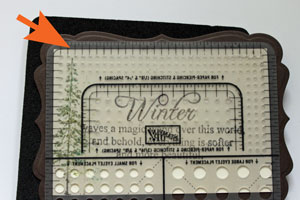
  2. Step 2

    Insert your Paper Piercing Tool in the first hole of your template and press down.
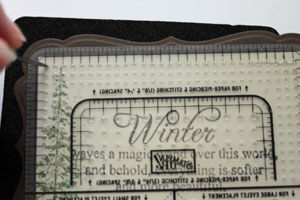
  3. Continue to pierce through each of the holes in the template.
  4. Step 3

    Turn the cardstock 90 degrees and line up the template with the second side.

    If you can, place the corner of the template over the right corner of the cardstock. That only works if the first hole you created on the left side lines up with one of the holes on the template.
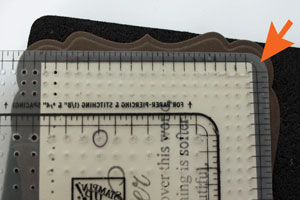
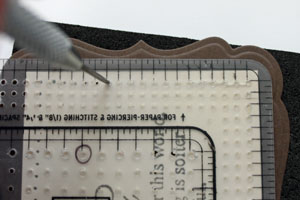
  5. If the template lines up with the corner, pierce the entire row.

    If the template doesn't quite line up like in the picture above, pierce one hole, then adjust the template slightly. Repeat until the template does line up with the next corner and continue piercing.
  6. Step 4

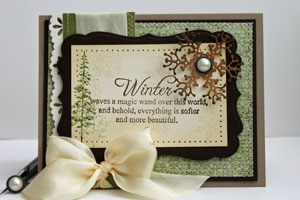
    Continue until there is a pierced border on each side of the rectangle or square.
  7. Step 5

    Paper Piercing curved edges
    Place cardstock on the paper piercing mat. Line up the guide line of the template with the edge of the cardstock.

    Hint:
    If you plan on layering the paper pierced layer, do that before paper piercing the border. Adhering the pierced layer to another piece of cardstock after the piercing, may close the pierced holes a bit because of the adhesive.
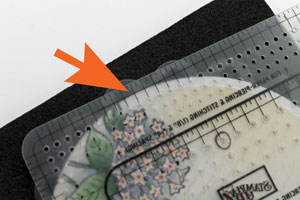
  8. Step 6

    Insert your Paper Piercing Tool in the hole under the guiding line that is lined up with the cardstock.
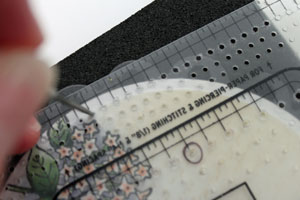
  9. Step 7

    Leave the paper piercing tool in the cardstock and turn the template so that the guide line over the next hole is lined up with the edge of the cardstock, and then pierce.
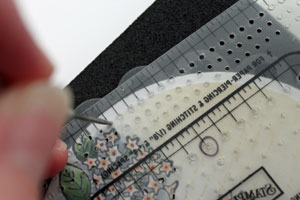
  10. Step 8

    Continue to pierce, turning the cardstock while the paper piercing tool is inserted. Repeat the "pierce and turn" until you've pierced all the way around your curved edge, oval or circular shape.
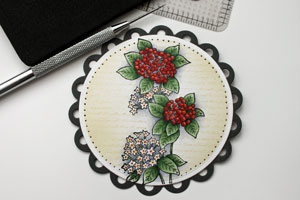
  11. Step 9

    Finish the card.

Video!

Questions and Comments

We'd love to get your feedback or questions. Leave your comment below.

I am living in Denmark, and I wold love to knew if you can tell me where(in which shop ) I can buy this paper piercing template, because I can not find it here in Denmark and I really want to get it.

With regards Anni S�rensen
anni  |  Thu Jan 13, 2011 at 8:47 AM
Hi Beate, what a wonderful video. You are very good at providing instruction in an easy to learn format. Thank you!
Beth Ann  |  Thu Jan 13, 2011 at 3:28 PM
Thank you for sharing this wonderful tutorial! I linked to it from today's scrapbooking news article at: http://exm.nr/eeiXNN smile Have a terrific Thursday!
Irene  |  Thu Jan 13, 2011 at 3:29 PM
Thank you again for a wonderful informative
Tutatorial! Love your card!
Sharon Madson  |  Fri Jan 14, 2011 at 2:03 PM
I think you ladies are amazing and I so enjoy watching your videos, with all your wonderful ideas.Very new to this art form and love it.
Thanks,
Linda
Linda  |  Fri Jan 14, 2011 at 3:49 PM
Thanks Beate!

This video is so clear and helpful. I am really new to this and at first was so imtimidated by the skill of others that I wondered if I would ever be able to do this. But with your helpful instructions I feel encouraged to try. I'm so excited!
Mary LaVille  |  Sat Jan 15, 2011 at 10:05 AM
thanks for showing us how to paper pierce around the curves and circles.
whitepuppy mammaw  |  Sat Jan 15, 2011 at 2:49 PM
Great tip will Try it later...
Judy Hamilton  |  Sat Jan 15, 2011 at 7:40 PM
Awesome tutorial Beate. You are so fabulous!!!
Gina K. Designs  |  Sun Jan 16, 2011 at 11:54 PM
Thank you for that informative tutorial! I am going to have to order that SU paper piercing template!
Kathy Humphrey  |  Tue Jan 18, 2011 at 8:02 PM
This is AWESOME!!! ESPECIALLY the circle/ curves. I'm using this in my next demo. Thank you!
Dianna  |  Mon Jan 24, 2011 at 2:18 PM
Great video Beate! I always wondered how you paper pierced a circle! Great hints on corners too!
Tammie27  |  Tue Jan 25, 2011 at 6:06 PM
Thanks for the demonstration, the piercing on the curved pieces made alot more sense! I think this is a neat technique, and it adds a nice textural accent to your stamped item- I hope to try it soon.
Julia Wright  |  Thu Jan 27, 2011 at 12:30 AM
Thanks so much for showing us how to use the matt to pierce circles or rounded edges. I have this set and have never used it for the curved edges. Thanks again!
Jane Ralph  |  Mon Jan 31, 2011 at 4:35 PM
I've been making cards for 5 years and never knew how to pierce this way. thanks!
Patricia  |  Tue Feb 1, 2011 at 4:02 PM
Gives Thanks for this. I got the connect from a commentary you left at different site and found it to be a great compiling of the story thus far. Here�s imploring for the integrity of the swap.
Personalised Canvas Prints
Abbiner  |  Mon Mar 7, 2011 at 1:08 PM
Thank you sooo much for this tutorial. It was SO very helpful. Especially how to pierce around a circle. I had no idea it was possible to do that and will definitely be using this technique in the future.
Karin Moyer  |  Wed Mar 23, 2011 at 12:06 PM
Thank you. Always wondered how the circle was done. Thought it was a special tool. Thanks again!!!
Regina  |  Wed Mar 23, 2011 at 12:24 PM

Page 3 of 3 pages  <  1 2 3

You need to be logged in to comment

GET OUR NEWSLETTER


Splitcoaststampers's privacy policy