Paper Buttons
by Lynn Pratt
Turn regular cardstock into paper buttons.
Supplies
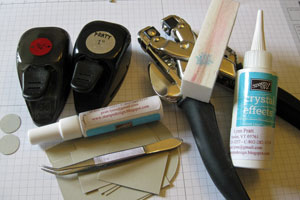
- Cardstock
- Sanding block
- Glue pen
- Crystal Effects™, or other clear drying glaze
- Crop-A-Dile™
- 3/4" Circle punch
- 1" Circle punch
- Heart punch or other shape punch
Step-by-Step
-
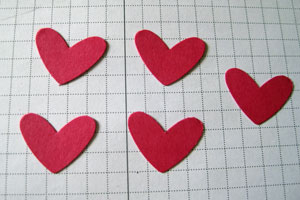
Step 1
Punch five of the same shapes out of cardstock.
-
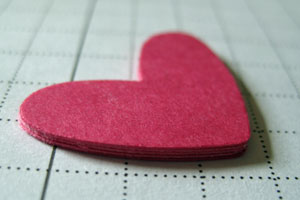
Step 2
Using a glue pen, stack them one on top of the other, making sure to line up the edges as close as possible.
-
Step 3
With a sanding block, smooth out the edges.

-
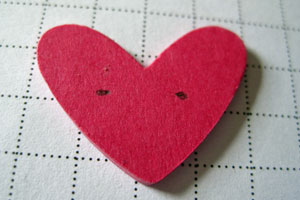
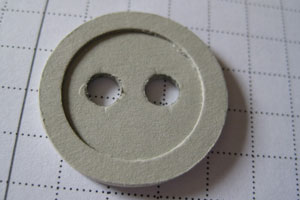
Step 4
Using a pencil, mark where you want the holes, then punch them using a Crop-a-dile™ or a hole piercing tool the size you want the holes to be.
-
Step 5
Cover the top and sides with Crystal Effects™ and put it on wax paper to dry. It should take about 30 minutes.
-
Step 6
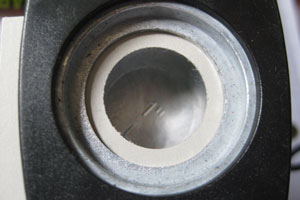
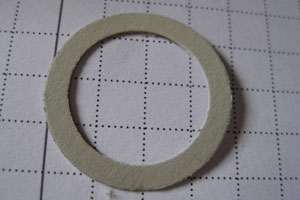
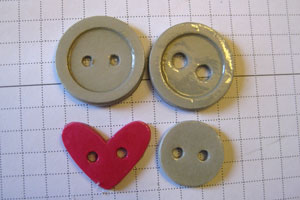
If you are making circle buttons, make the stack of cardstock out of 1" circles. Then punch out a 3/4" circle and then the 1" circle around this.
-
This will give you an outer ring. You will need two of these.
-
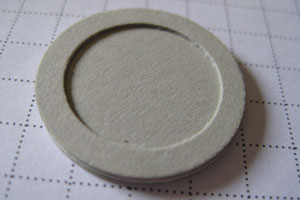
Step 7
Stick these on top of the stack to create your button shape.
-
Step 8
You have perfect buttons to match any color you are using!
Tip:
Experiment with different punches and hole sizes. Add patterned paper to the top of the card stock stack to get different varieties!
-
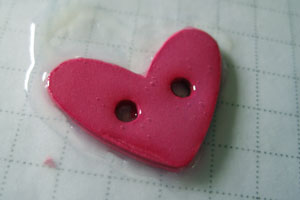
Step 8
Punch holes with a Crop-a-dile™ and then use the Crystal Effects™ as shown with the heart button.
-
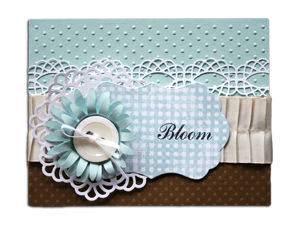
Step 9
Use buttons on your project.
Video!
Your Turn
You've seen the tutorial, now you try it! We've got a section of the gallery set aside for Paper Buttons. Try this technique, then upload your artwork to the gallery. Show us your creations!
***Please note - Internet Explorer/Edge is not a supported browser, and will not allow you to see the videos. Please use Chrome, Firefox or Safari to view our tutorial videos.

Questions and Comments
We'd love to get your feedback or questions. Leave your comment below.
Gracias
The lace is a Die-namics die from My Favorite Things called Dizzy Border https://www.mftstamps.com/catalog/product_info.php?products_id=1148
I also used one of their smaller doily dies behind the flower from the Decorative Doily Duo https://www.mftstamps.com/catalog/product_info.php?cPath=58&products_id=1209
Hope that is what you were looking for!
thanks!
You are GOOD!
The only punches I used were for the buttons - a 1" circle punch and a 3/4" circle punch.
The daisy, the lace border and the doily are all three dies from My Favorite Things
HTH!
Page 2 of 5 pages < 1 2 3 4 > Last »