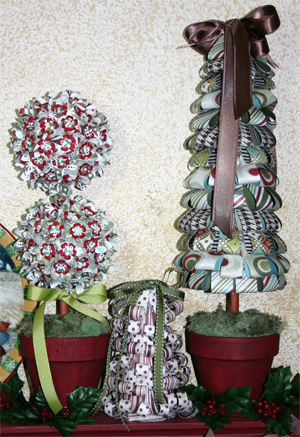
Paper Trees
by Jenn Balcer
Bust out some holiday paper you've stashed, and create pretty decorations for your mantel or table.
Supplies
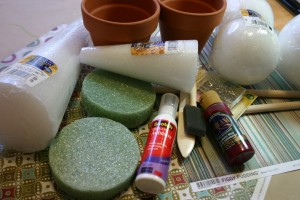
- 12" x 12" Patterned paper (number of sheets varies depending on size of tree)
- Styrofoam form (here, two different cones for trees, 4" spheres for topiary, and 3 7/8" disc for inside pot
- Paper trimmer
- Quilting pins(Three packages were used for the trees shown here)
- Adhesive
- Terracotta pot (Optional. 4" diameter pots were used here)
- Styrofoam to fit inside pot, if used
- Wooden dowel (if a trunk is desired)
- Craft paint and/or pigment ink
- Moss (optional)
- Embellishments
Step-by-Step
-
Step 1
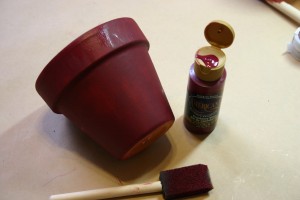
If you'd like a potted tree, paint the terracotta pot now and set aside to dry.
-
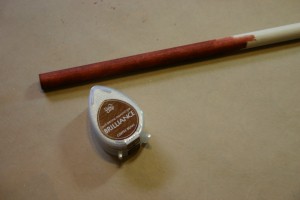
Step 2
If you're creating a topiary, or want a trunk, either paint or apply ink to a dowel. Set aside to dry.
-
Step 3
Insert Styrofoam in pot.
Insert dowel in tree form. A bit of adhesive will keep the form in place.
Center tree over pot, and insert into Styrofoam.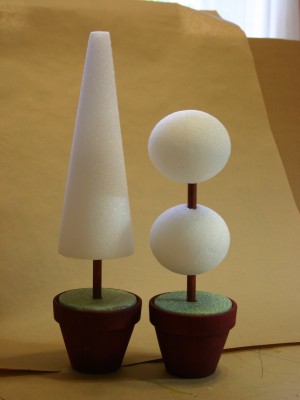
-
For the topiary, insert dowel all the way through the Styrofoam sphere for the bottom, making sure to keep dowel centered. Remove sphere.
Insert dowel part of the way into the Styrofoam sphere for the top. Remove sphere.
Add some adhesive (hot glue is perfect for this) inside the hole in Styrofoam sphere and replace dowel.
Insert dowel through sphere for bottom of topiary, and apply more adhesive at the bottom. This will keep the dowel from shifting. Any adhesive will be covered by your paper.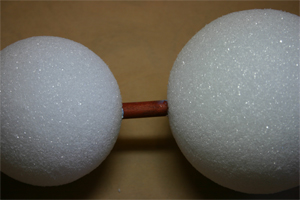
-
Step 4
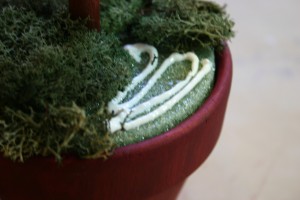
Adhere moss and cover Styrofoam base. A few pins here and there may be helpful.
-
Step 5
Prepare patterned paper strips by using paper trimmer.
For the tall tree, four 12" x 12" double-sided sheets were cut into 4" x 1" strips.
Instructions for each type of tree are to the left of each close up picture.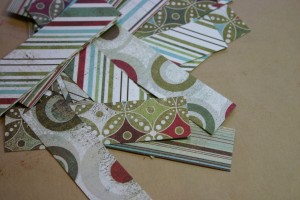
-
Step 6
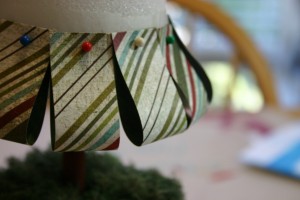
Bend a paper strip in half. Using a quilting pin, attach to tree form starting at the bottom, and going all the way around the tree.
-
Step 7
Repeat Step 6, starting the next row slightly overlapping the previous one, until the entire tree is covered.
A single pattern was used for each row, but try alternating patterns within the row for a fun look.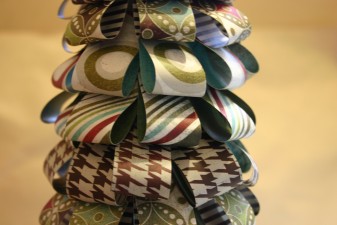
-
Step 8
One sheet of 12" x 12" double-sided paper cut into strips 3" x 1/2" was used for the smaller tree.
Strips were curled on one end with a bone folder before attaching to the tree form.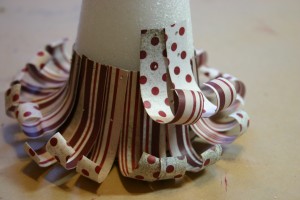
-
Step 9
For the topiary, three sheets of 12" x 12" double-sided paper and large and small flower punches were used.
Large flowers were punched and then the petals curled with a bone folder.
A small punched flower and Prima paper flower were layered on top as shown, and then pinned to the sphere. To cover any exposed Styrofoam, pin more tiny flowers in the openings.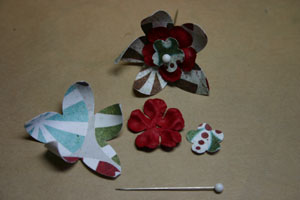
-
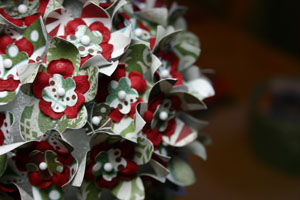
Close up view of topiary.
-
Step 10
Embellish as desired. Here, a loopy bow is pinned to the top of the tree.

-
Step 11
Finished paper trees.


Your Turn
You've seen the tutorial, now you try it! We've got a section of the gallery set aside for Paper Trees. Try this technique, then upload your artwork to the gallery. Show us your creations!
***Please note - Internet Explorer/Edge is not a supported browser, and will not allow you to see the videos. Please use Chrome, Firefox or Safari to view our tutorial videos.

Questions and Comments
We'd love to get your feedback or questions. Leave your comment below.
the topiary would be great for Valentine's Day.
Page 1 of 3 pages 1 2 3 >