Out of the Box with Nestabilities
by Diane Zechman
Create an image that comes partly out of a Nestabilities™ die cut.
Supplies
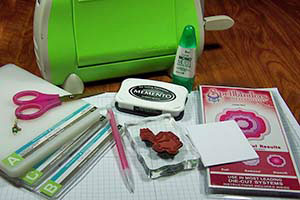
- Die Cutting Machine (Cuttlebug™ used here)
- Nestabilities die
- Cardstock
- Stamps, (Cookie Crumbs "Time For Cake" used here)
- Ink
- Pencil with eraser
- Scissors
- Adhesive
- Patterned papers, ribbon, brads, and other embellishments to finish your card
Step-by-Step
-
Step 1
Stamp the image and place the Nestabilities die on top of it.
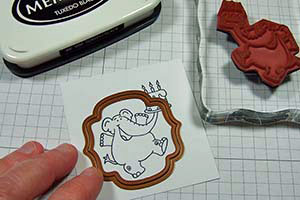
-
Step 2
Using a pencil, lightly mark a small line on the inside of the die, above and below the portion of the image that you want to leave outside of the die cut shape.
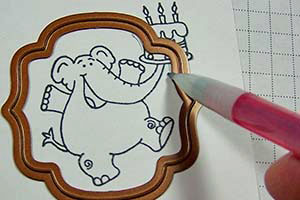
-
Step 3
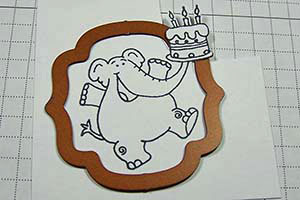
Remove the die. With a pair of sharp scissors, cut from the edge of your paper up to the line you drew, cutting along the lines of the image. Then cut around the section that will pop out.
Here, I cut up to the lines and then cut around the cake.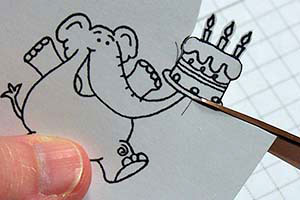
-
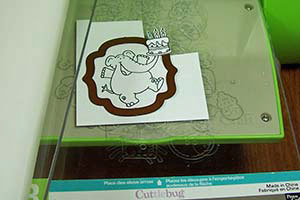
Step 4
Place the die back into position, with the cutting edge down. When you slide the die into place, lift the section that will pop out so that it lays above the die. This will keep it from being cut off when it is put through the die cut machine.
-
Step 5
Sandwich the image and die with the cutting plates and run it through the die cutting machine.
-
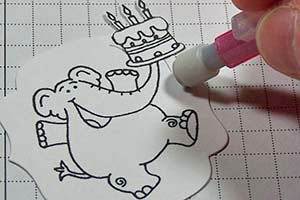
Step 6
Remove the die and erase the pencil marks.
-
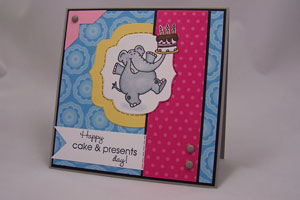
Step 7
Attach image to your card and embellish as desired.
Video!
Variations
No dies needed
Instead of using a Nestabilities™ die, try drawing a shape and cutting it out with scissors. Use a ruler, shape template or even trace a cookie cutter.
Your Turn
You've seen the tutorial, now you try it! We've got a section of the gallery set aside for Out of the Box with Nestabilities. Try this technique, then upload your artwork to the gallery. Show us your creations!
***Please note - Internet Explorer/Edge is not a supported browser, and will not allow you to see the videos. Please use Chrome, Firefox or Safari to view our tutorial videos.

Questions and Comments
We'd love to get your feedback or questions. Leave your comment below.
Smiles!
Gwen
Lovely greet Marja
Cazzy x
Page 3 of 3 pages < 1 2 3