Misting With Markers
by Beate Johns
Use waterbased markers to add multiple colors to an image.
Supplies
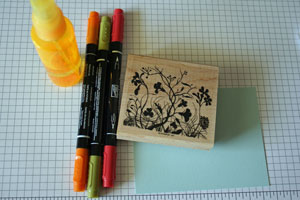
- Waterbased markers
- Water misting bottle
- Stamp here, Essence of Love by SU!
- Cardstock
Step-by-Step
-
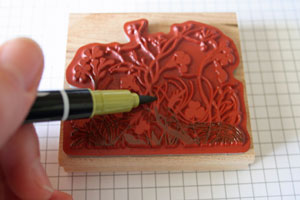
Step 1
With stamp rubber side up, color the image with a marker.
-
Step 2
Continue to color with the marker until everything in this color has been covered.
It's helpful to start with the lightest color first.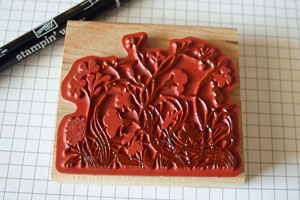
-
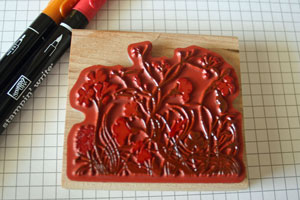
Step 3
Continue to color your image with other colored markers until the entire image is colored.
-
Step 4
Spray the image with water mist bottle.
The more you spray, the more the ink will run when you stamp.
Hint: Hold the stamp in one hand and the misting bottle in the other, with hands about 12" apart. Spray a couple of times.
You can also spray water into the air first, then move your image through to make sure the stamp doesn't get too wet.
-
Step 5
Stamp image on cardstock.
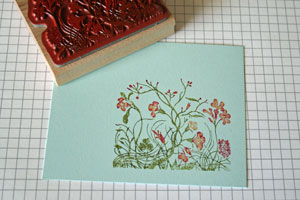
-
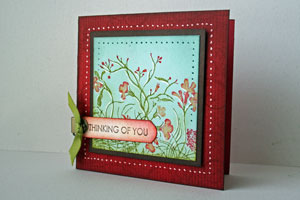
Step 6
Finished card.
Video!
Your Turn
You've seen the tutorial, now you try it! We've got a section of the gallery set aside for Misting With Markers. Try this technique, then upload your artwork to the gallery. Show us your creations!
***Please note - Internet Explorer/Edge is not a supported browser, and will not allow you to see the videos. Please use Chrome, Firefox or Safari to view our tutorial videos.
Questions and Comments
We'd love to get your feedback or questions. Leave your comment below.
Do I need to use watercolor paper for this technique? Thanks
I can't wait to begin using this technique on ATC I am making for my Stampin' Up party which I am hostesting next Saturday.
As you can see in my sample, I didn't use watercolor paper. I would not use Whisper White or Very Vanilla because they are too thin. Colored cardstock, Natural or Confetti Cardstock should work fine.
Hugs and smiles
thanks.
Sue in Australia
I want to thank everyone from the bottom of my heart.
You are appreciated.
God Bless
Page 3 of 3 pages < 1 2 3