Metal Flower
by Starla Nelson
Create a flower out of a sheet of metal.
Supplies
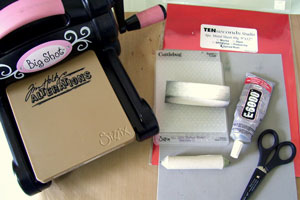
- 40g colored aluminum metal
- Die cutting machine of choice
- Embossing folders of choice
- Finishing block or fine grit sandpaper
- Sharp scissors
- Strong adhesive or hot glue gun
- Optional thin mat, paper stump, pearls, buttons, embellishments
Step-by-Step
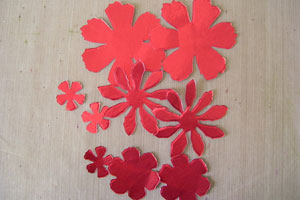
-
Step 1
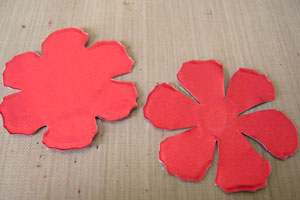
Die cut several different sizes of flowers out of the metal.
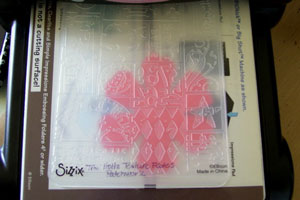
-
Step 2
Emboss the die cut metal using the embossing folder
-
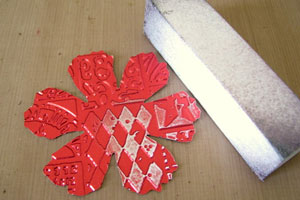
Step 3
Lightly sand the color off the raised areas of the embossed metal with the finishing block or fine grit sandpaper, if desired, exposing the aluminum
-
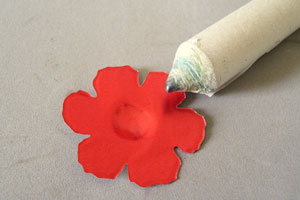
Step 4 (Optional)
You can use a paper stump and thin mat to emboss a center to the flower.
-
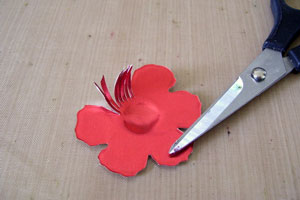
Using your sharp scissors, snip fine lines to the center of the flower. The metal will automatically start to curl, creating a fringe. Arrange the fringe to your liking.
-
Step 5 (Optional)
Snip a small “v” between the petals to the center of the flower to create petals that you can mold as desired
-
Step 6
Gently bend the petals to the desired shape. Layer the different sized flowers as desired.

-
Adhere with strong adhesive or hot glue.
WARNING:
If using hot glue, be VERY CAREFUL! The metal will get hot!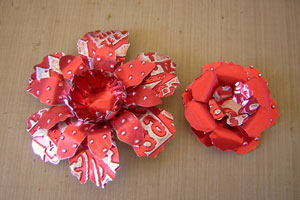
-
Step 7
Add pearls, buttons or other embellishment in center of flower if using.
Adhere the metal flowers to your card, layout, or altered project using a strong adhesive or hot glue.
Special thanks to Lin Brown of yoursartfully.blogspot.com for allowing me to present this tutorial based on her creative techniques.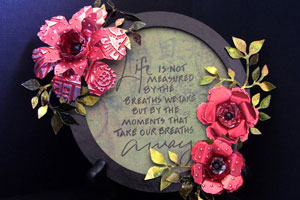
Video!
Your Turn
You've seen the tutorial, now you try it! We've got a section of the gallery set aside for Metal Flower. Try this technique, then upload your artwork to the gallery. Show us your creations!
***Please note - Internet Explorer/Edge is not a supported browser, and will not allow you to see the videos. Please use Chrome, Firefox or Safari to view our tutorial videos.

Questions and Comments
We'd love to get your feedback or questions. Leave your comment below.
www.tensecondsstudio.com
Julie-
This technique will work with your Cuttlebug! The metal will be your paper. You would make your sandwich as you normally would, according to what type of die you are using.
BTW,Your ring on your right hand looks wonderful! Is it a braid? I love the look of it!
Thank you for all of your time and effort with this video. If you know the answers to my above questions, will you please message me? Thank you so very much!
He IS Able,
Traci S.
Page 2 of 2 pages < 1 2