Mechanical Iris
by Melanie Schulenberg
Create a card with an interactive window.
Supplies
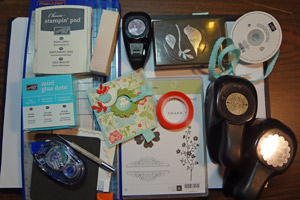
- Cardstock
- Paper Trimmer
- Punches, 1" circle punch, 1 1/4" circle punch, Scalloped Circle Punch as well as decorative punches
- Paper Piercing tool and mat
- Sticky Strip, or other strong adhesive
- Stamps
Step-by-Step
-
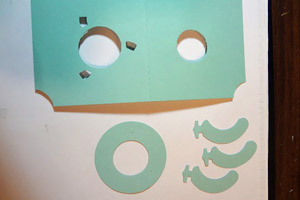
Step 1
Print Mechanical Iris template onto Pool Party cardstock. Cut and score according to template directions.
Revised Mechanical Iris Template
-
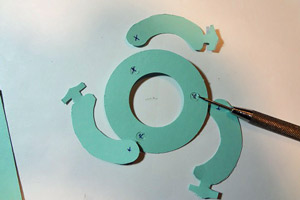
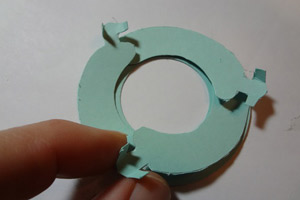
Step 2
Attach glue dots to the 3 crosshairs on the circular ring. Line up the shutter around the ring and attach the ‘TAIL END OF THE SHUTTER ONLY’ to the glue dot. The crosshairs on the circular ring should line up with the crosshairs on the tail in of the shutters. The inner curve of the shutters should be turned toward the center of the large circle.
-
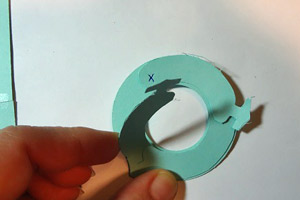
Step 3
Make sure the arrow-shaped ends of the shutters are free to move (not adhered to the ring).
-
Step 4
Bend the arrow sides.
-
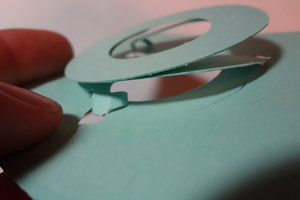
Step 5
Turn the ring over and place the arrows inside the base of the template with the large hole in the middle and three slots along the outer rim.
-
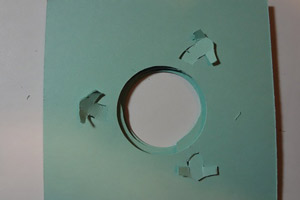
Step 6
Turn over the template and open up the arrow tabs so they are flush against the cardstock.
-
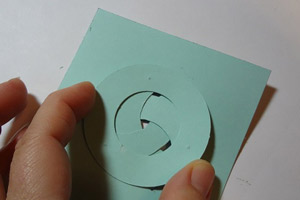
Step 7
Twist and turn the iris to make sure it’s turning properly. It takes a few twist to get used to the grooves.
-
Step 8
Place patterned paper on the front of the card with temporary adhesive. Open the lid and use a pen to trace the inner circle onto the patterned paper.
-
Step 9
Use a paper trimmer to cut the patterned paper in half along the center of the circle. You simply want to cut the circle in half.
An alternative to cutting the inner circles with an exacto or on the cutting tool is to use framelits or dies that match the size of the circle.
-
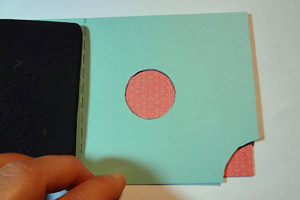
Step 10
Use a 1 1/4" circle punch and remove the circle sections from the top and bottom of the patterned paper.

-
Step 11
Reattach to front of card using adhesive, making sure to center the circle back in place.
-
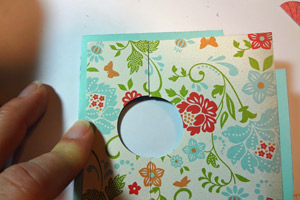
Step 12
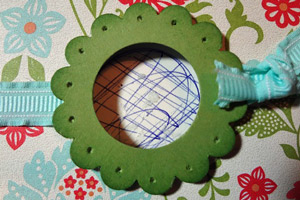
Create a scallop circle with a hole in the middle.
Hint:
To center the hole properly, first create a hole using the 1" circle punch, then place the circle scallop over the 1" circle and then punch. Use paper piercing tool to create small holes around each scallop. Attach scallop to front of card.
-
Step 13
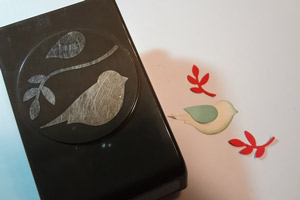
Use decorative punches to create embellishments.
-
Step 14
Create an arm for the iris by using the scrap left from the template. Cut a 4" x 1' strip. Score in the middle along the length. Cut about 1/4" – 1/2" from the top on the score side. This will allow you to open the arm and attach it to the wheel. Turn the iris so the shutters are closed.

-
Step 15
Open the two sides of the arm and attach it to the ‘WHEEL ONLY”. Make sure you don’t attach it to any of the shutters. Also make sure that the top of the arm does not extend into the inner circle.

-
Step 16
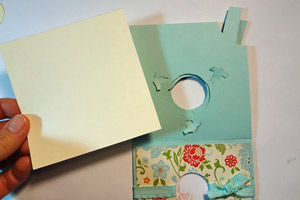
Attach a 4" square of neutral cardstock to the back of the card with temporary adhesive, covering the shutter tabs.
-
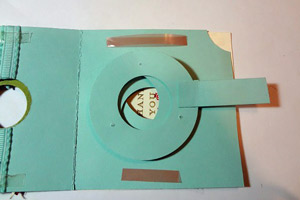
Step 17
Turn card over, close front cover and scribble/mark inside the inner scallop onto the neutral colored cardstock. Remove the cardstock from back of card.
-
Step 18
Punch a 1 1/4" neutral colored cardstock circle and stamp desired image onto the punched circle. Sponge the edges and attach this 1 1/4" circle to cover the scribble/mark you previously made. Reattach the neutral colored layer to the back of the card with permanent ink.

-
Step 19
Open the card and attach two strips of Sticky Strip along the sides of the card. Be sure to leave the base of the card open for the handle to move back and forth.
-
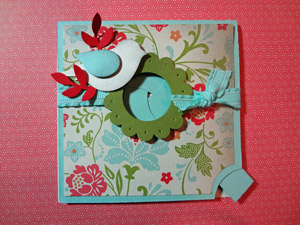
Step 20
Here is the card with the iris closed.
-
Here is the card with the iris open.

Video!
Mechanical Iris Card from Melanie Schulenberg on Vimeo.
Your Turn
You've seen the tutorial, now you try it! We've got a section of the gallery set aside for Mechanical Iris. Try this technique, then upload your artwork to the gallery. Show us your creations!
***Please note - Internet Explorer/Edge is not a supported browser, and will not allow you to see the videos. Please use Chrome, Firefox or Safari to view our tutorial videos.

Questions and Comments
We'd love to get your feedback or questions. Leave your comment below.
Love the card!
I took the corners off the template b/c if someone decides to design a card with the wheel 'outside', then there's no need for the arm or the notch.
Any circle punch will do for the notch. You're simply creating a place to grab the arm to open and close the iris.
Orange = Yes, it's the backside of the double-sided paper.
Scallop circle punch = 1 3/4" Of course, you can use any decorative punch, just as long as you create the 1" circle in the center.
Any more questions feel free to ask.
Page 2 of 2 pages < 1 2