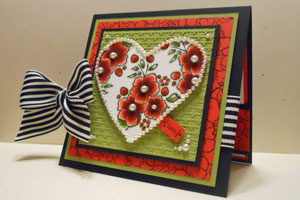
Marker Layering

by Karen Barber

Create beautiful shaded images with water based markers and blender pen.

Supplies
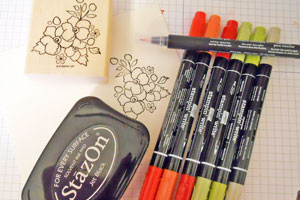
  • Outline Stamp Image, stamp from Stampin' Up!'s Bordering on Romance used here

  • Black Stazon™ or other waterproof ink

  • Watercolor paper

  • Water based Markers, in gradient colors, Stampin' Up! Markers used here

  • Blender Pens

Step-by-Step

  1. Step 1

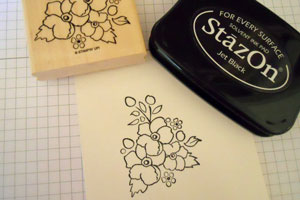
    Stamp your image in black Stazon™ on your watercolor paper.
  2. Step 2

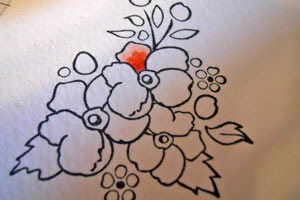
    Starting with the lightest color, lay down a fair amount of color at the inside base of each petal, and then with a circular motion use a blender pen to spread the color out to the outside edge of your image.
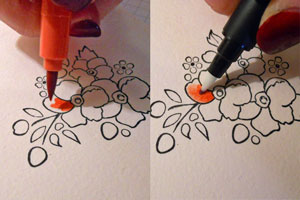
  3. Then lay down some more of the same color at the base of each petal.
  4. Step 3

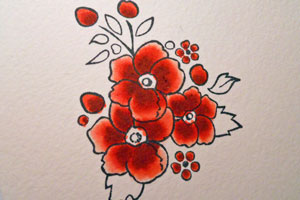
    Continue with this process but each time, go a shade darker.
    Add Poppy Parade marker to your Calypso Coral but do not cover up the whole petal, only go part of the way out to where it gets lighter, do not cover the light part. Use a blender to just take the line out between the two colors. Next add a very tiny amount of Riding Hood Red, at the very base and use the blender again to remove the line. Continue with all the flowers.
  5. Step 4

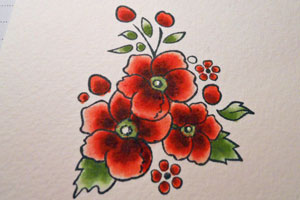
    Continue with this process to color your leaves. (Pear Pizazz and Lucky Limeade were used here.)
  6. Step 5

    This shows the different stages of what the flowers will look like as you continue to layer your colors.
  7. Step 6

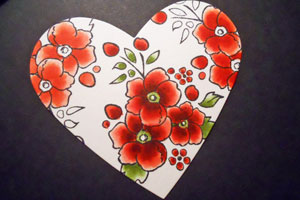
    Continue until all your images are colored.
  8. Step 7

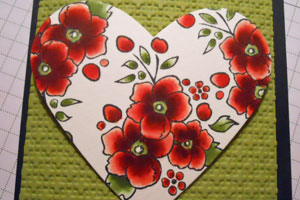
    Use a light gray marker to go around the entire outside of the image (Sahara Sand used here).

    Hint:
    Be careful not to over do this, just a very light halo around your image.
  9. Step 8

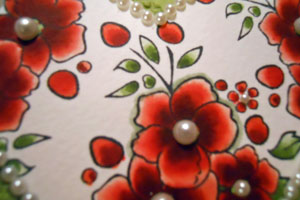
    Finish your project.

Video!

Your Turn

You've seen the tutorial, now you try it! We've got a section of the gallery set aside for Marker Layering. Try this technique, then upload your artwork to the gallery. Show us your creations!

***Please note - Internet Explorer/Edge is not a supported browser, and will not allow you to see the videos. Please use Chrome, Firefox or Safari to view our tutorial videos.

Questions and Comments

We'd love to get your feedback or questions. Leave your comment below.

This was very educational and helpful. I love the impact it gives each flower and leaf. Thank you for taking the time to do this tutorial, it will help a lot!

He IS Able!
Traci S.
Traci S.  |  Wed Feb 8, 2012 at 5:04 PM
Thanks for the great tutorial! I'm glad to know that I can use the markers that I have before leaping into a big investment of yet more "stuff"
Terri S  |  Wed Feb 8, 2012 at 5:09 PM
You make it look so easy, even a non-colorer like me should be able to make it work! Thanks for the great tips and the photo in step 5 is wonderful to see how each layer should look.
Mary Beth
Mary Beth West  |  Wed Feb 8, 2012 at 5:21 PM
LUV this! I am not nor will I be a copic person. Thank you for showing copic technique w/ our Stampin Up markers. I've never used a blender pen. Do you need one for each color or dark, medium, light or what?
facsmom  |  Wed Feb 8, 2012 at 5:51 PM
This was very imformational. I never knew you could acheive this look with those markers. Very nice. TFS!
Traci Lord  |  Wed Feb 8, 2012 at 5:54 PM
To Penny: The Blender pen Karen is using is from Stampin' Up! - it is formulated to work with water-based inks.

To facsmom - you only need one blender pen - to clean it in between colors, just color on your stamping mat until it's clear again and then start on the next color.

To Lisa - Watercolor paper is best for any time you are going over an area again and again as she shows here - regular cardstock suitable for stamping will not stand up to that and the surface will pill. Ideally you would look for a watercolor paper with a very smooth surface so that your stamped image looks good - but beyond that it doesn't matter, really. smile

Thanks for your great questions!
lydia  |  Wed Feb 8, 2012 at 5:56 PM
Yahoo Karen!!! Thank you SOOO very much! You know I am your #1 fan! Love you girl! Not boring AT ALL!
Kristen Conant  |  Wed Feb 8, 2012 at 7:42 PM
Thanks for the prompt response. Could you describe what you are referring to when you say stamping mat?
facsmom  |  Wed Feb 8, 2012 at 7:55 PM
Thank you so much. Didn't know water based markers could look so good! I've wanted that effect but didn't want to spend the money on Copics...off to play with my markers!
Judy Hanson  |  Wed Feb 8, 2012 at 8:24 PM
Karen I didn't find your video boring. I learned something new and now I really want to use my S U markers and try some layering. Thanks so much.
Lynn Fletcher  |  Wed Feb 8, 2012 at 8:50 PM
I loved the tutorial, but am wondering what brand of watercolor paper you use. What I have is pilling and does not blend like yours does.
Susan Yeager  |  Wed Feb 8, 2012 at 9:44 PM
I have always admired your beautiful colouring Karen - thank you for sharing your process. Itching to give it a try grin
Tracey Wilson  |  Wed Feb 8, 2012 at 10:20 PM
Beautiful... thank you for sharing this. I am going to have to practice this technique. I love it!
Renee Bjurstrom  |  Wed Feb 8, 2012 at 11:58 PM
I use SU's watercolor cardstock - everytime - no pilling, it's a wonderful heavy quality without too many bumps! smile If you are coloring a very small image such as the flowers in Simply Soft, you can use regular cardstock because you don't have to smear the color, you just do that same technique without the blender pens.....layer the color and if the image is small enough you won't need to move the color. Give it a try - It's so relaxing and so FUN!
Karen B Barber  |  Thu Feb 9, 2012 at 5:05 AM
Thank you so much. Coloring is my favorite part of stamping. I love this look but could never quite get the hang of it.
Lynda Smith  |  Thu Feb 9, 2012 at 5:15 AM
What a wonderful tutorial=the colors are amazing!
Dawnll  |  Thu Feb 9, 2012 at 3:09 PM
Oh Karen, you've done an absolutely marvelous job with this card and tutorial! I've always admired your work, and at the 2012 leadership event picked out every one of your contest submissions as my favorites! Thanks for sharing your expertise and knowledge! And thank you for this tutorial too! Fabulous job!
Hugs,
An unknown admirer... Sharon Field
Sharon Field  |  Thu Feb 9, 2012 at 4:24 PM
Karen,
Gorgeous card. What a wonderful video tutorial you did. I am a visual learning ~ I love to see how things are done. Thank you
Annette Stewart  |  Thu Feb 9, 2012 at 6:16 PM
Thanks, Karen, great tutorial!! - love how you took the time to explain each step - great to be able to use my watercolor markers like copics!!
Sue Worthington  |  Thu Feb 9, 2012 at 6:33 PM
This absolutely beautiful! Perfect for Valentine's Day! Thanks so much for the tutorial.
Karen Keltner  |  Fri Feb 10, 2012 at 9:57 AM

Page 3 of 4 pages  <  1 2 3 4 >

You need to be logged in to comment

GET OUR NEWSLETTER


Splitcoaststampers's privacy policy