Loopy Flower

by Tosh Leyendecker

Create a gorgeous flower out of felt.

Supplies

  • Felt
  • Hot glue gun
  • Scissors
  • Cutting tool
  • 1 1/2" circle die
  • Sewing machine

Step-by-Step

  1. Step 1

    Cut felt into strips:
    2" x 8 1/2"
    1 1/2" x 4"
    1" x 3"

    Using a circle die, cut one 1 1/2" circle out of the same color of felt.
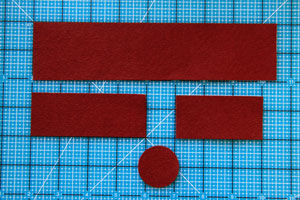
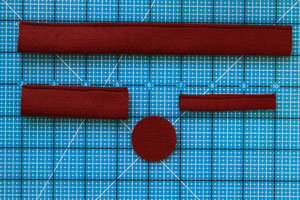
  2. Step 2

    Fold strips in half lengthwise and sew ends together.
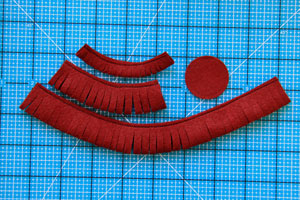
  3. Step 3

    Cut the felt tubes in approximately 1/8" strips from the non-sewn end up to, but not over, the sewn end.
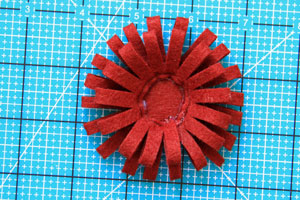
  4. Step 4

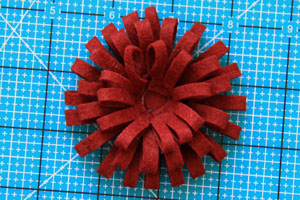
    Hot glue the largest looped piece to the outside edge of circle until you have two layers.

  5. Step 5

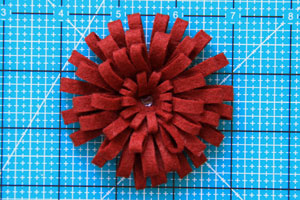
    Glue one layer of the second largest loop to the inside of the first two.

  6. Step 6

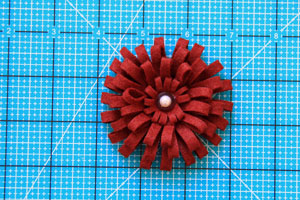
    Glue one layer of the smallest loop on the inside of the other layers.

  7. Step 7

    Add a button, rhinestone, pearl, etc. to the center with hot glue.

  8. Step 8

    Attach your loopy flower to a card.

Video!

Your Turn

You've seen the tutorial, now you try it! We've got a section of the gallery set aside for Loopy Flower. Try this technique, then upload your artwork to the gallery. Show us your creations!

***Please note - Internet Explorer/Edge is not a supported browser, and will not allow you to see the videos. Please use Chrome, Firefox or Safari to view our tutorial videos.

Questions and Comments

We'd love to get your feedback or questions. Leave your comment below.

Awesome tutorial, Tosh! What a veat embellishment! Can't wait to give this ine a try!
Amy Sheffer  |  Mon Jun 27, 2011 at 9:25 AM
Love this and will definetly have a go at making it, maybe even tomorrow! thanks for sharing!
Canne  |  Mon Jun 27, 2011 at 3:27 PM
This was a great video but do you have to sew the felt? Can you use something else?
Tanya  |  Mon Jun 27, 2011 at 3:45 PM
I love this technique! But is sewing the best way to do this project? Can you do it some other way?
Tanya  |  Mon Jun 27, 2011 at 3:48 PM
I'm glad the material worked for you Dee Dee. I've since made one with fabric too, and they're a lot of fun. I even used some burlap for a rugged, rustic look. Did you upload your flower to SCS? I'd love to see it.
Tosh  |  Mon Jun 27, 2011 at 5:49 PM
Tanya: You could glue the ends together to form a tube, thus eliminating the sewing if you like. I'm sure that would work too.
Tosh  |  Mon Jun 27, 2011 at 5:51 PM
SUPERB! Thanks so much for sharing. I'm definitely trying this out. x
Sally  |  Wed Jun 29, 2011 at 5:00 AM
Great tutorial. Can't wait to make one.
Penny  |  Fri Jul 1, 2011 at 6:56 AM
Beate, I use hot glue with a chopstick ,is what I use besides my fingers or use fingers always have a bowl of ice water to dip in ..no burns .both work great .your biggest fan . anne p.s. i love your tutorials .. cant say it enough .you rock Beate and women of SCS
anne marie sweeney  |  Sat Jul 9, 2011 at 7:29 PM
Awesome and easy. Will try this soon
Annette Stacy  |  Sun Jul 10, 2011 at 2:14 PM
Wonderful...thank you for a great tutorial...a super idea for all the felt in my stash.
Cheri  |  Thu Jul 14, 2011 at 8:07 PM
I just love this tutorial so straight forward, and who ever thinks of making such items are so talented in their own right.
Margaret  |  Sat Jul 16, 2011 at 5:56 AM
Awesome tutorial, can't wait to try this! I was *cursing* for you every time your burned your fingers, Beate! Ouch!
Angie Tieman  |  Wed Jul 20, 2011 at 11:43 PM
Вы такая умница! Спасибо вам большое!!!
Katerina  |  Sat Jul 23, 2011 at 12:50 PM
COMPLETELY LOVE THIS! I must give this a try!!! TFS!
Jami (sgtstamper)  |  Mon Jul 25, 2011 at 9:44 PM
hi, it is very nice flowers....what is felt??? from where i get dat ????
kanchan nemade  |  Mon Sep 3, 2012 at 9:12 AM
Thanks for this tutorial--these will make nice flowers, add a pin back or a barrette back and embellish a sweater, a tee-shirt, or your hair.
Pam Aylmer  |  Wed Jan 16, 2013 at 8:15 AM
Very nice great technique thanks for sharing cheers Lee (NZ)
Lee Gysberts  |  Thu Jan 17, 2013 at 12:22 AM
cool project
Theresa Goodletson  |  Fri Oct 27, 2017 at 7:26 AM

Page 3 of 3 pages  <  1 2 3

You need to be logged in to comment

GET OUR NEWSLETTER


Splitcoaststampers's privacy policy