Lever Card
by Laura Lipe
Create a card that “levers” through a front window.
Supplies
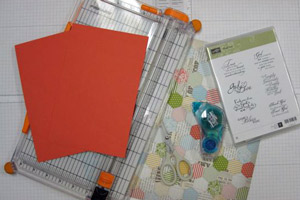
- Two 5 1/2" x 8 1/2" pieces of cardstock
- Paper Cutter
- Scoring tool
- Adhesive
- Patterned paper, stamps, and dies to decorate completed card
Step-by-Step
-
Step 1
Score the first piece of cardstock at 4 1/4" and fold in half. This will be the card itself. On the side that is the front, cut out a square window, 1” from all 4 sides.
Note:
The completed card measure 4 1/4" x 5 1/2".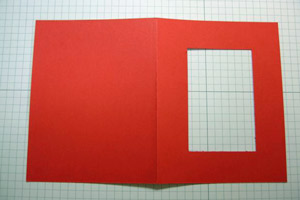
-
Step 2
Score the second piece of cardstock at 4 1/4" and 6 3/8”. Go in 2 1/8” from the left edge and score down to 1” from the top and up to 1” from the bottom.
Note:
This will be the inside of the card.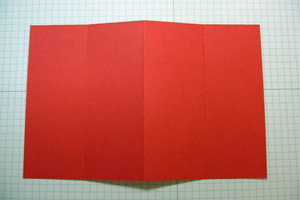
-
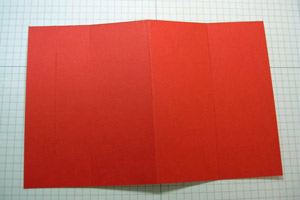
Step 3
To cut the “lever” that will fit through the card front “window”, go in 1” from the left edge and cut a slit that starts 1” from the top and goes down to 1” from the bottom.
-
Step 4
Cut from the top and bottom ends of that slit over to the 2 1/8” score line. This produces the “lever” that will fit through the front window.
-
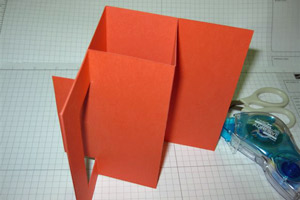
Step 5
Fold on all score lines. Folds should be valley/mountain/valley folded.
-
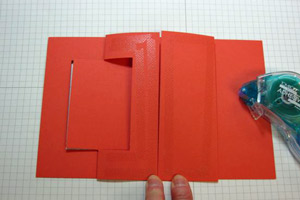
Step 6
Add adhesive to the “backside” of the left and right panels of the cardstock you just scored and glue it inside the card. The “lever” tucks inside of the front “window”. If this is a tight fit, trim a sliver off the top and bottom of the lever so that it will move freely through the window.
-
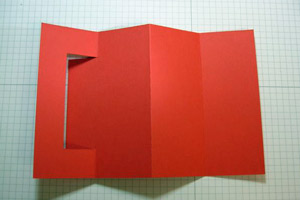
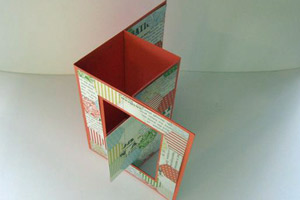
Step 7
The card will look like this when folded closed.
-
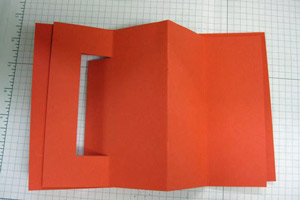
It will look like this when opened out.
-
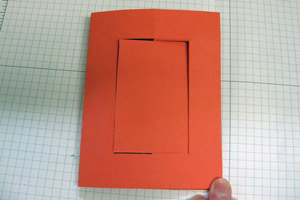
Step 8
Cut a 4” x 5 1/4” piece of patterned paper for the front of the card. Cut in 7/8” from all 4 sides to make the decorative layer for the front of the card.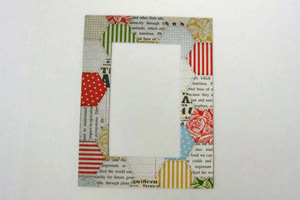
-
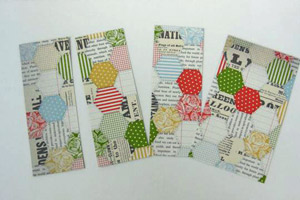
Step 9
For the inside of the card, cut 3 strips of patterned paper 1 7/8” x 5 1/4” tall. Cut a fourth piece 3 1/8” wide by 5 1/4” tall. Adhere two of the 1 7/8” pieces to cover the two right panels inside the card. The third will be used to cover the left side of panel after you shape it.
-
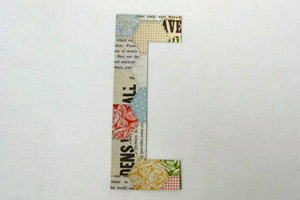
Step 10
On the remaining 1 7/8” x 5 1/4” piece, cut in 1” from the RIGHT side, 7/8” from the top and 7/8” from the bottom. Make a vertical cut that connects these two cuts, so that the remaining piece of patterned paper looks like a “C”. Adhere this to the LEFT panel of the inside of the card.
-
Step 11
On the 3 1/8” x 5 1/4” patterned paper, cut in 1 1/8” from the LEFT side, 7/8” from the top and 7/8” from the bottom. Cut down from the top and up from the bottom to meet these two cuts and remove those two small squares of paper. This creates a shape that will cover the “lever” part of the card.
Adhere inside the card on the remaining panel. If needed, trim a sliver off the top and bottom of the “lever” part so that it fits your card.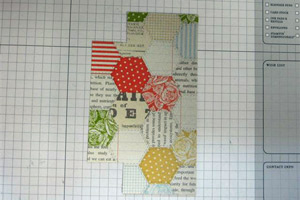
-
-
Step 12
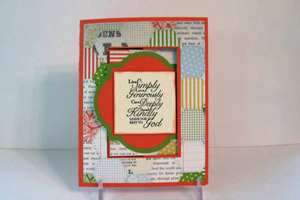
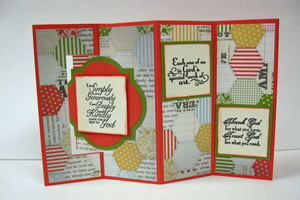
Decorate the front and inside of the card with die-cuts, images, and sentiments as desired.
-
Video!
Your Turn
You've seen the tutorial, now you try it! We've got a section of the gallery set aside for Lever Card. Try this technique, then upload your artwork to the gallery. Show us your creations!
***Please note - Internet Explorer/Edge is not a supported browser, and will not allow you to see the videos. Please use Chrome, Firefox or Safari to view our tutorial videos.

Questions and Comments
We'd love to get your feedback or questions. Leave your comment below.
As for the sentiment, I cannot read it as it is too small. I am sorry it caused someone to take exception to its use. Use whatever sentiment you like. Some people do not celebrate Halloween or Christmas that doesn't mean that Halloween or Christmas cards shouldn't be displayed. My Mom has passed, but I will still look at Mother's day cards usually because they have gorgeous flowers on them. The gallery & tutorials are there for whomever wishes to learn and get ideas. To ask a believer not to use a Bible verse goes against their belief system. "But whoever denies me before men, I also will deny before my Father who is in heaven." Matt 10:33
Here is my card :
http://www.splitcoaststampers.com/gallery/photo/2374267?&cat=500&ppuser=205884
niki
I normally would not comment on someone else's negative post but I felt so bad for Laura that I just have to. Laura, your card is beautiful and the sentiment is perfect. Isn't it funny how all those different colors and patterns in your patchwork paper come together to become one beautiful piece of work. hmmm! Personally, I can't imagine that anyone would find that sentiment offensive on this website. The only thing I found offensive was the rudeness of the original poster.
Beate and Laura, thanks again for all the hard work you do for us. Now off I go to give this one a try!
Page 5 of 5 pages « First < 3 4 5