Kaleidoscope Medallion
by Michelle Shuman
Create a gorgeous medallion out of patterned paper.
Supplies
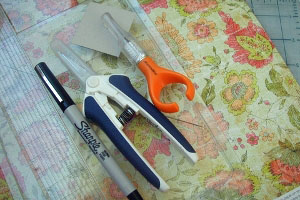
- Patterned paper with a repeated pattern – 2-3 identical sheets (floral, paisley, and tapestry-type patterns work well)
- Grid paper
- Clear plastic for creating template (leftover acetate or packaging materials)
- Ruler
- Permanent pen
- Craft knife and/or sharp scissors
- Adhesive
- Cutting mat
- Small cardstock square
Step-by-Step
-
Step 1
Create a template using grid paper.
Draw a 45 degree line by connecting the diagonals of the squares.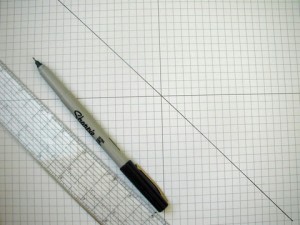
-
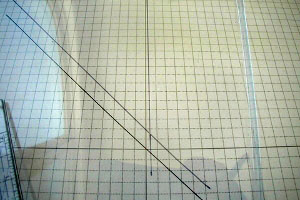
Step 2
Transfer the 45-degree line and one of the intersecting straight lines to a plastic sheet with the permanent pen.
-
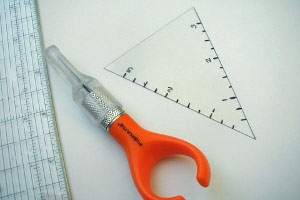
Step 3
Cut the triangle-shaped template out, marking the sides with a ruler for easier placement later.
-
Step 4
Select the portion of patterned paper that you want to use.
You will need 8 of the same design to make a complete medallion.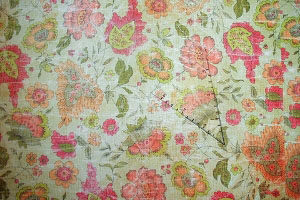
-
Step 5
Line up template with the image, making sure the template is even on both sides. Mark with a pen along the template sides.
In this case, the edges of the flowers are both at approximately 1 3/4” – you can mark the exact spots on your template for easy placement on the remaining portions of the medallion.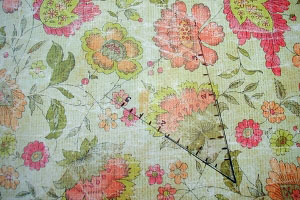
-
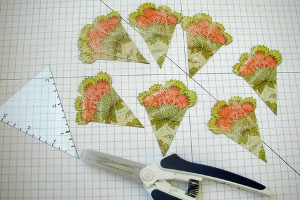
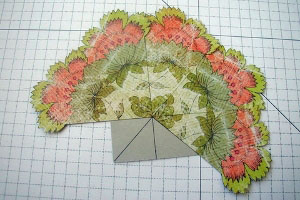
Step 6
Cut out all 8 images along the marks, and around the top of image.
-
Step 7
Mark the cardstock square with lines connecting opposite corners, and across the centers of each side.
Cover the square with adhesive. Here, adhesive was applied with a Xyron.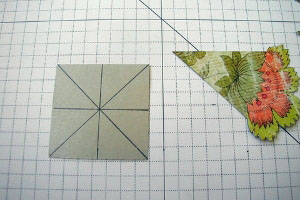
-
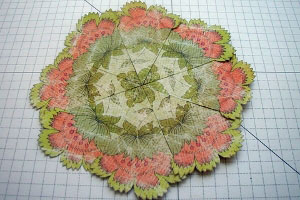
Step 8
Adhere medallion images to the square, aligning marks and the points of each image with the center.
-
Step 9
Continue to align your patterned paper wedges until your medallion is finished.
-
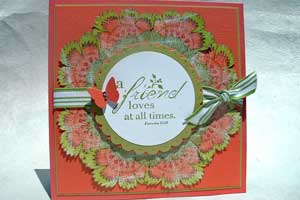
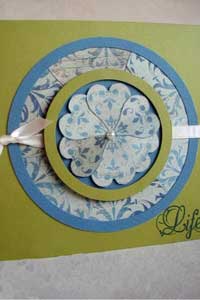
Step 10
Finish your card.
Variations
-
Cut your images as described in step 5, not bothering to trim the top of the image. After medallion is complete, trim the outer edge with a circle cutting system (such as Coluzzle™ ).
Your Turn
You've seen the tutorial, now you try it! We've got a section of the gallery set aside for Kaleidoscope Medallion. Try this technique, then upload your artwork to the gallery. Show us your creations!
***Please note - Internet Explorer/Edge is not a supported browser, and will not allow you to see the videos. Please use Chrome, Firefox or Safari to view our tutorial videos.
Questions and Comments
We'd love to get your feedback or questions. Leave your comment below.
abrazos,mirabella
Thanks for sharing with us!
They will love it and think I am so smart...yes I am, to use your beautiful design.
Thanks Michelle.
For those who asked, grid paper is available at any business supply store such as Staples/Business Depot or maybe even Walmart.
What a fantastic idea. I wonder why no-one thought of it before? I certainly plan to try it very soon.
Thanks again!!!
Deanne
xx
Thank you all so much for the wonderful responses! I'm so excited that you're excited!!
The grid paper I use is by Stampin' Up! (Thanks Yvonne!), but I know you can find it by other companies, I used to use Alvin (usually with the drafting supplies). I like the SU! because of the bright white, and the 'centering' lines on the grid. HTH!
Also, I want to make sure that you all know that I didn't make this up! I found it years ago in a crafting magazine, and when I made a card using it earlier this year, I couldn't find the directions or mention of it on any websites, so I made up my own from what I remembered. Beate was gracious enough to allow me to write this tutorial so that you all try this 'WOW' technique...thanks Beate, and thanks SCS!
Thanks!
No, it doesn't matter the number of squares per inch. I actually only used it to get a diagonal line, so any grid paper would work fine
Page 1 of 2 pages 1 2 >