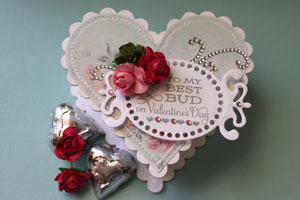
Heart Box
by Beate Johns
Create a heart shaped box out of coasters and patterned paper
Supplies
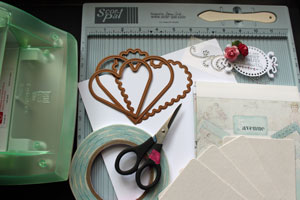
- Classic Heart and Scalloped Heart dies
- Thin coaster or thin cardboard
- White cardstock
- Patterned paper
- Xyron or other strong adhesive
- Scor-Tape™ or other strong adhesive
- Scor-Pal™
- Scissors
- Crocheted lace, or ribbon
Step-by-Step
-
Step 1
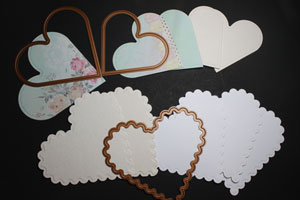
Cut two thin coasters and three pieces of white cardstock with the largest scalloped heart die. Cut two coasters and two pieces of patterned paper with the second largest Classic heart die. Cut and emboss one piece of patterned paper with the largest classic heart die.
-
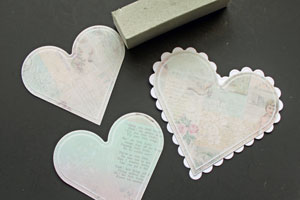
Step 2 (Optional)
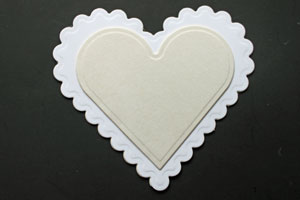
Sand the patterned paper pieces and adhere the big patterned paper heart to one of the scalloped cardstock hearts.
-
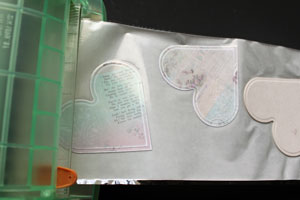
Step 3
Run all your hearts except for the scalloped coaster hearts through your Xyron machine, or use other strong adhesive.
-
Step 4
Adhere one of the scalloped cardstock hearts to the front and back of one of the scalloped coaster hearts. This will be your box top.
Adhere the remaining cardstock scalloped heart to the other scalloped coaster heart.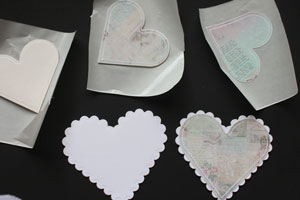
-
Step 5
Adhere one of the smaller coaster hearts to the center of the plain scalloped heart. This will be your box bottom.
-
Step 6
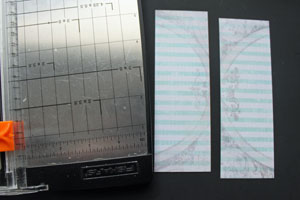
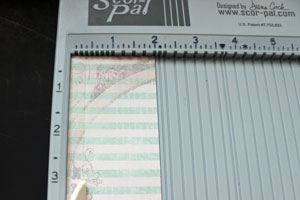
If you are using a 6" x 6" patterned paper pad, cut two 2" wide strips.
-
Adhere the strips to one long 11 7/8" strip.
-
Step 7
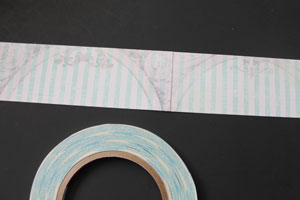
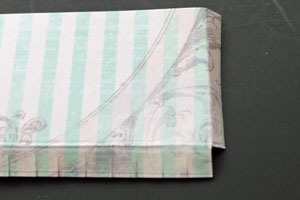
Score the long side of the strip at 3/8".
-
Step 8
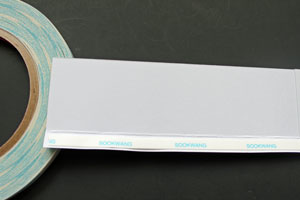
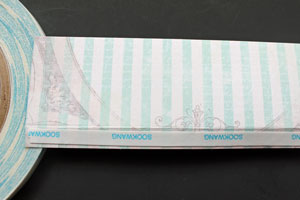
Add adhesive to the score line on both sides.
-
-
Step 9
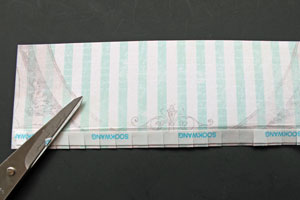
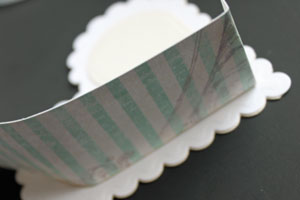
Cut the glue tab every 1/4".
-
Step 10
Fold the end of the strip 1/4" over and cut the last glue tab piece off on both sides. Peel off the liner of the adhesive strips on both sides.
-
Step 11
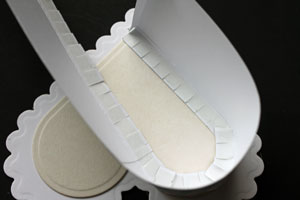
Start at the point of the heart and tape the paper strip along the edge of the coaster heart.
-
-
Step 12
Add adhesive to the folded over piece of cardstock and adhere heart walls together.
Hint:
If the paper strip is too long, cut the overhanging piece off or adhere to the wall.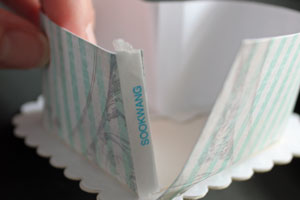
-

-
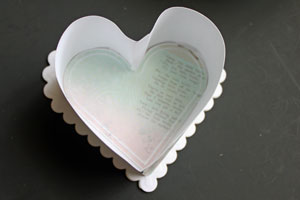
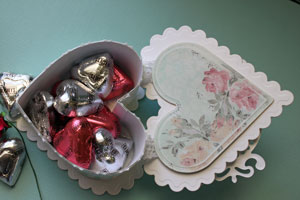
Step 13
Adhered your patterned paper heart to the inside of your box.
-
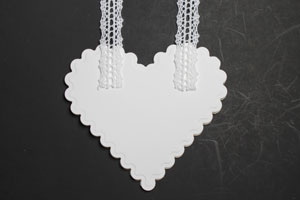
Step 14
Adhered two strips of crocheted lace to the back of the heart box cover.
-
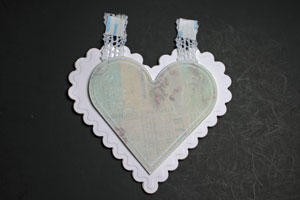
Step 15
Adhere the patterned paper covered coaster heart in the center of the back of the heart box cover. Cut the lace down and add adhesive to the end of the lace.
-
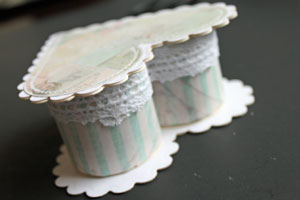
Step 16
Place the top on the box bottom and adhere the lace to the box walls.
Hint:
Leave a little slack so the box top will open all the way.
-
Step 17
Adhere a lace strip on top the box wall. It will hide your lace "hinges".
-
Step 18
Decorate the box top
-
and fill your box.
Video!
Your Turn
You've seen the tutorial, now you try it! We've got a section of the gallery set aside for Heart Box. Try this technique, then upload your artwork to the gallery. Show us your creations!
***Please note - Internet Explorer/Edge is not a supported browser, and will not allow you to see the videos. Please use Chrome, Firefox or Safari to view our tutorial videos.
 *
*
Questions and Comments
We'd love to get your feedback or questions. Leave your comment below.
Team Craftwell
Thank you for both and the Box is beautiful xxx
thanku again
I have wanted to learn how to make a heart box since last year LOL!
I am going to make one for my mom for Valentines Day :o)
Your directions are so easy to understand.
Hugs, Candy
and not hard to do.
Page 2 of 2 pages < 1 2