Grid Technique
by Beate Johns
Create a faux tile look and/or lovely backgrounds with your scoring tool.
Supplies
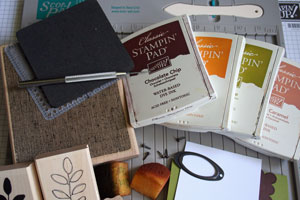
- Scor-Pal™ or other scoring tool
- Ink
- Cardstock
- Stamps
- Adhesive
- Embellishments
Step-by-Step
-
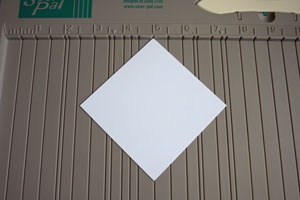
Step 1
Line your cardstock up diagonally with a score line on the Scor-Pal.
-
Step 2
Score card stock at even intervals.
Here, the scores were made every 1/2".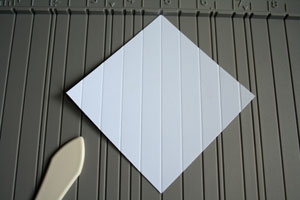
-
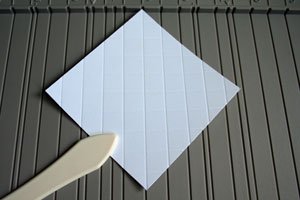
Step 3
Turn card stock 90 degrees, line up as before, and score at every 1/2" again to create a scored grid.
-
Step 4
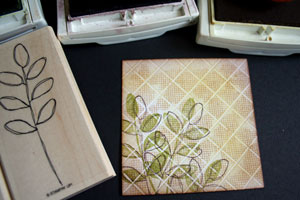
Ink the stamp and stamp on the card stock side with the indented score lines.
Note:
Here, the background was placed wood-side down with the card stock over it. To get a partly stamped image, finger walk over the paper.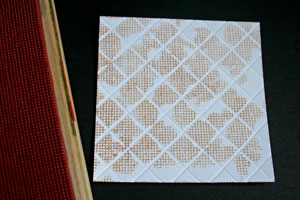
-
Step 5
Add more images and sponge card stock if wanted.
-
Step 6
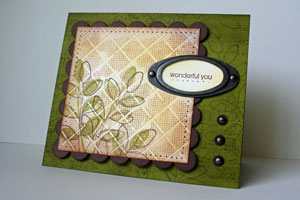
Finished card.


Video!
Variations
-
Flip it over
Instead of stamping on the cardstock side that has the indented score lines, stamp on the side that has the score lines facing up for a different look.
-
Add a Border
Score a small border all around the card stock before adding a grid inside the score line.
Show it off
Don't stamp over the grid at all, but use it as a background.


Your Turn
You've seen the tutorial, now you try it! We've got a section of the gallery set aside for Grid Technique. Try this technique, then upload your artwork to the gallery. Show us your creations!
***Please note - Internet Explorer/Edge is not a supported browser, and will not allow you to see the videos. Please use Chrome, Firefox or Safari to view our tutorial videos.
 *
*
Questions and Comments
We'd love to get your feedback or questions. Leave your comment below.
thanks for this and other techniques, i am now finding scrapbooking aditicive.
Page 3 of 3 pages < 1 2 3