Grand Treat Basket
by Theresa Momber
Create a darling basket out of a scalloped circle die cut.
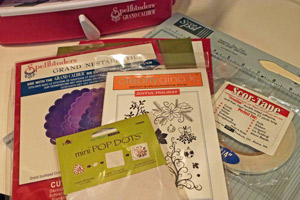
Supplies
- One 1/2" x 8 1/2" piece of cardstock for handle
- One 1/4" x 8 1/2" piece of cardstock (optional to decorate handle)
- One sheet 8 ½" x 11" card stock for cutting scallop circle
- Spellbinders™ Grand Nestabilities™ Scalloped Circles LF-124
- Spellbinders™ Grand Calibur® Machine or other die cutting machine for large format dies
- Scor-Pal™ or other scoring tool
- Scor-Tape™ or other strong adhesive
- Scissors
- Stamps
- Ink
- 2 brads
- Additional cardstock and embellishments to decorate your box
Step-by-Step
-
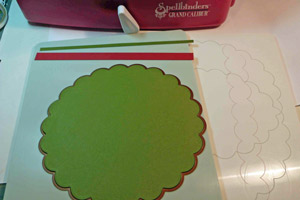
Step 1
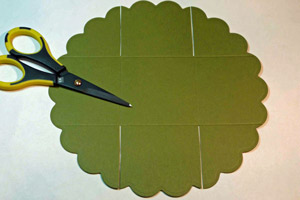
Cut and emboss card stock using the largest die template from Spellbinders™ Grand Nestabilities™ Grand Scalloped Circles and trim card stock pieces for handle.
-
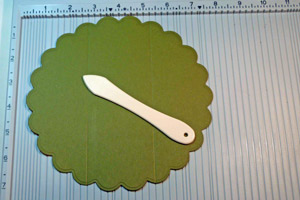
Step 2
Place the scalloped circle cut out in Scor-Pal™, lining up the valley between two scallops with the 4" mark on the Scor-Pal. Be careful to make sure the opposite valley also lines up at the 4-inch mark. Then score at 2 3/4" and 5 1/4".
-
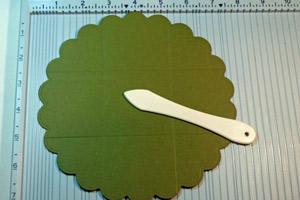
Step 3
Rotate card stock 90 degrees, this time lining up the peak of the scallop at the four inch mark and again being careful to make sure the opposite scallop is also lined up.
-
Step 4
Cut along the first two score lines just until they reach the intersecting score lines. Then pre-fold all score lines.
-
Step 5
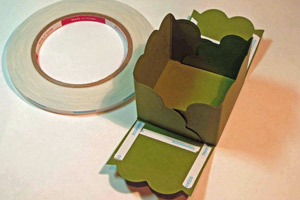
Fold the sides in and adhere together using Scor-Tape. Add tape to the bottom and sides of the remaining panels and adhere.
-
Step 6
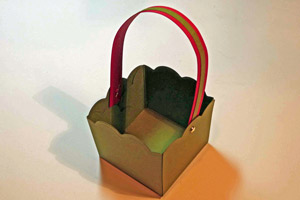
Secure handle to sides using brads.
-
Step 7
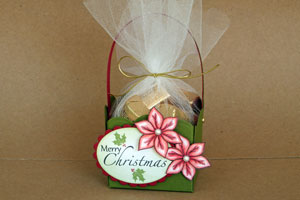
Finish projects by adding stamped images or other embellishments, and fill with treats. As a variation, you can alter theme to fit the season.
Video!
Your Turn
You've seen the tutorial, now you try it! We've got a section of the gallery set aside for Grand Treat Basket. Try this technique, then upload your artwork to the gallery. Show us your creations!
***Please note - Internet Explorer/Edge is not a supported browser, and will not allow you to see the videos. Please use Chrome, Firefox or Safari to view our tutorial videos.

Questions and Comments
We'd love to get your feedback or questions. Leave your comment below.
It for several people for Christmas.
Thanks, Carole
The largest scalloped circle (that was used here) measures 7 3/8".
Colleen,
since that die measures 7 3/8" (over 6" width that is the opening for the big shot), it won't work with the Big Shot.
Good with a pieced & cut poinsetta also, it gives height & depth for the flower. Love it !!TFS !!
Grand Treat Basket-Option 2
Materials: compass, cardstock, graph paper, ruler, scoring tool.
Decide the diameter of the circle you want to draw. For example, a four-inch diameter circle will produce a basket big enough to fit two-three pieces of hard candy. Draw a circle on graph paper using the compass. Divide it into thirds along the diameter, trace lines. Rotate the circle 90 degrees, and repeat division into thirds. Again, re-trace lines. Trim graph paper circle closely and carefully. Make a notch where the lines end to use as reference for the cardstock circle. Draw identical diameter circle on cardstock. Use reference circle to draw lines, score all four of them. Carefully trim cardstock circle using big scallop scissors. Follow original directions after step 4 to assemble basket.
Grand Treat Basket-Option 3
Cut a square from cardstock. Divide it into thirds, both length and widthwise. This will produce nine identical squares, three per row, in three rows. Score all lines. Follow directions from step 4 in original directions. Fold to assemble basket.
For a twist in assembling the basket, instead of folding the two flaps overlapping one another aligned with the basket base, just bring them together to overlap in their corners and adhere. Repeat with the other side. This will create an open basket rather than a box-like one.
Page 1 of 2 pages 1 2 >