Gift Card Box
by Brenda Quintana
Create a box to hold a gift card and a sweet treat.
Supplies
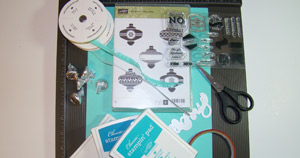
- Cardstock
- Scoring Tool
- Scissors
- Sticky Strip™ , or other strong adhesive
- Decorative Punch, Stampin' Up!'s Decorative Label Punch used here
- Embellishments
- Stamps, optional
Step-by-Step
-
Step 1
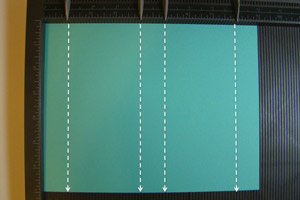
To make the box, start with a piece of 9" x 7" piece of cardstock (Stampin' Up!'s Coastal Cabana used here). On the 9" side, score at the 1", 4", 5" and 8".
-
Step 2
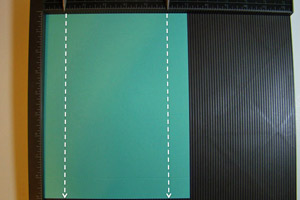
On the 7" side, score at the 1" and 6".
-
Step 3
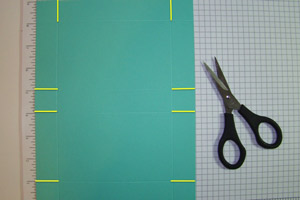
Cut along the score lines in the eight places shown by the yellow highlights. Cut just until the score lines intersect.
-
Step 4
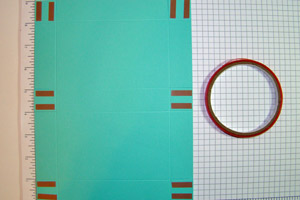
Place two strips of Sticky Strip on each of the six tabs.
-
Step 5
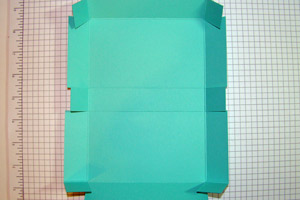
Flip the card stock over and fold inward along all the score lines.
-
Step 6
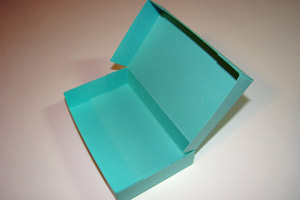
Remove the Sticky Strip liner and bring the tabs together to form a box with an attached lid.
-
Step 7
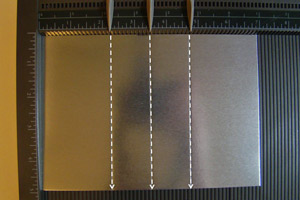
To make the gift card insert, start with a piece of 7" x 5" cardstock (Silver Foil Cardstock used here). On the 7" side, score at the 2 1/4", 3 1/2" and 4 3/4" marks.
-
Step 8
Fold the cardstock in half along the middle score line. Punch a hole in the folded center with the Decorative Label Punch.
Note:
The punch should only go half way in along the fold.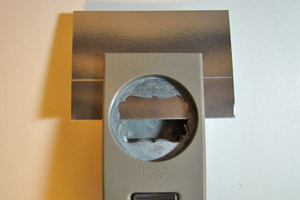
-
Step 9
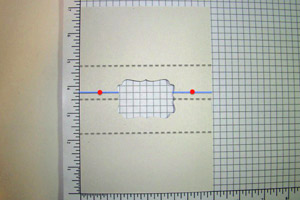
To make the gift card slot, flip the cardstock over to work on the back side. Draw a pencil line across the short width of the cardstock at the 3 3/4" mark (see blue line). Then make a mark along the pencil line 3/4" in from each side (see red dots).
-
Step 10
Cut a slot on both sides of the punched space just until you reach the pencil marks from the previous step (see yellow lines).
Note:
To make the slot wide enough for a gift card, make a cut on either side of the pencil line and then nip off the little strip of card stock that remains.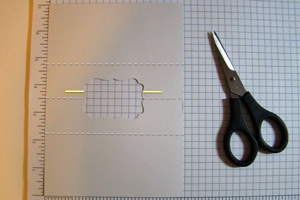
-
Step 11
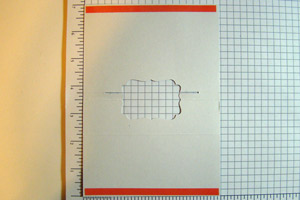
Place a line of Sticky Strip along each of the short ends of the insert piece.
-
Step 12
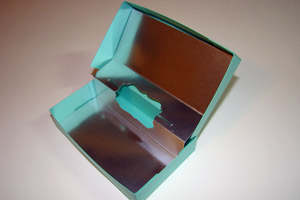
Fold the insert piece along the remaining score lines. Remove the Sticky Strip liner and attach the insert to the inside of the box. Make sure the side with the slot faces up.
-
Step 13
This box has a small space near the front (approx 1" x 1" x 5"), to put some candy. If you put candy elsewhere your box might not close.
Cut a 1" x 5" strip of cardstock and adhere 5 Hershey’s kisses or other small wrapped candy to it with mini glue dots.
Note:
A roll of Rolos wrapped in cardstock also looks nice.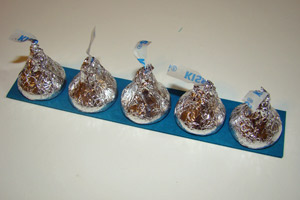
-
Step 14
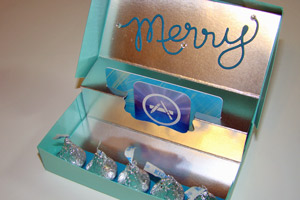
Adhere the strip of kisses to the front of the box and insert a gift card. Decorate the inside of the box as desired.
-
Step 15
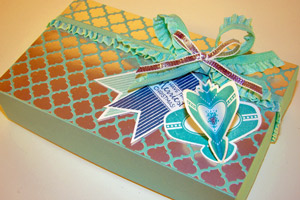
Decorate the outside of the box with ribbon (this will help the box stay closed) and other embellishments.
Video!
Your Turn
You've seen the tutorial, now you try it! We've got a section of the gallery set aside for Gift Card Box. Try this technique, then upload your artwork to the gallery. Show us your creations!
***Please note - Internet Explorer/Edge is not a supported browser, and will not allow you to see the videos. Please use Chrome, Firefox or Safari to view our tutorial videos.

Questions and Comments
We'd love to get your feedback or questions. Leave your comment below.
Page 2 of 2 pages < 1 2