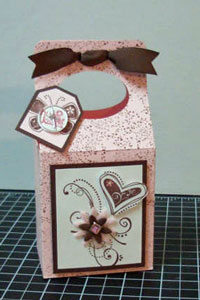
Gable Box
by Regina Andari
Create this adorable box with a few scores, cuts and punches.
Supplies
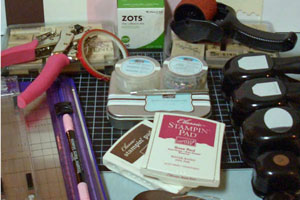
- One 8 1/2" x 11" piece of Cardstock
- Paper Cutter with scoring tool
- Sticky Strip™ or other strong adhesive
- Scissors
- Stamps
- Ink
- Punches
- Corner Rounder
- Crop-a-Dile™
- Embellishments
Step-by-Step
-
Step 1
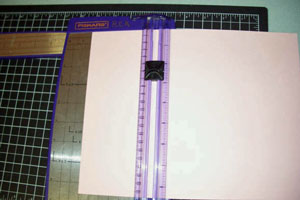
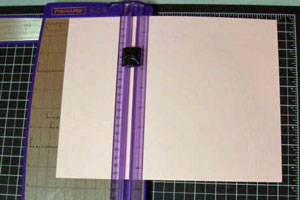
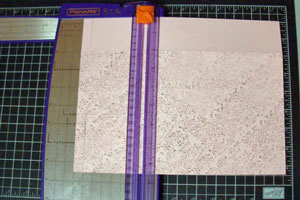
Score 11” side of cardstock at 1/2", 3 1/2", 5 3/4", and 8 3/4".
-
Step 2
Score the 8 1/2” side at 3" and 6 1/2".
-
Step 3
Fold the bottom of the card stock (the portion with the short scored sections) under and stamp across the exposed area of card stock.
-
Step 4
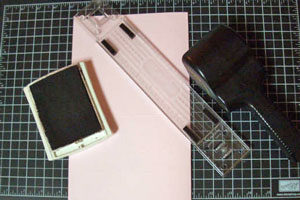
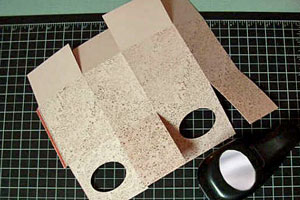
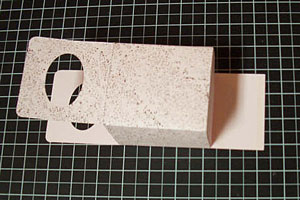
Cut each score line up to the intersecting score line to create flaps as shown.
-
Step 5
On one edge of the card stock, you’ll have 1/2” flaps.
Cut off the two 1/2" flaps on the ends, leaving the center flap.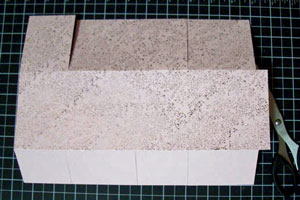
-
Step 6
Place Sticky Strip™ on the 1/2" flap.
Be sure to place the adhesive strip on the front (stamped) side. Leave the liner on the adhesive.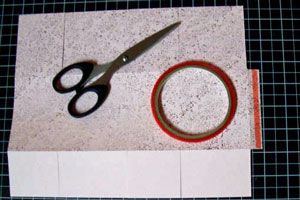
-
Step 7
Place Sticky Strip™ on the other flaps as shown to createl interior sections of the box.
Leave the liner on the adhesive.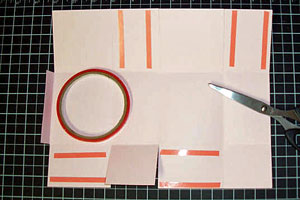
-
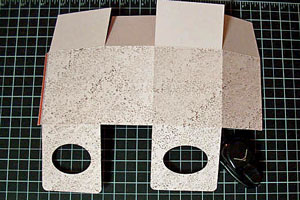
Step 8
Center punch over panel and push the cardstock all the way into the Wide Oval punch to create handles for the box.
-
Step 9
Use the corner rounder on the corners of the handles.
-
Step 10
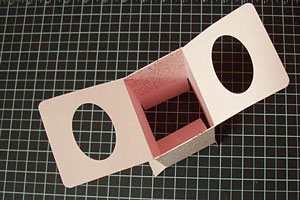
Peel the liner from the 1/2" flap on the side of the box (mid section).
Fold the box into shape so that the ends meet the adhesive. If necessary, fold the flaps out of your way.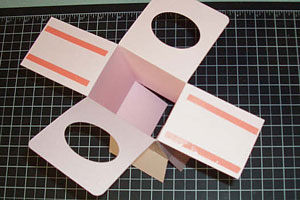
-
Step 11
Peel the liner from the side flaps and adhere them to the interior sides of the box for added stability.
-
Step 12
Remove the liner from the bottom flaps.
Fold in the two smaller flaps and then adhere one of the longer flaps to the smaller flaps.
I fold in the flap that’s on the side where the seam is so the front of the box will be seamless.
Fold the remaining flap into place.
-
Step 13
Decorate the front of the box. Use the Crop-a-Dile™ to punch holes for the ribbon closure.
Video!
Your Turn
You've seen the tutorial, now you try it! We've got a section of the gallery set aside for Gable Box. Try this technique, then upload your artwork to the gallery. Show us your creations!
***Please note - Internet Explorer/Edge is not a supported browser, and will not allow you to see the videos. Please use Chrome, Firefox or Safari to view our tutorial videos.

Questions and Comments
We'd love to get your feedback or questions. Leave your comment below.
you rock! This is a great tutorial!
Your Sassy Sister - Lisa
Thanks for the tutorial.
This is oh so cute and way to simple. Know exactly what I will be doing today. TFS!
Jennifer
Page 1 of 3 pages 1 2 3 >